Introduction
Assignment Grader allows learners to upload assignments and rubrics and receive instant AI-powered grading with detailed feedback and suggestions for improvement. It helps learners understand their work more clearly, improve more effectively, and build confidence in their learning.Accessing Assignment Grader
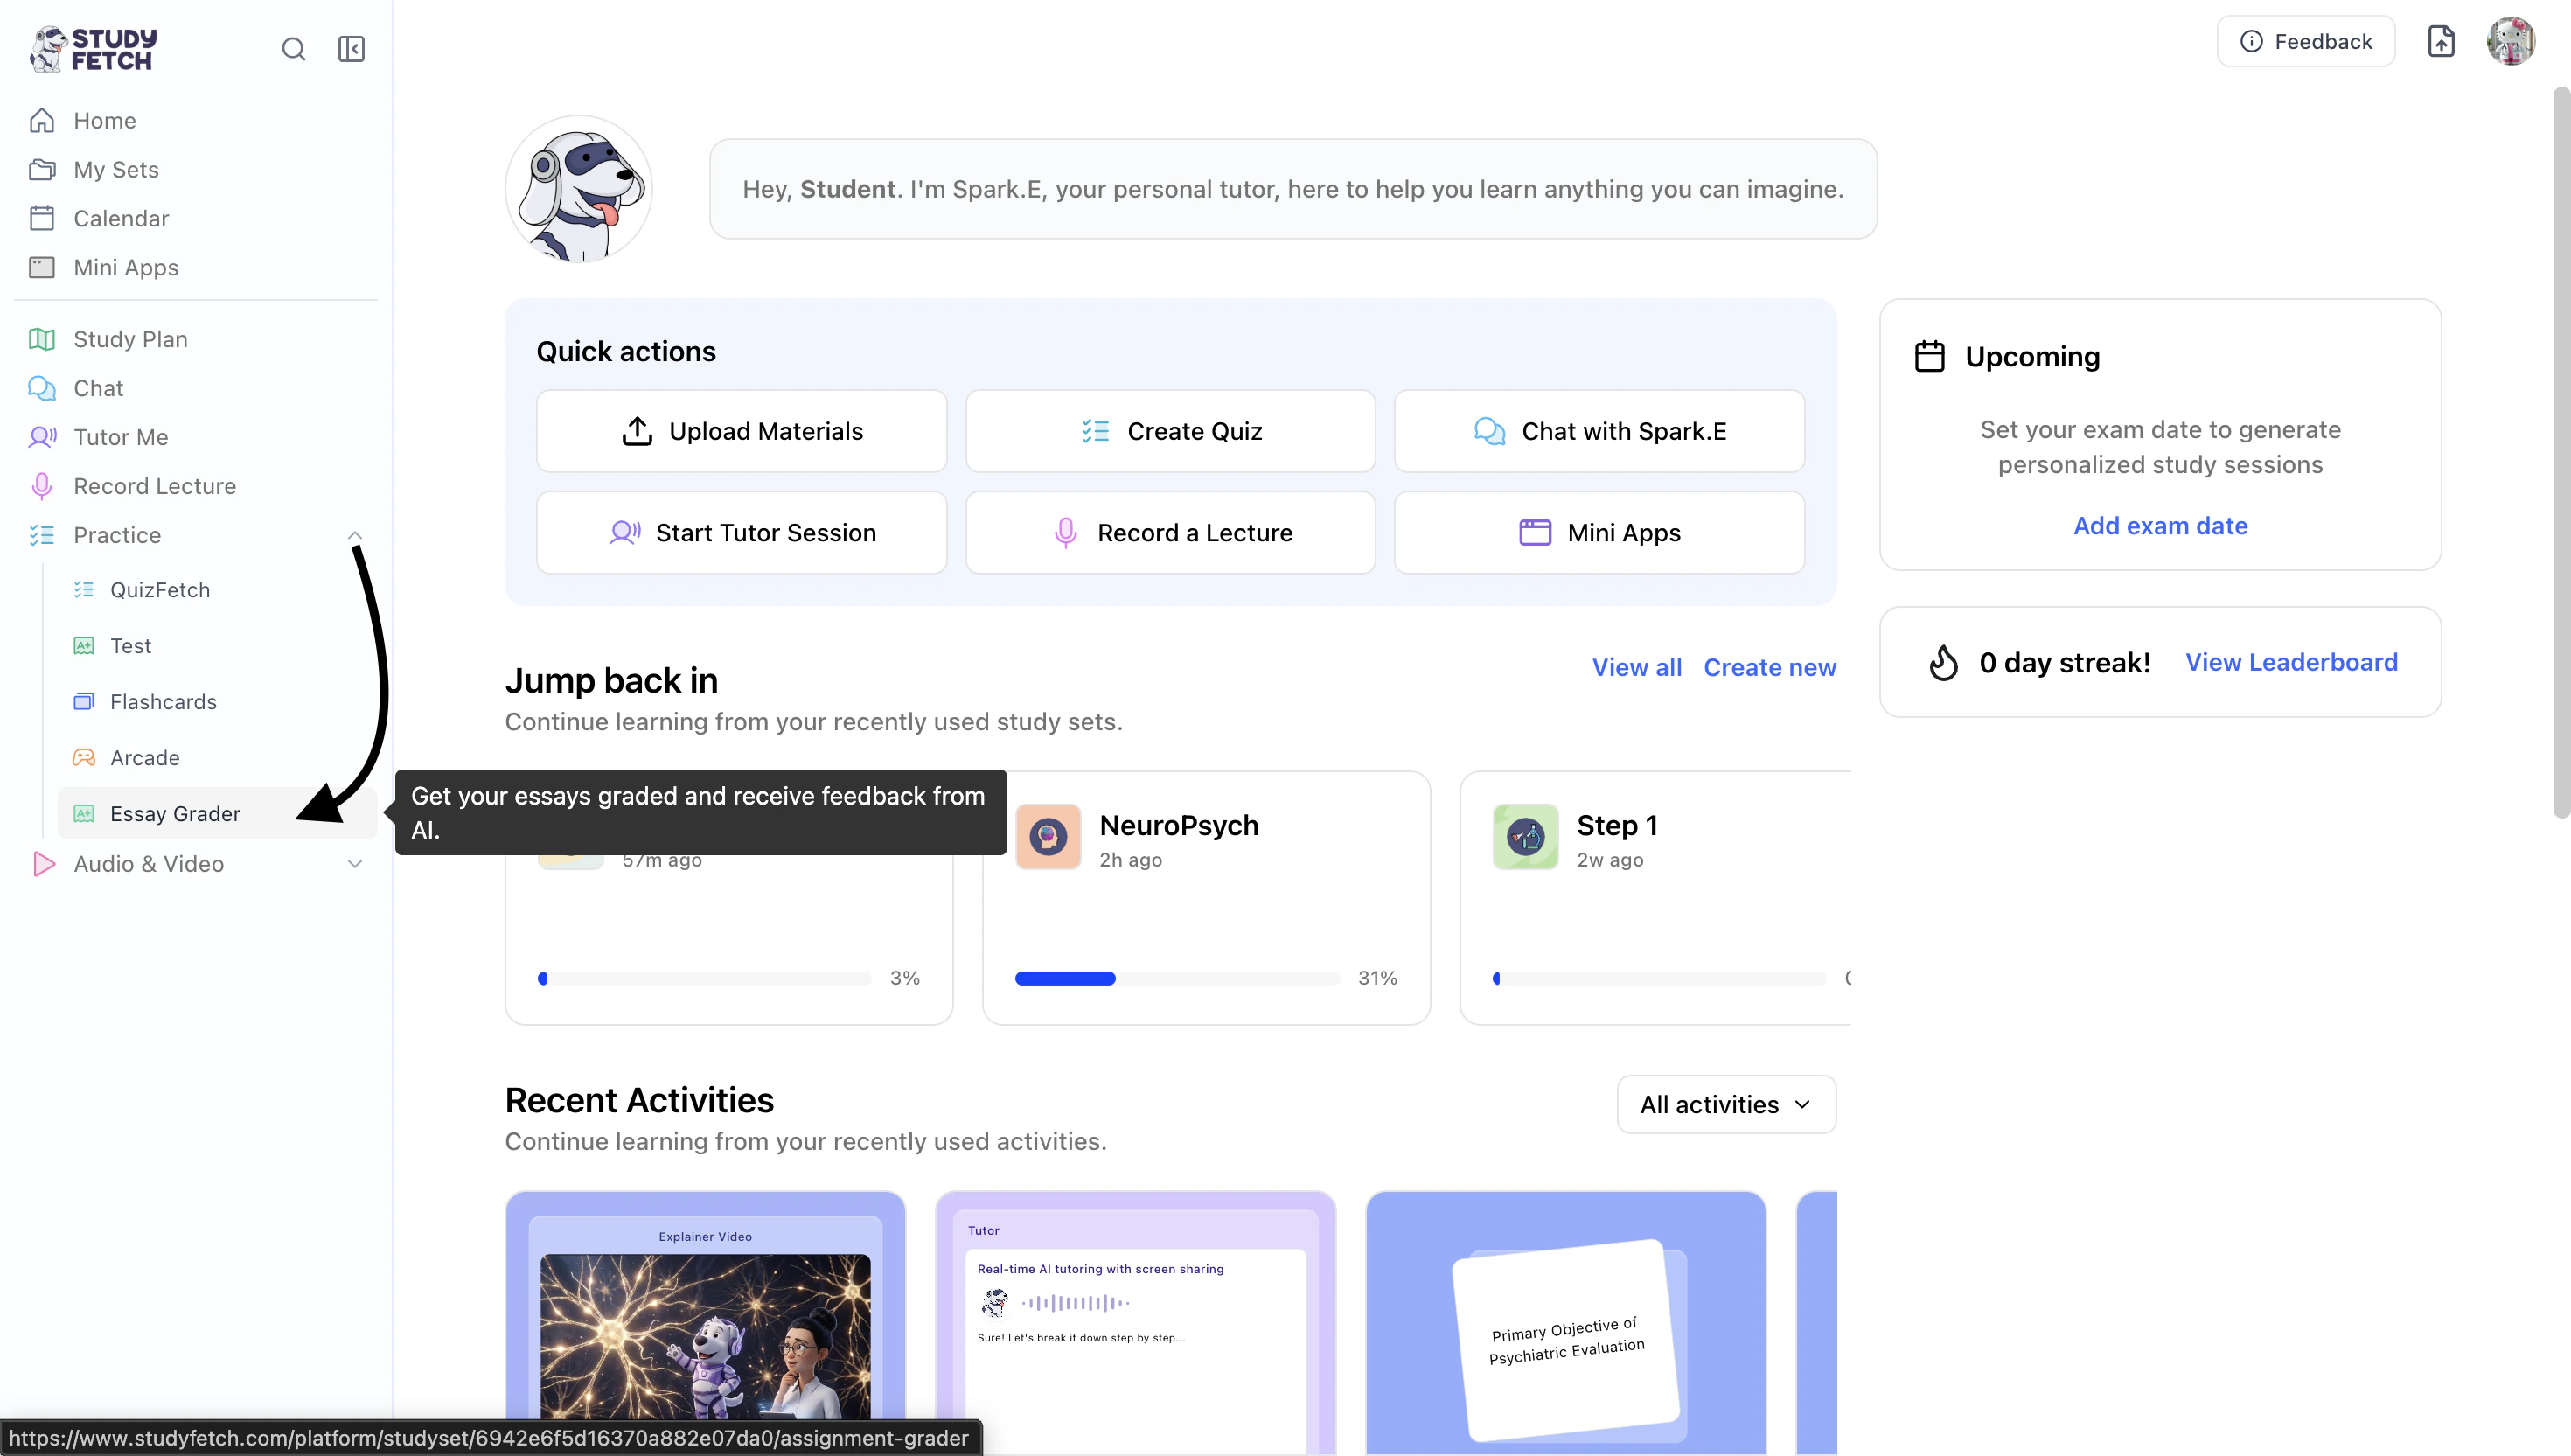
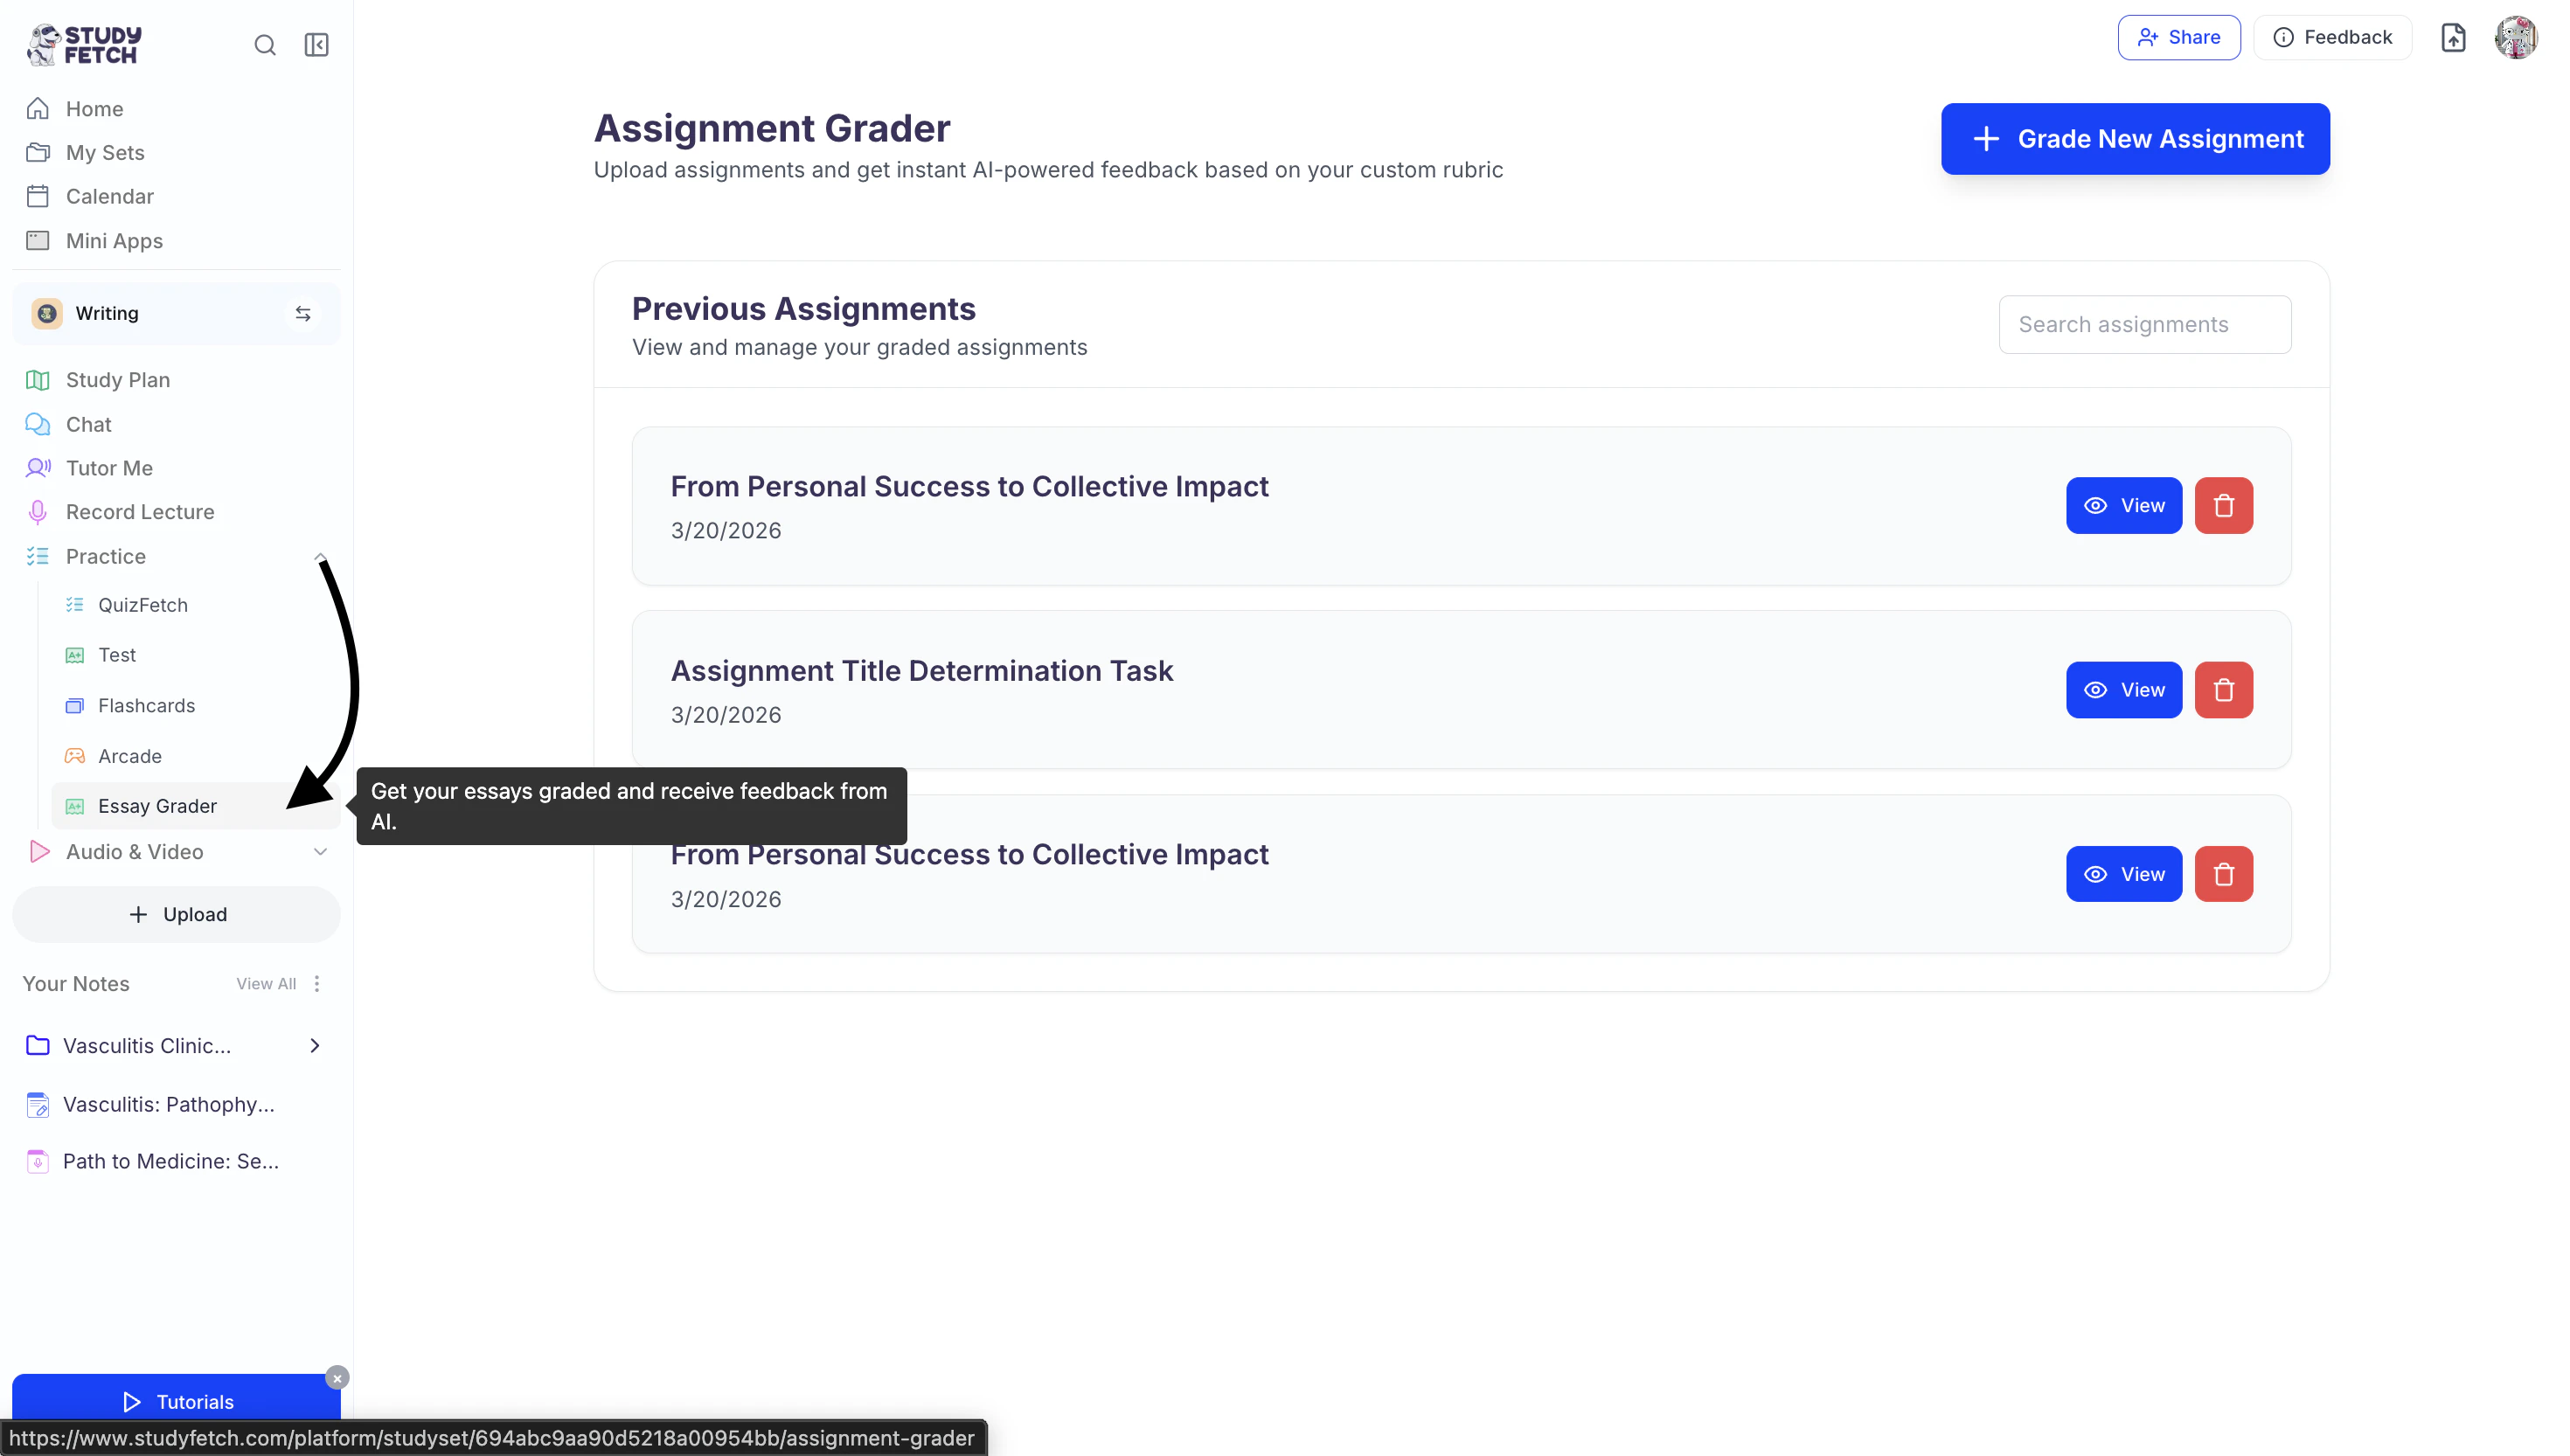
- On the left-hand side of your dashboard click Practice and then select Essay Grader.
- All previous assignments associated with your study set can be found on this page.
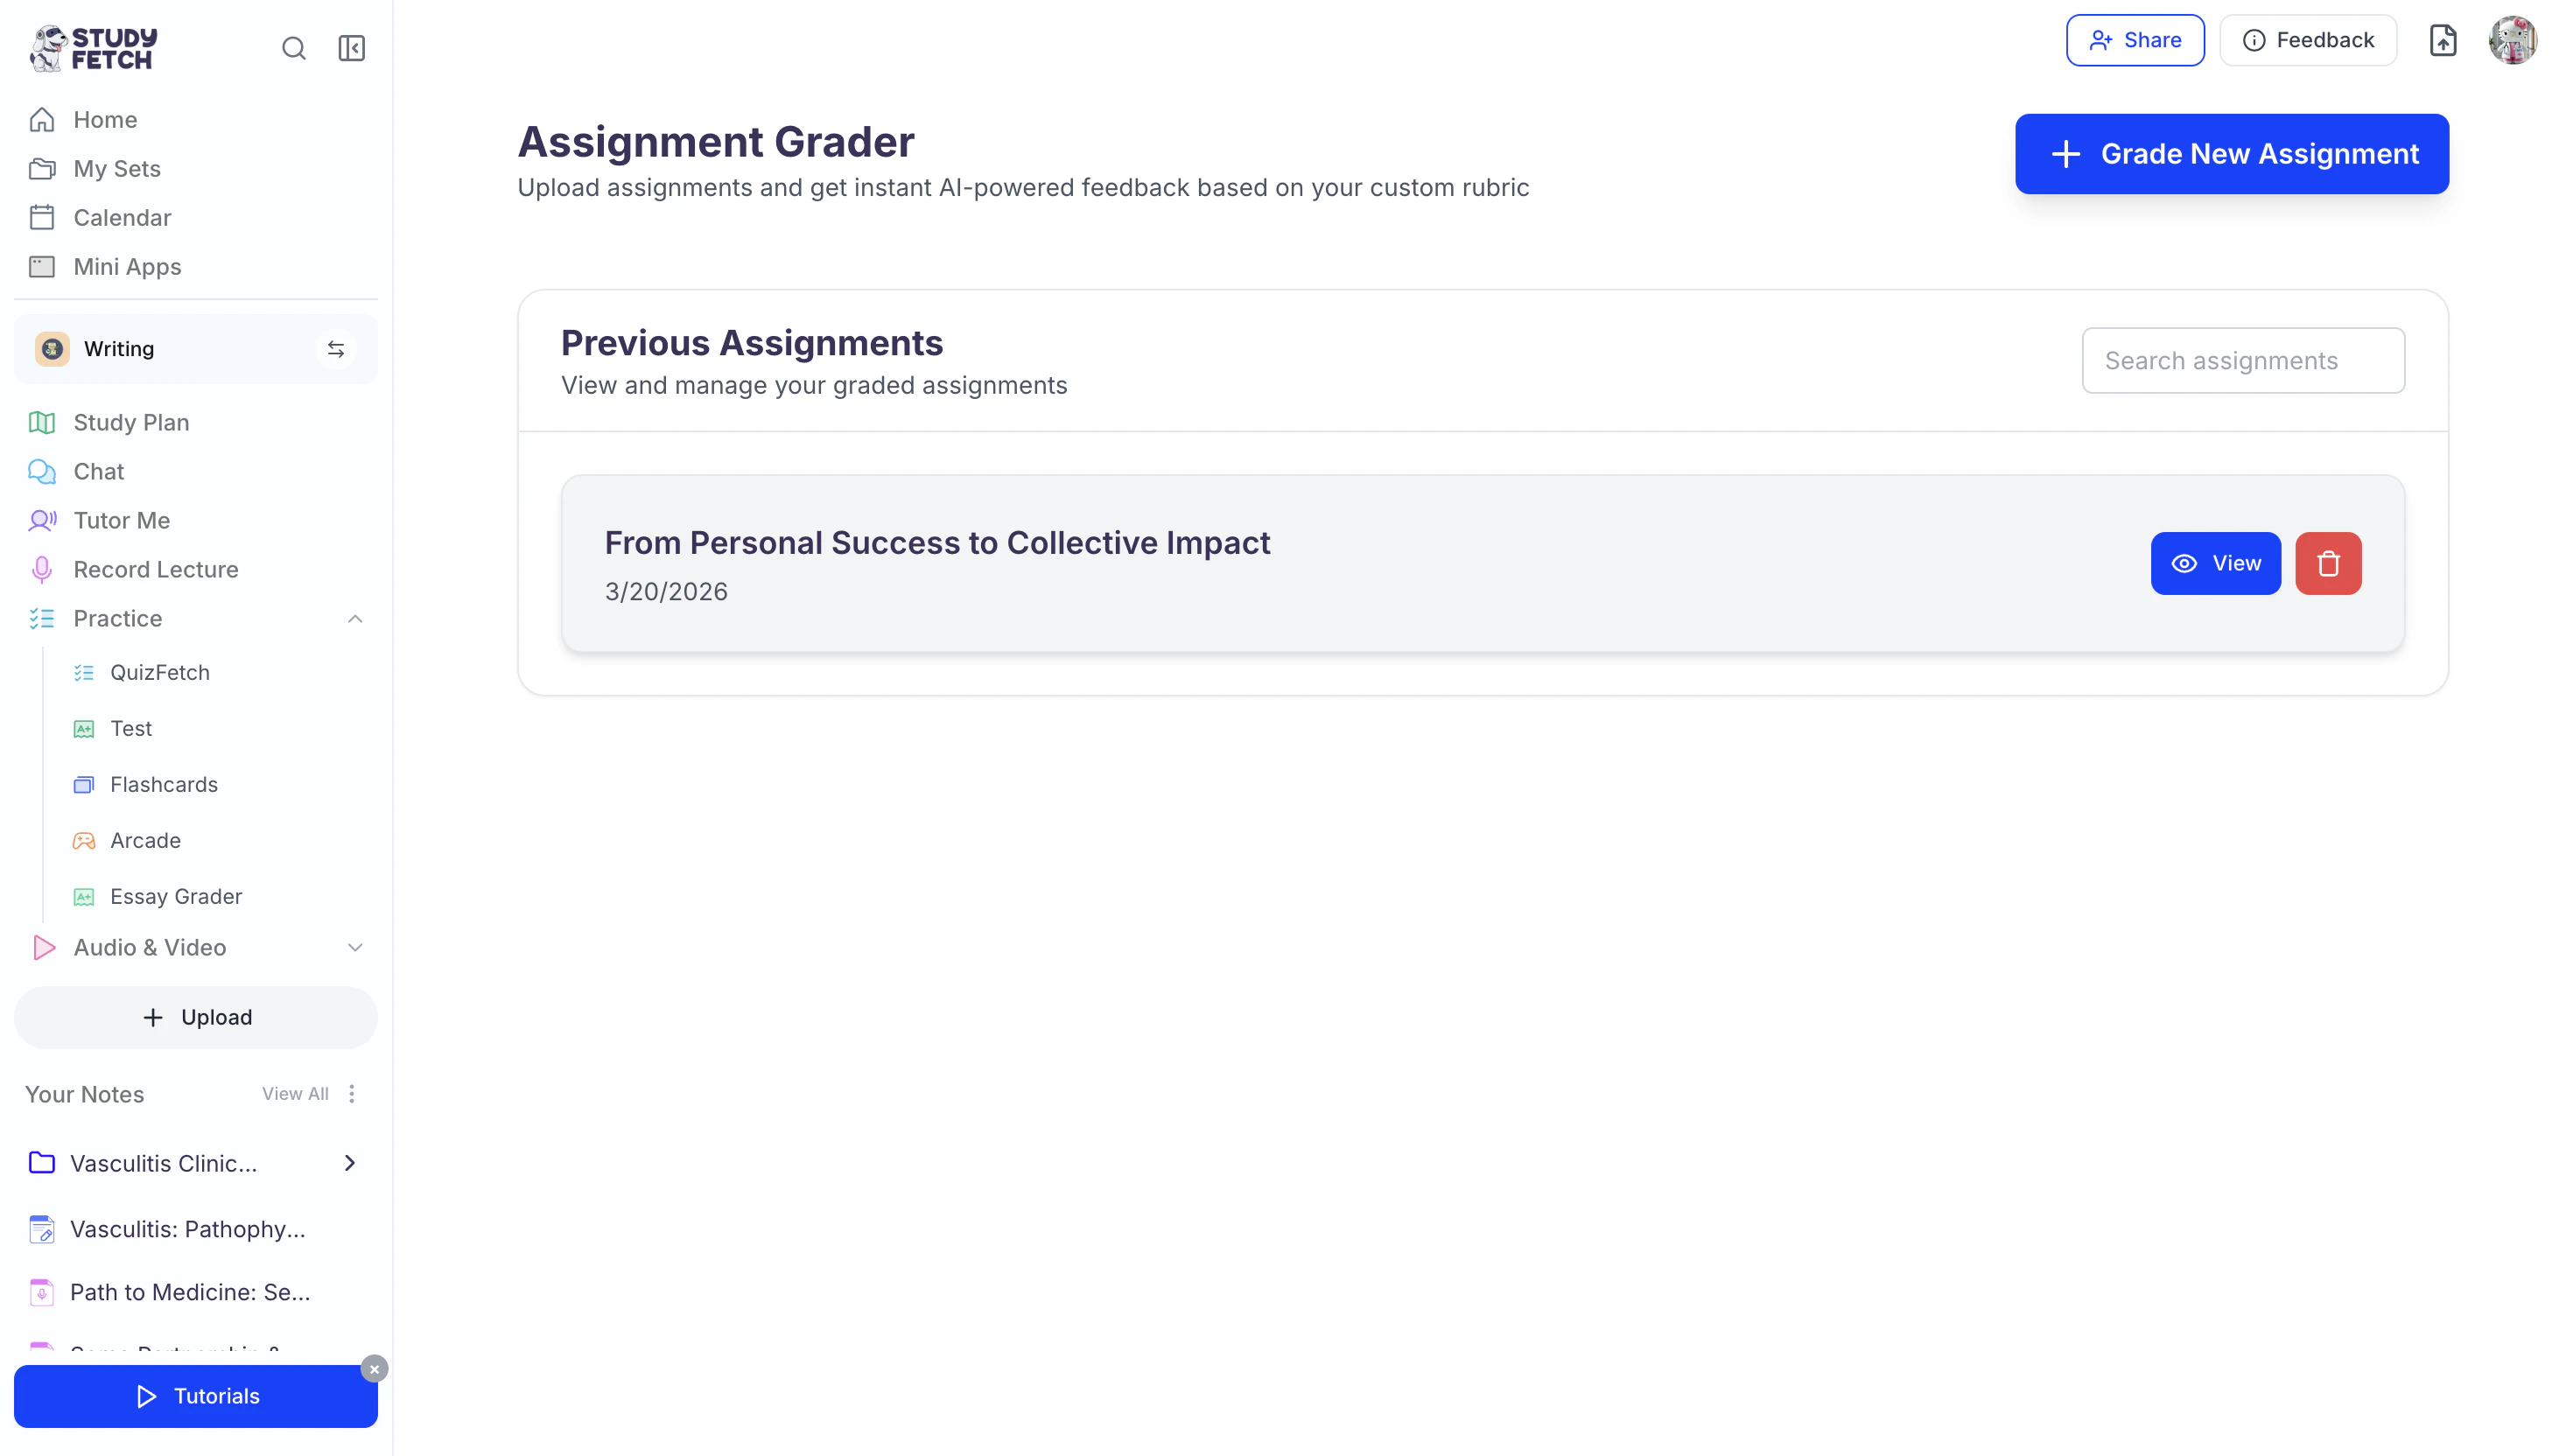
- To open a previous assignment, simply click on the name of the assignment you would like to view.
- To grade a new assignment, follow the steps outlined below.
Grade a New Assignment
Step 1: Add your Assignment
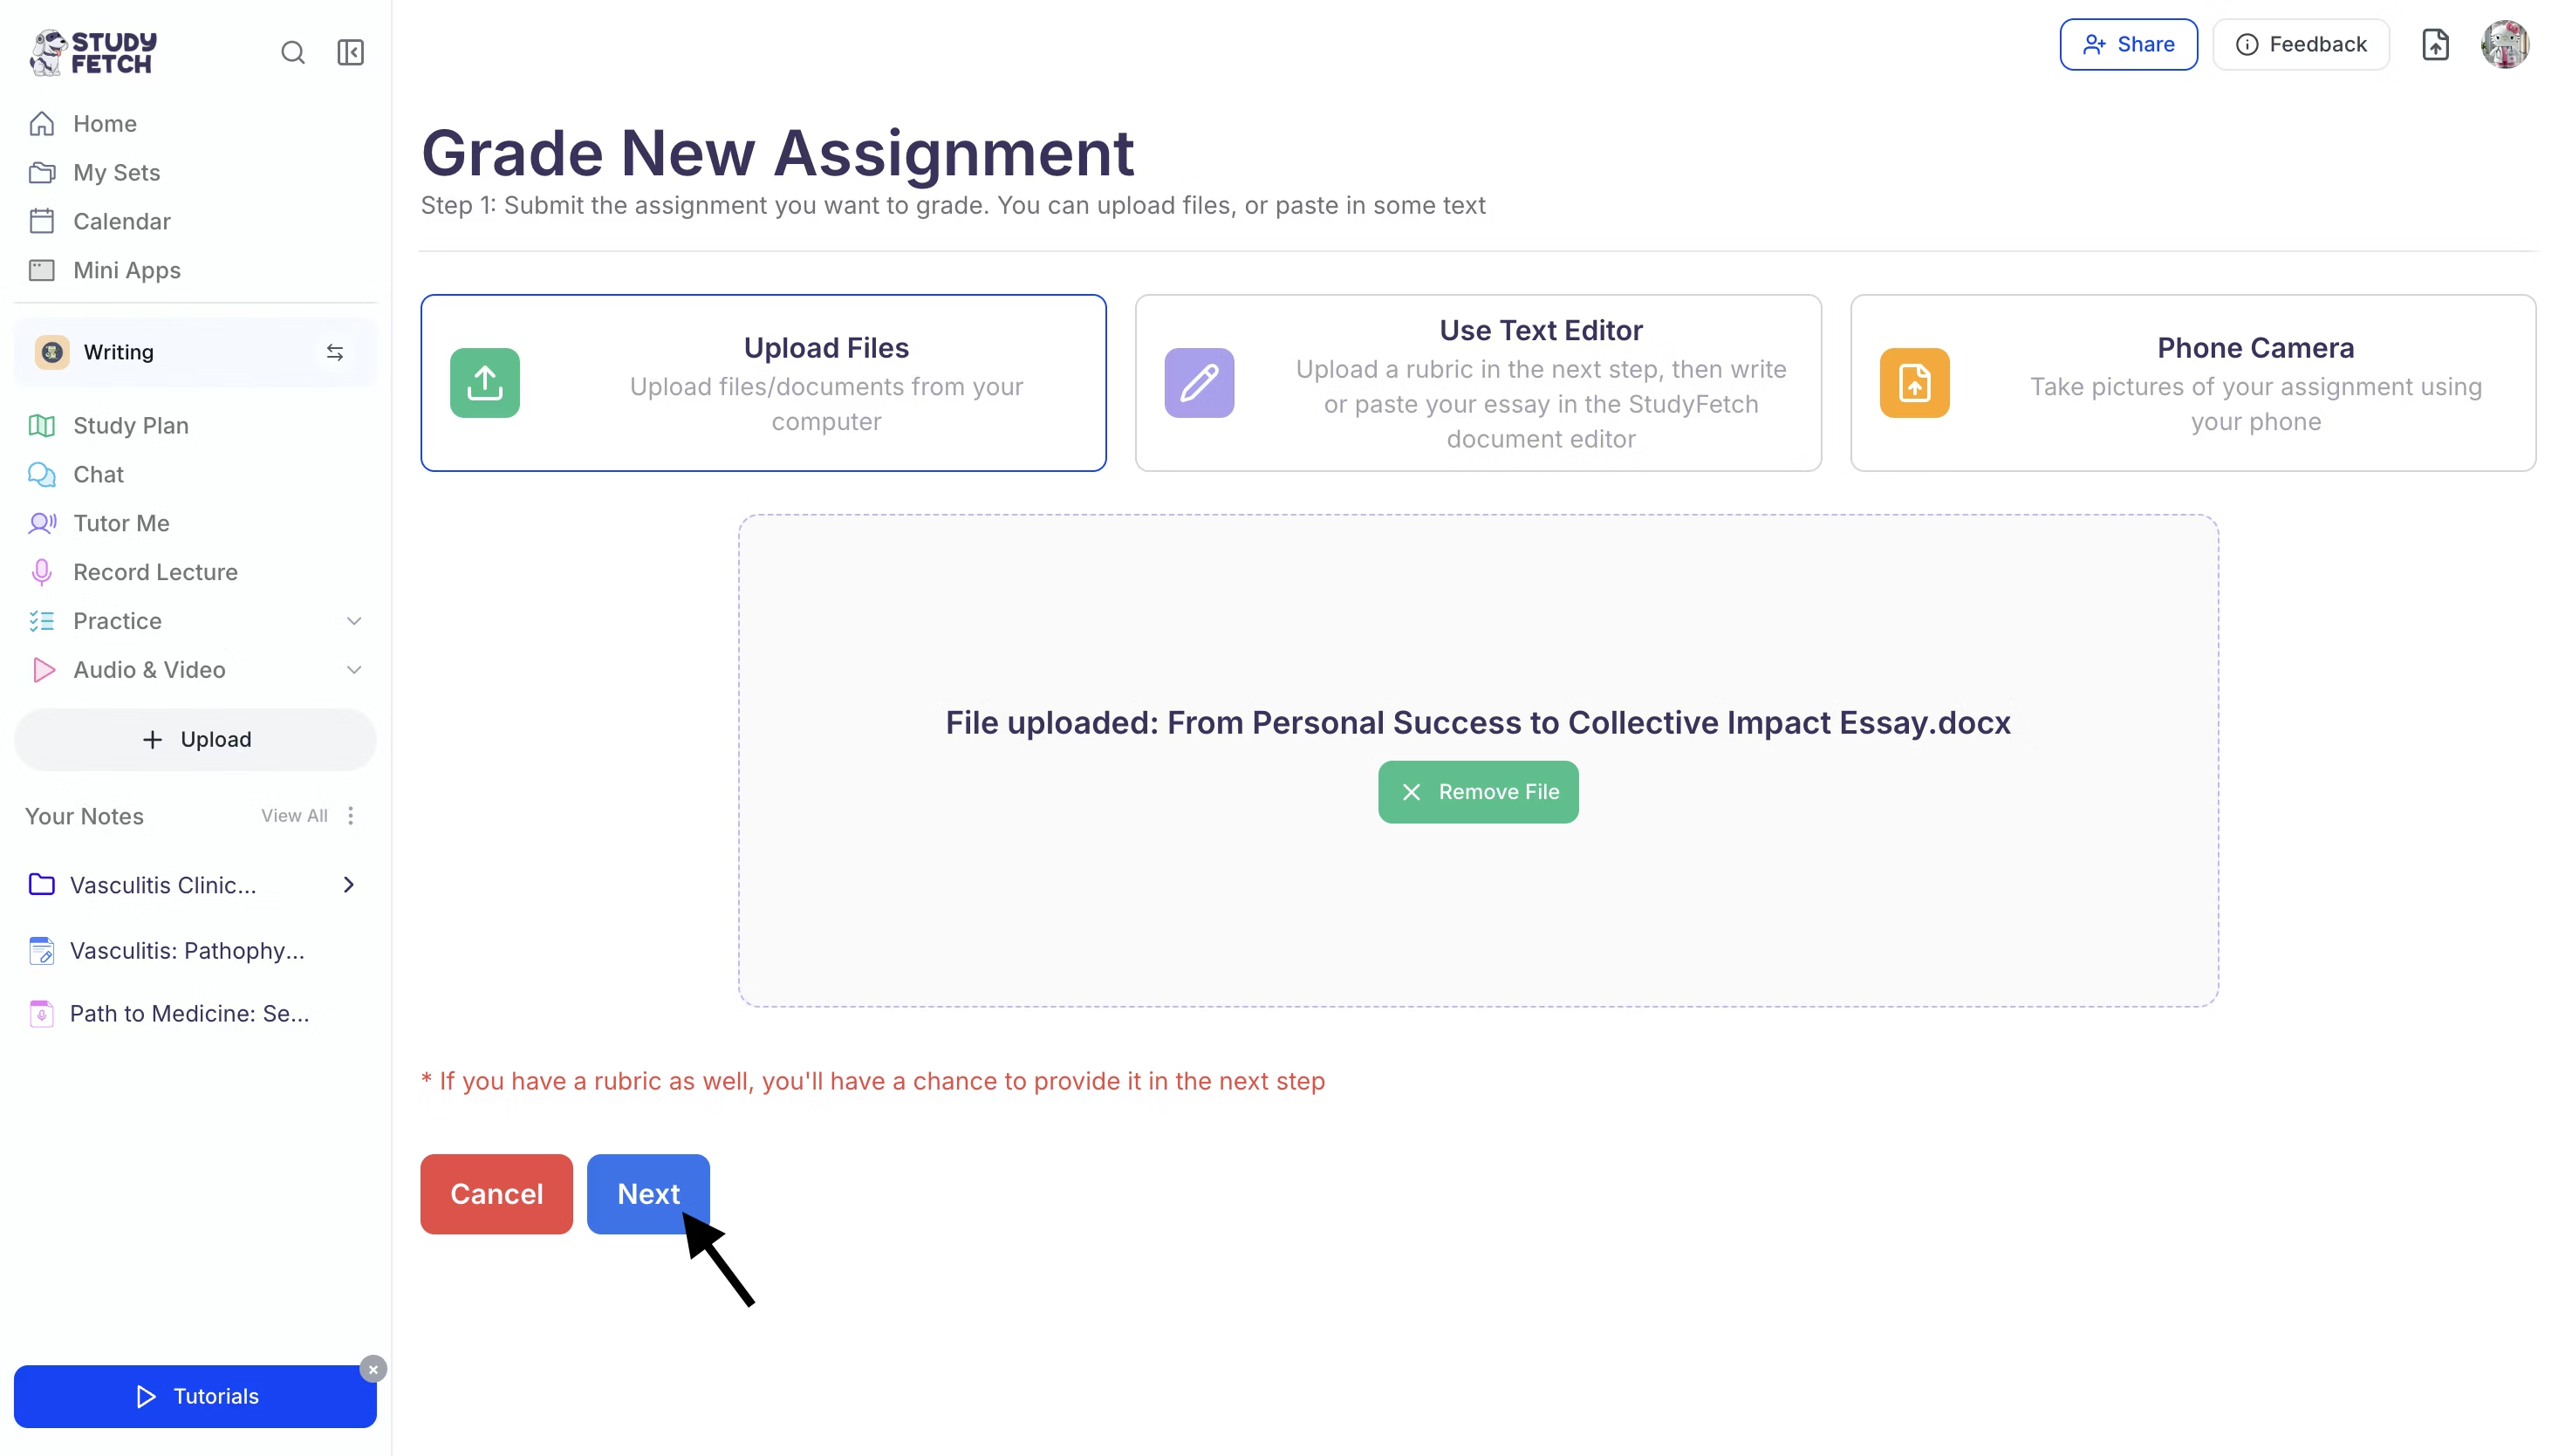
- To submit a new assignment for grading, click the + Grade New Assignment button.

- Add your assignment by selecting one of the following options:
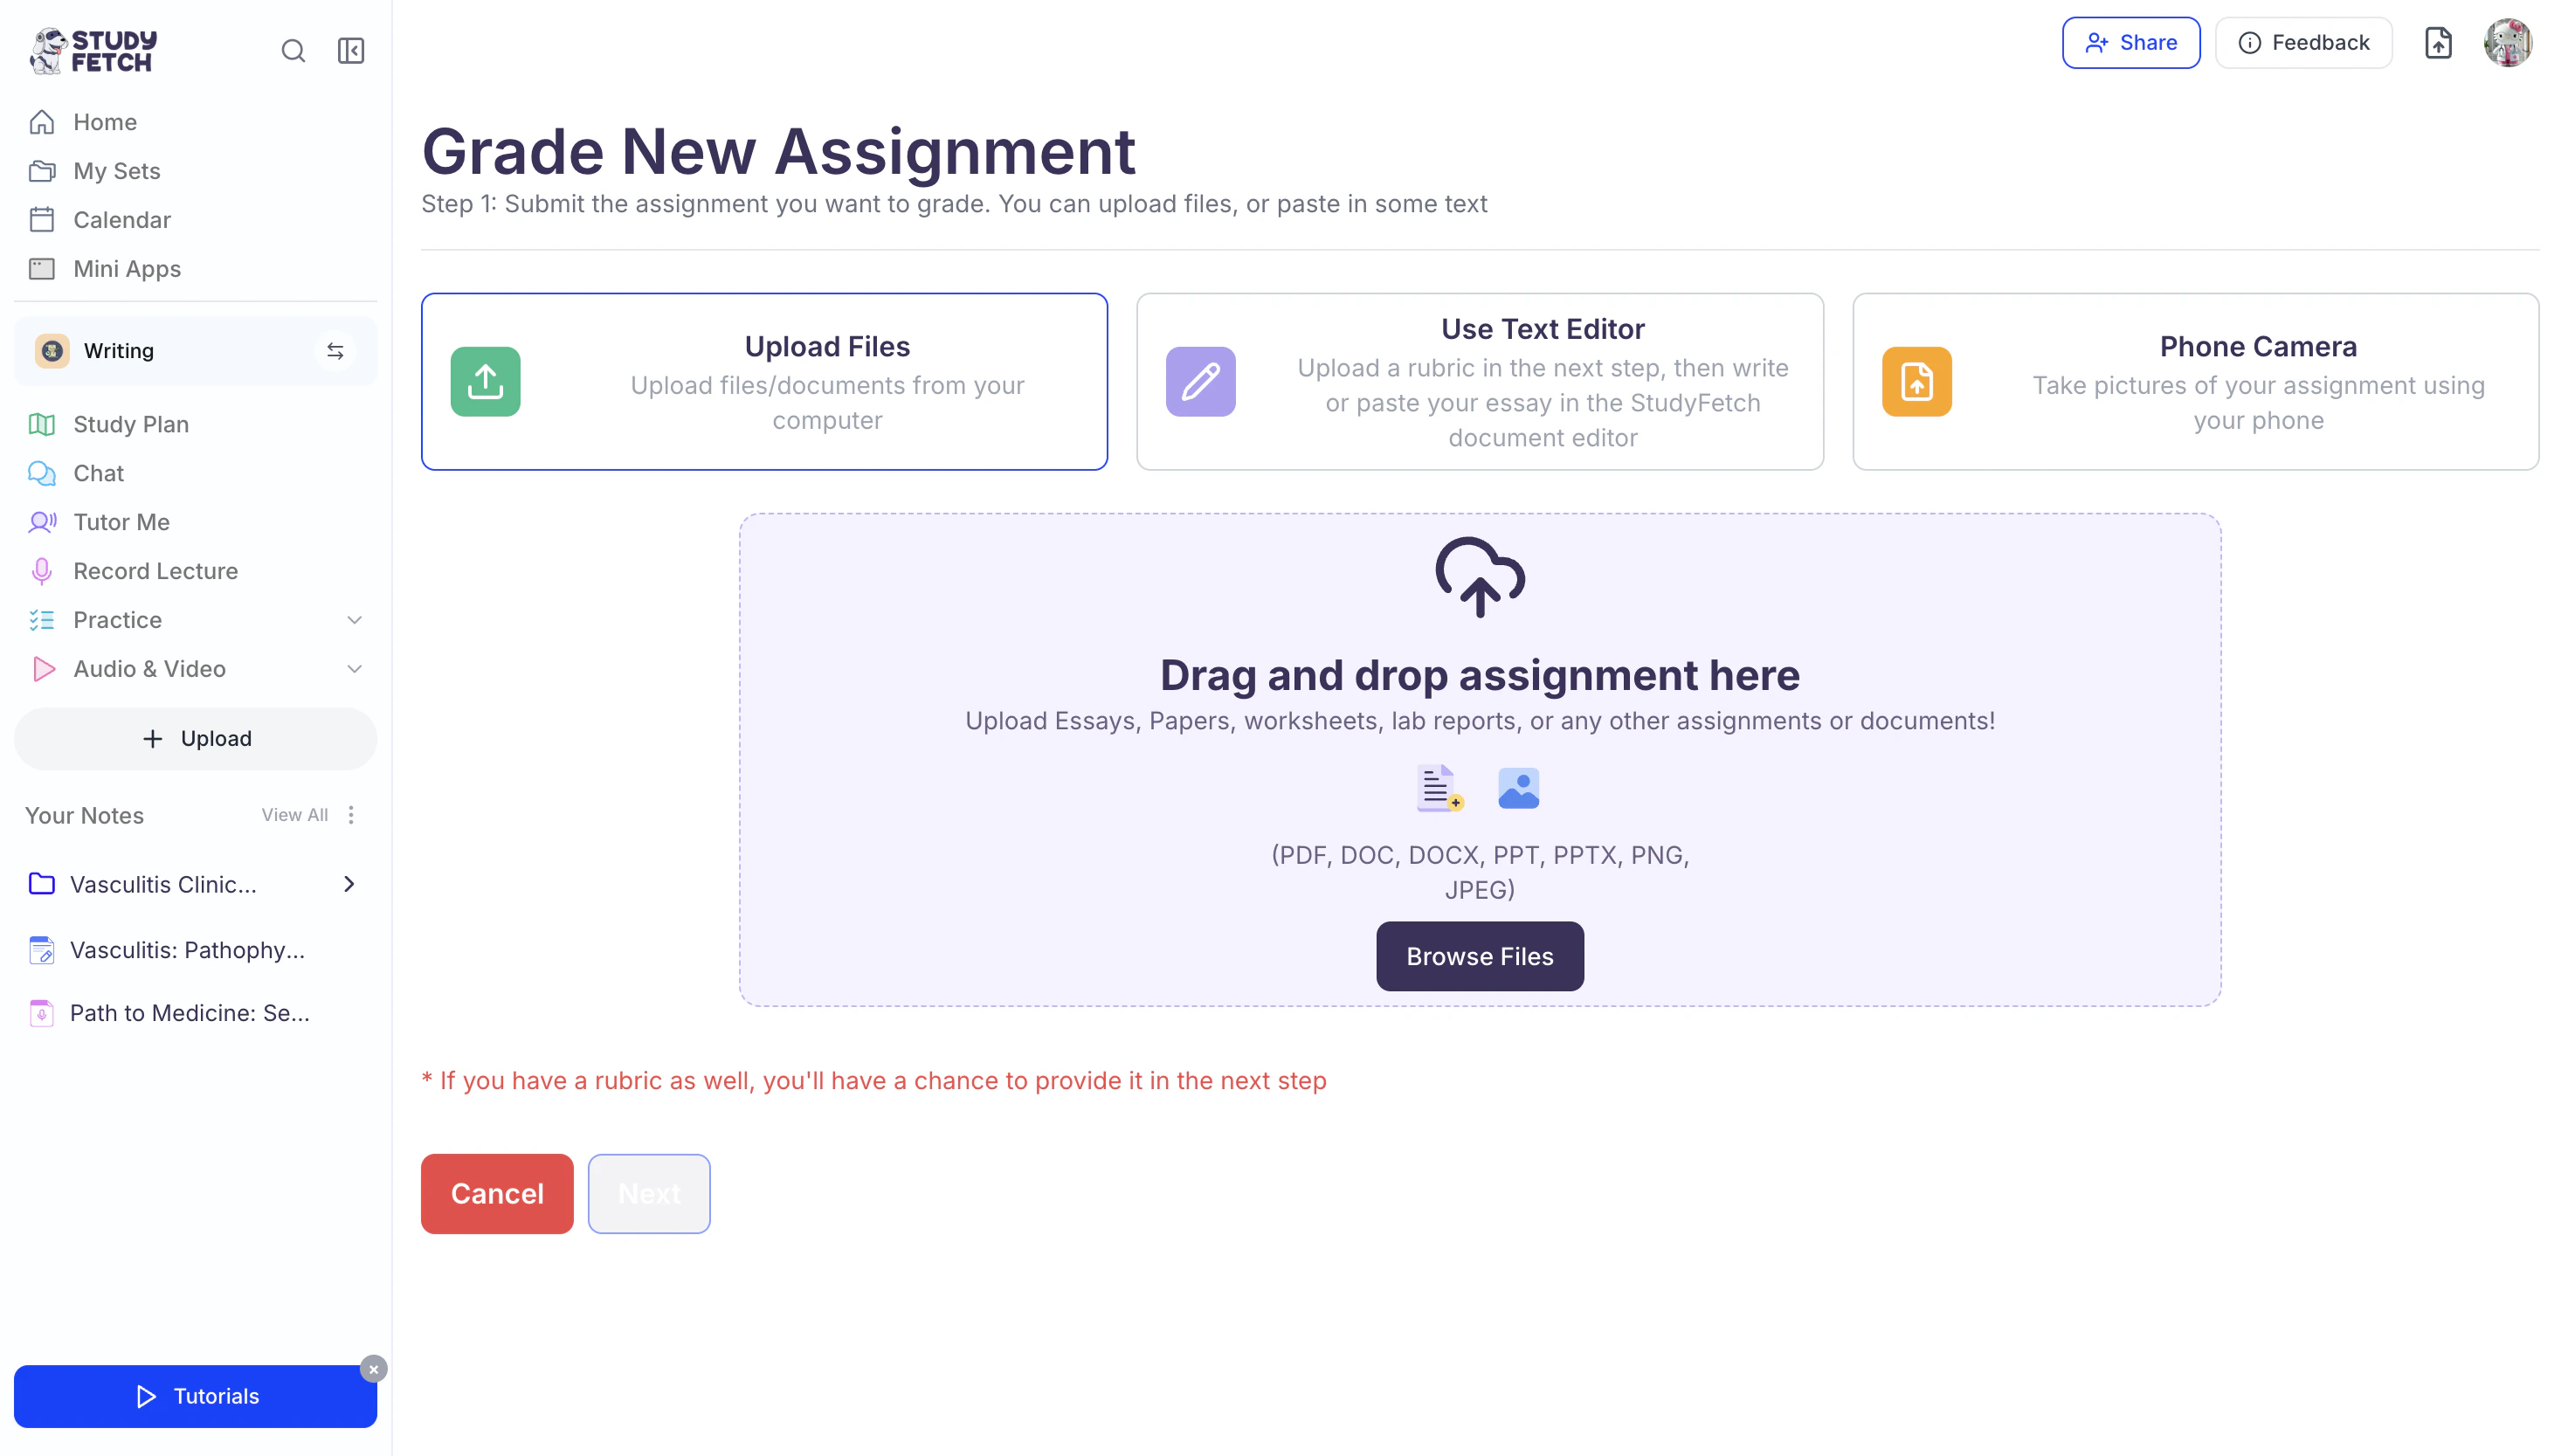
- Select Upload Files to upload any file or document from your computer.
- Select Text Editor to write or paste your assignment in the StudyFetch document editor.
- Select Phone Camera to take pictures of your assignment using your mobile device.
- Then follow the steps for your selected method below.
Method 1: Upload Files
After selecting Upload Files, you can upload your assignment in PDF, DOC, DOCX, PPT, PPTX, PNG, or JPEG format.
- To begin, click Browse Files to open your device’s file explorer and select the file you want to upload.
- Alternatively, you can simply drag and drop your file into the box labeled “Drag and drop assignment here.”
- Once your file is uploaded, click Next to continue to Step 2: Upload a Rubric.
Method 2: Use Text Editor
- After selecting Use Text Editor, click Next.
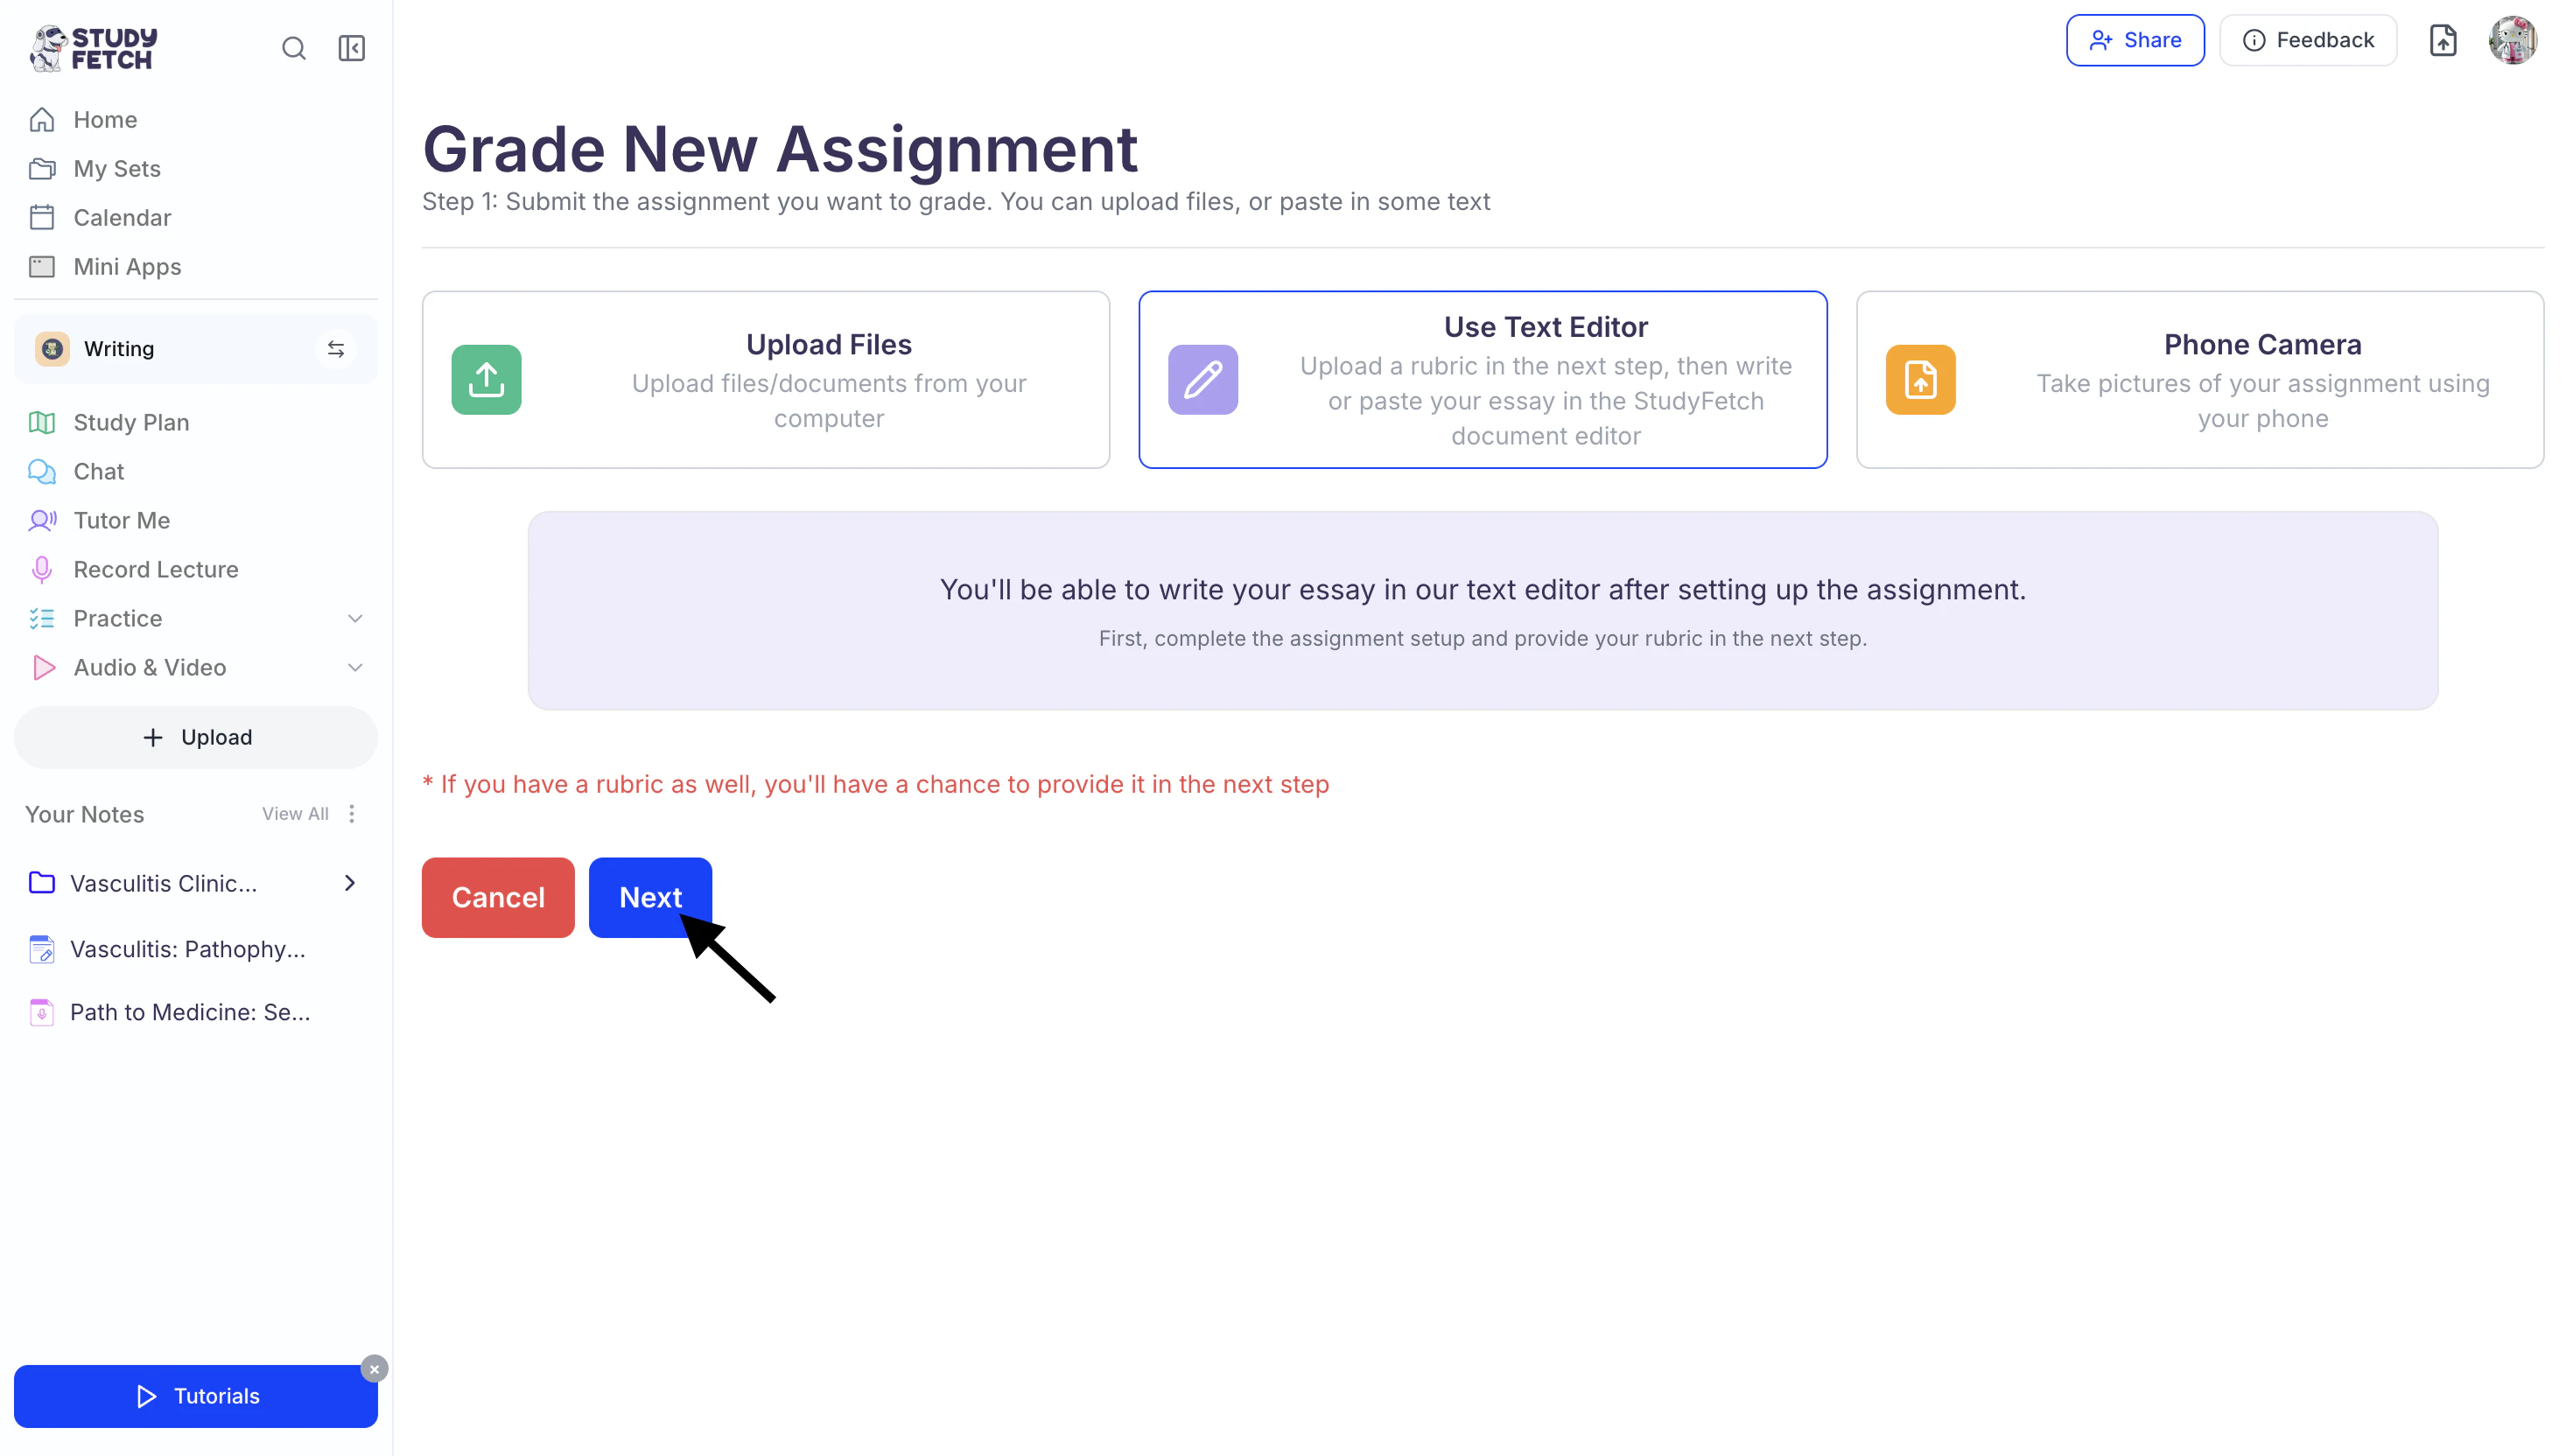
- Proceed to Step 2: Upload a Rubric, where you’ll upload the rubric for your assignment, then complete Step 3: Review Assignment Details and Submit before returning to this section.
- Once Steps 2 and 3 are complete, a text editor will appear where you can type or paste your assignment.
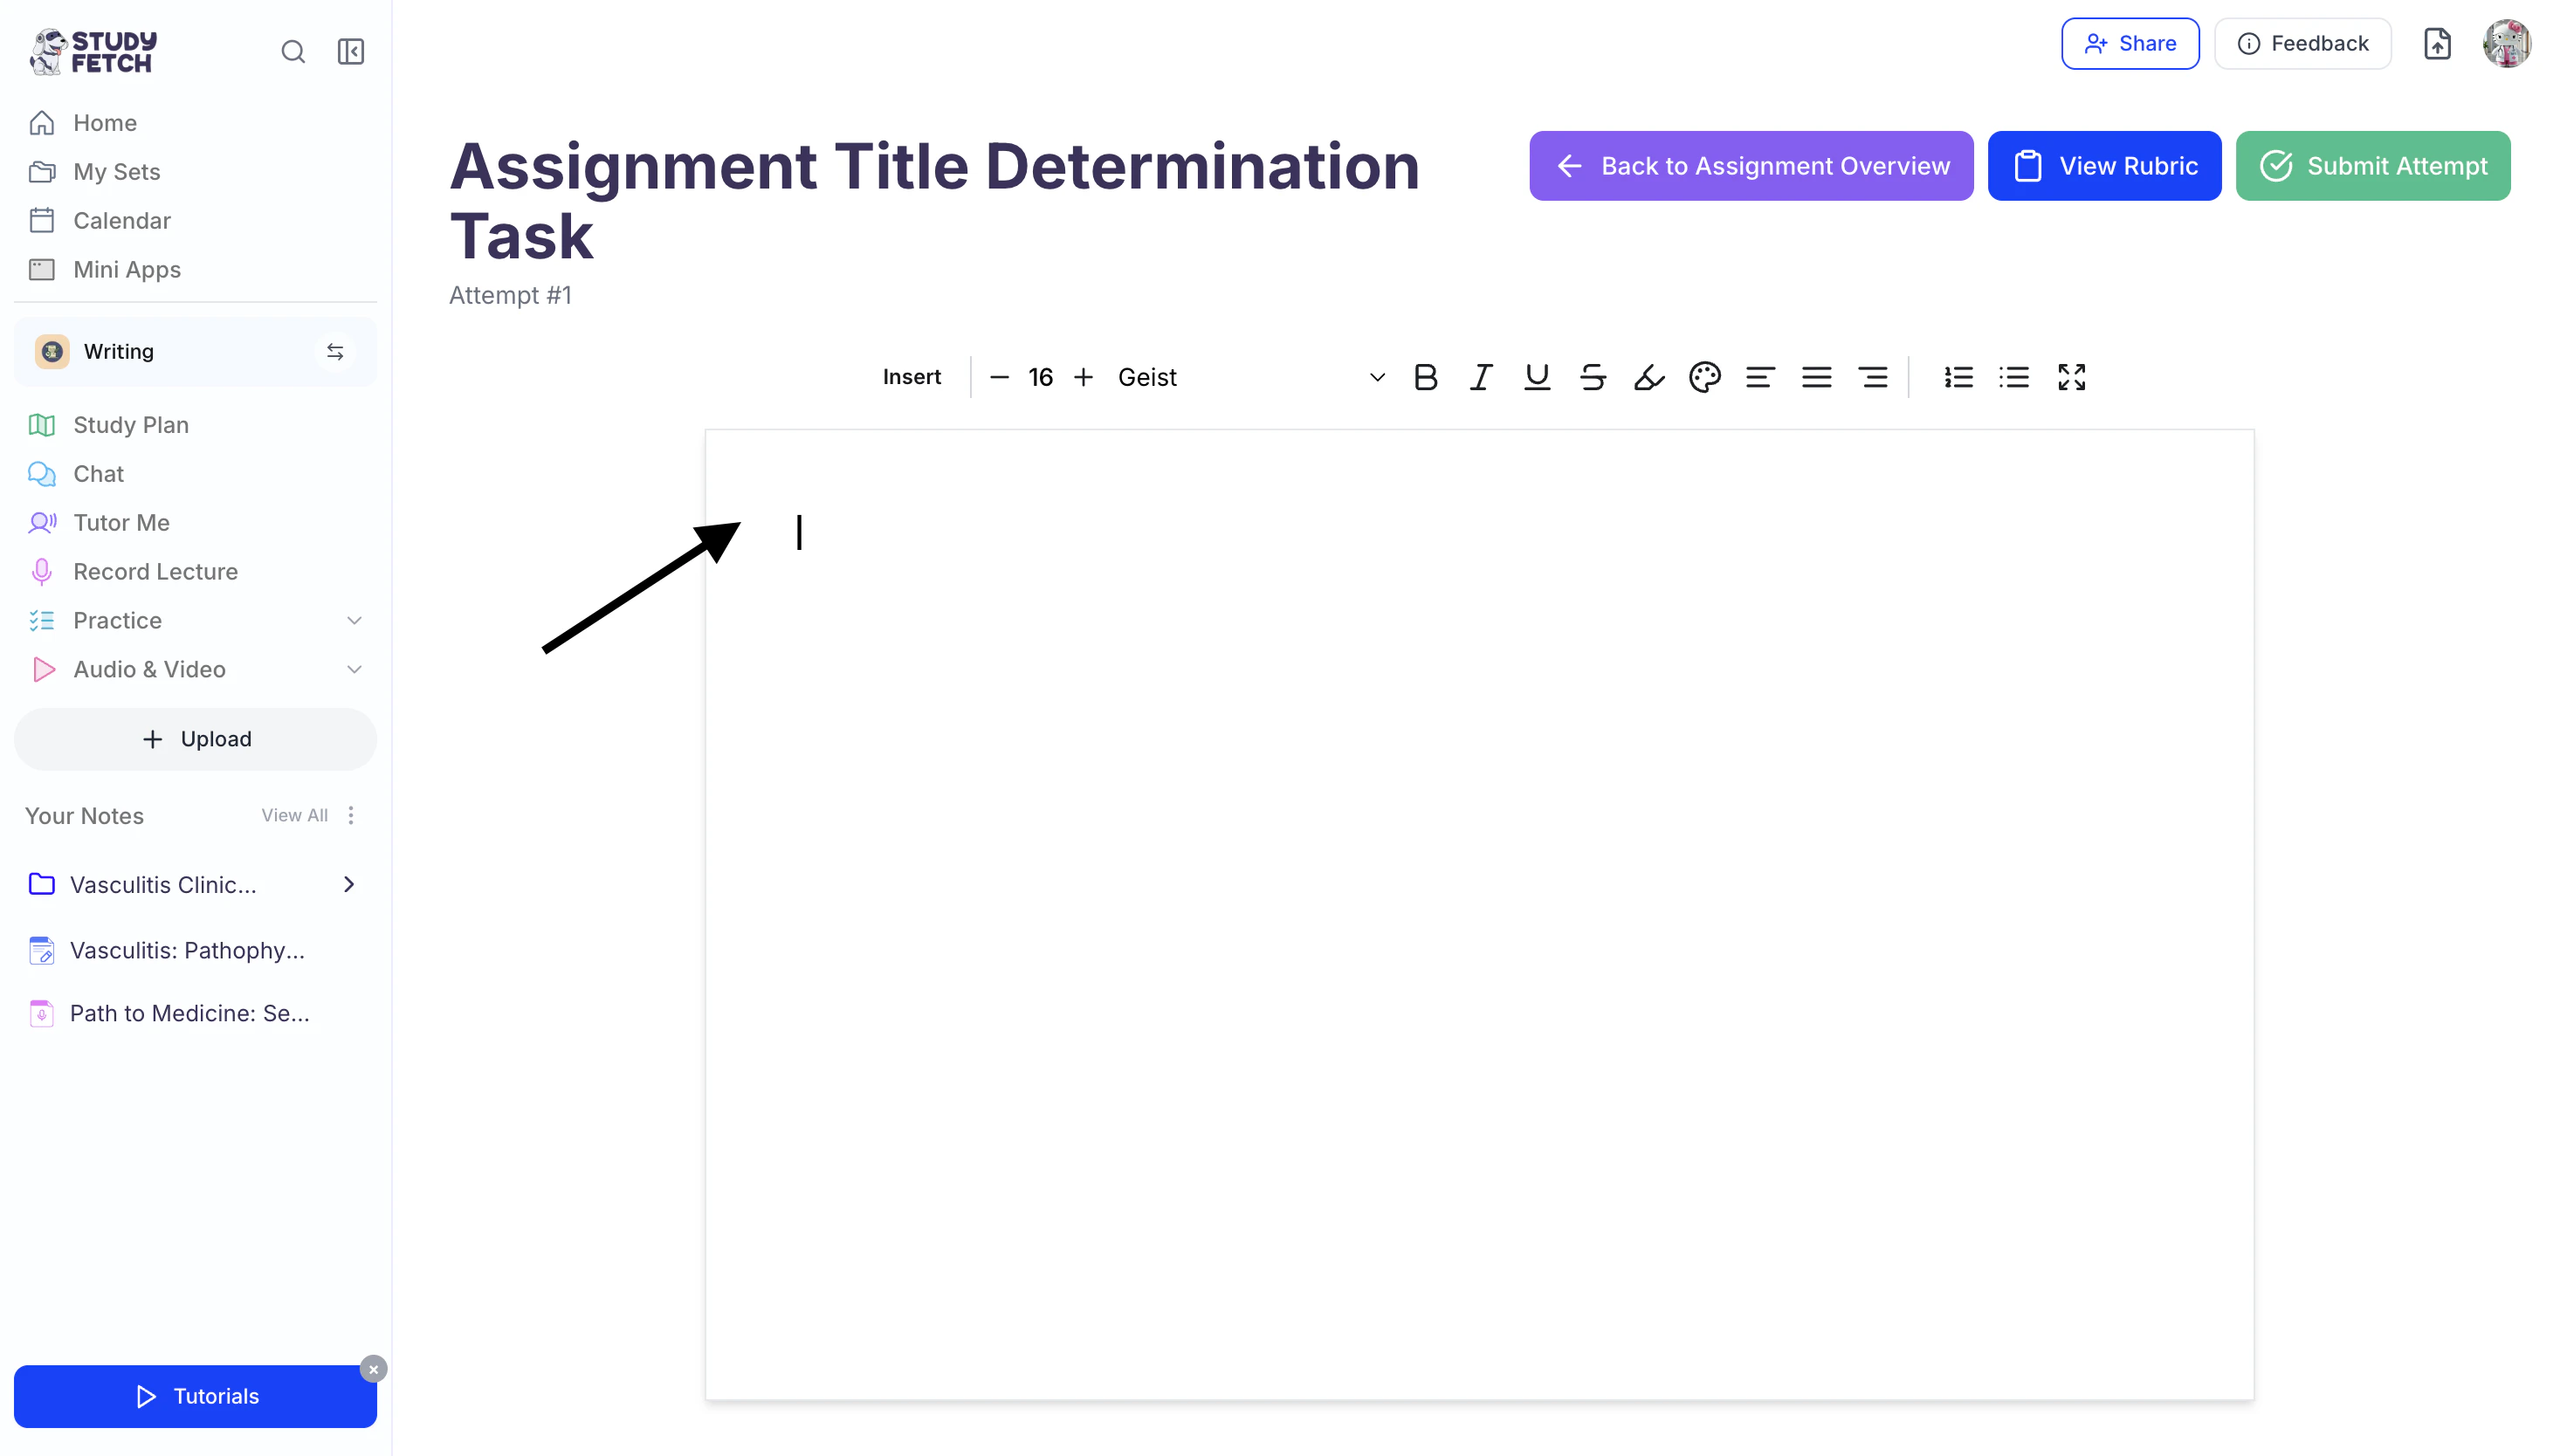
- You can also use the top toolbar to format your work as needed, including adjusting font size, changing font color, and applying bold or italic styling.
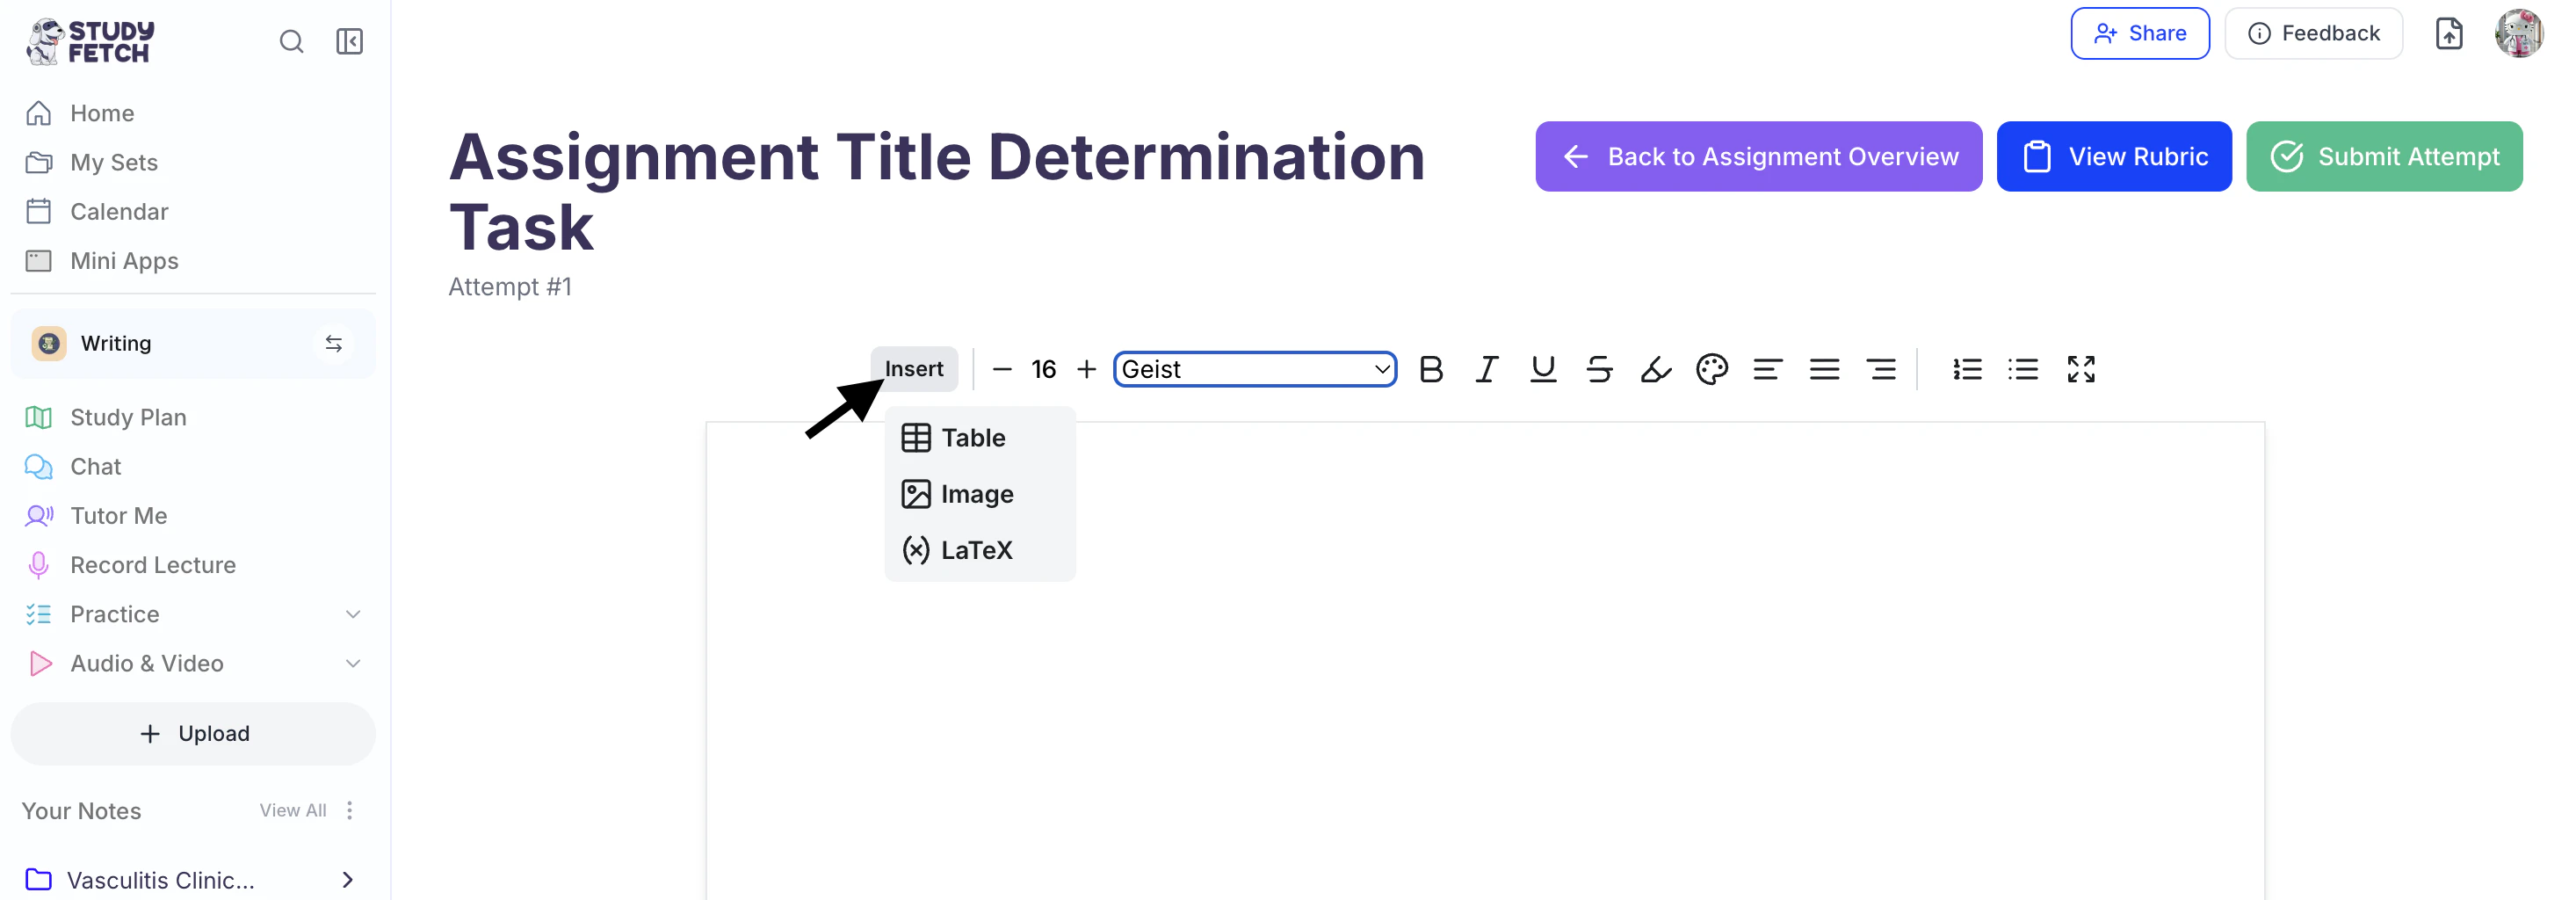
- To add a table, image or LaTeX to your note, click Insert and select your desired option.
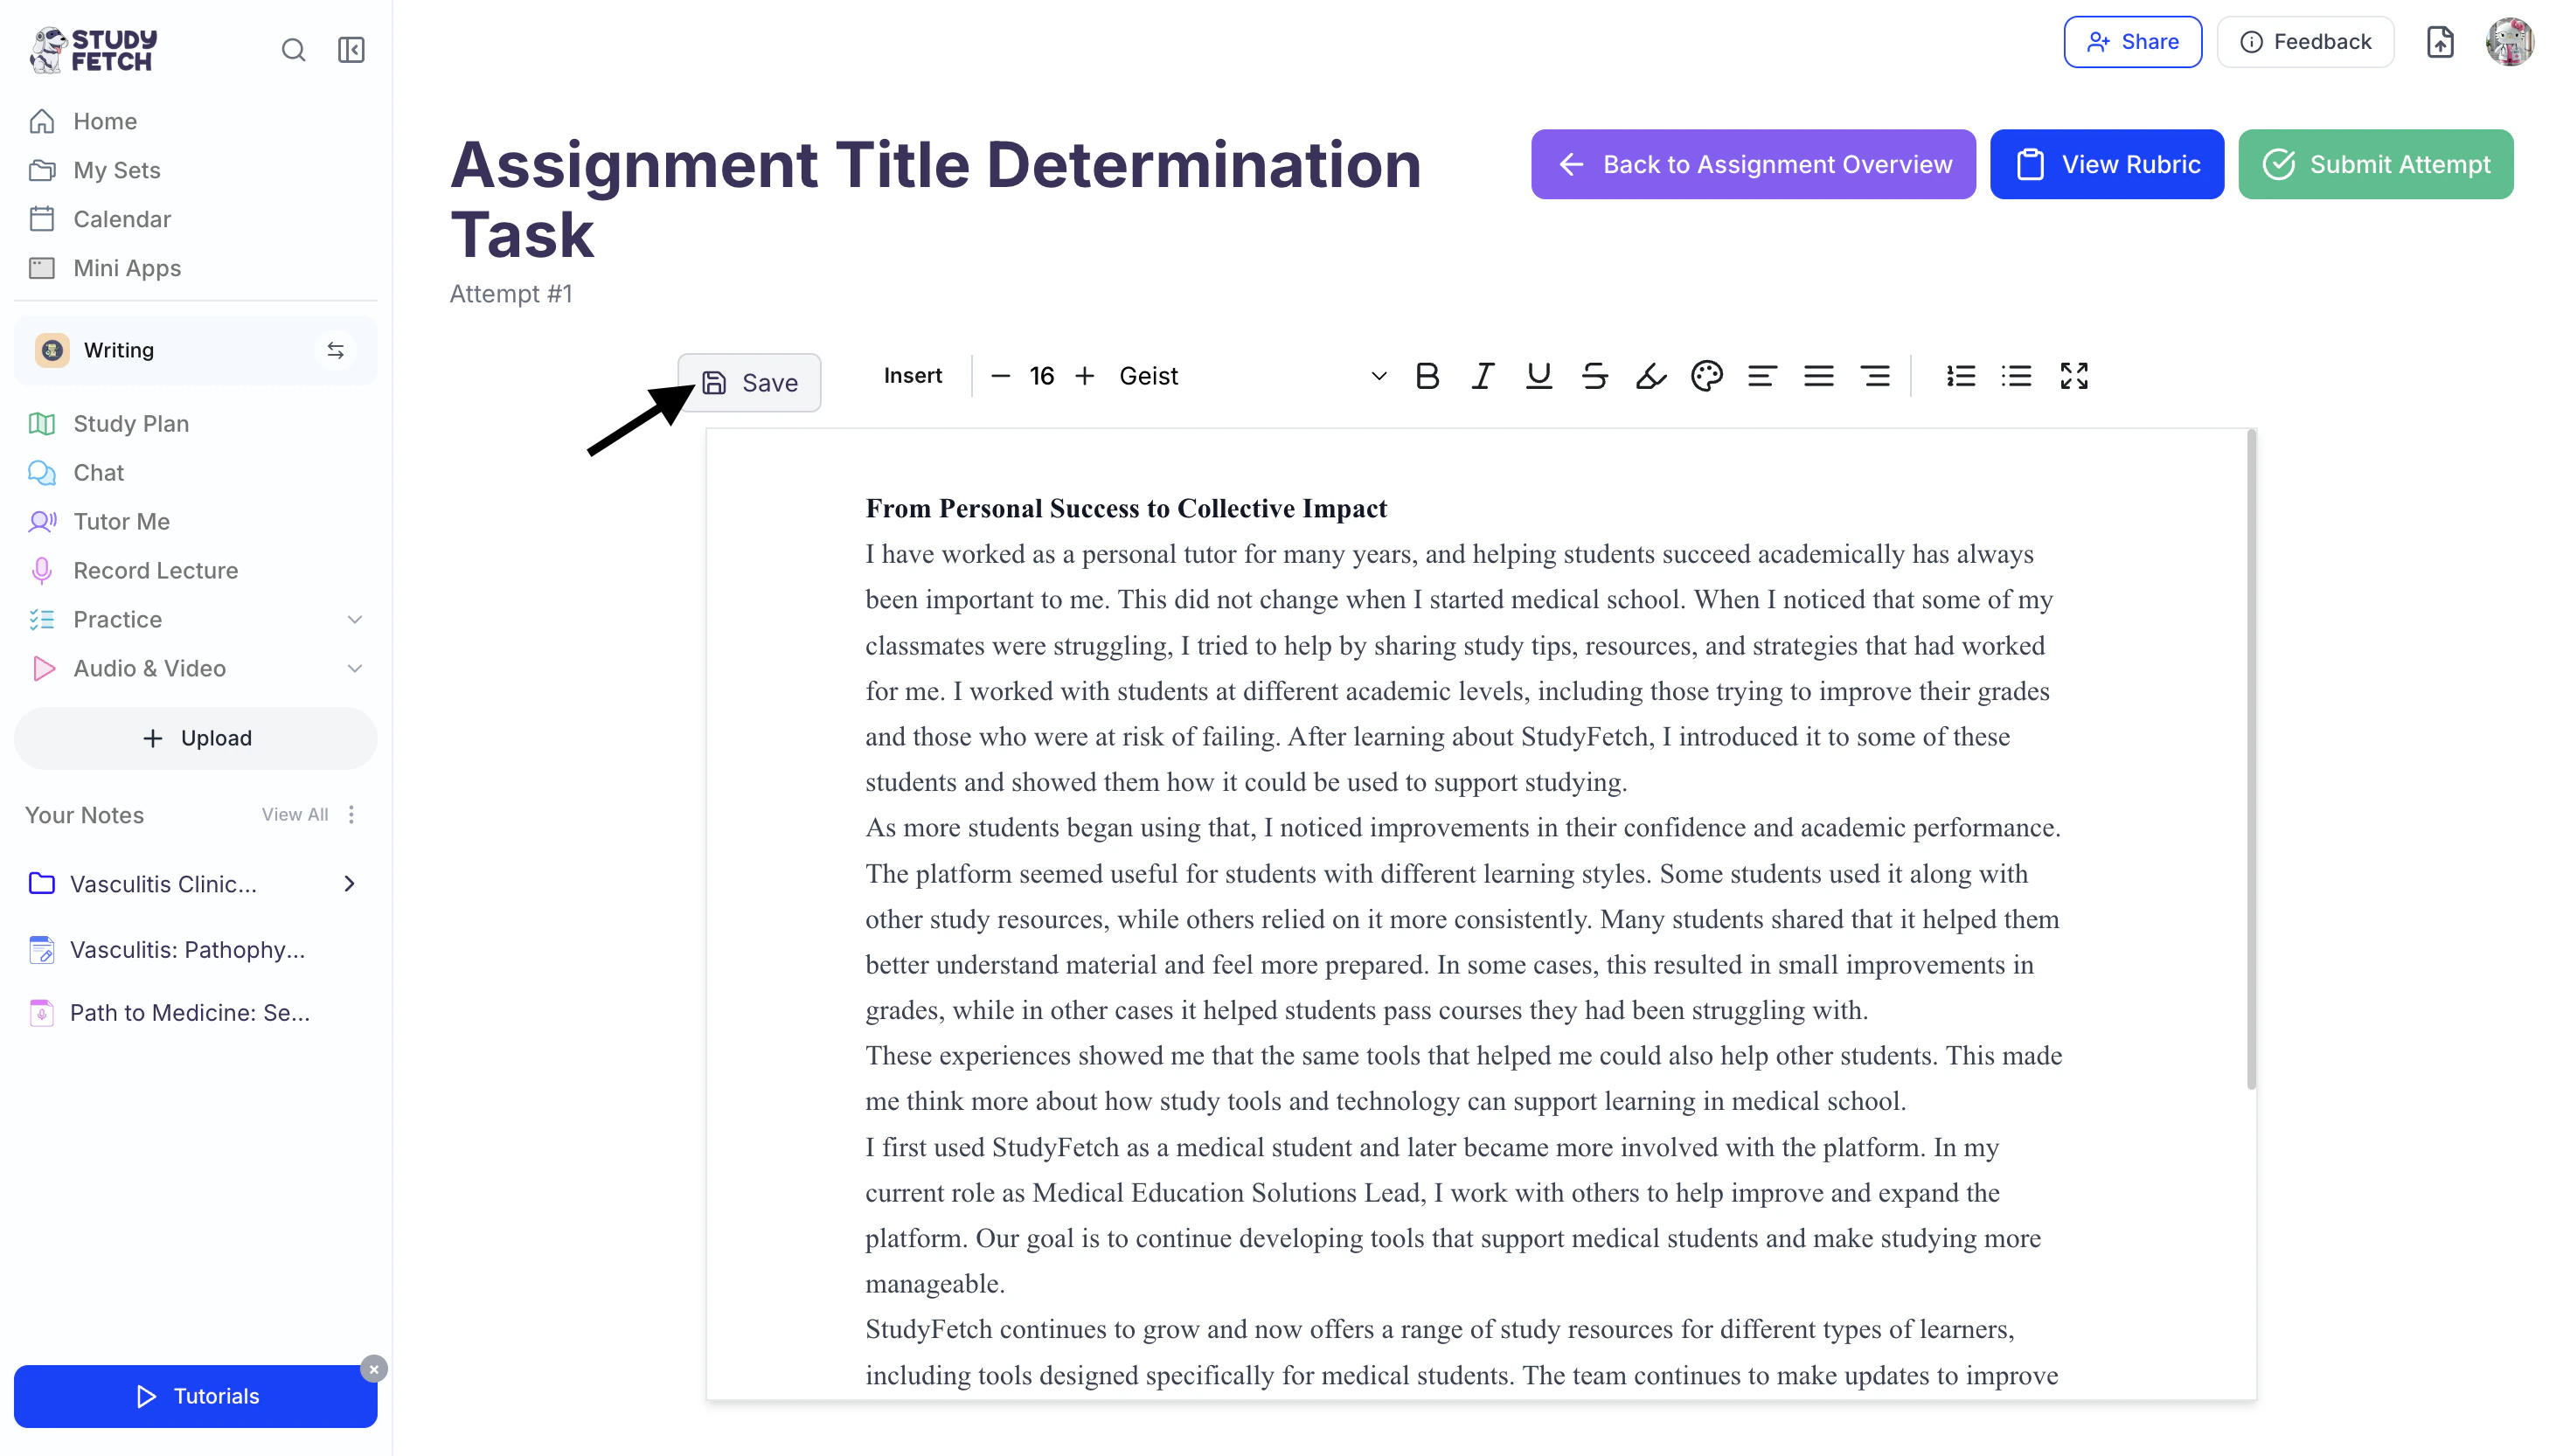
- As you work in the text editor, click Save to ensure all your changes are stored.
This allows you to return to the editor later without losing your progress.
- When you’re finished, click Submit Attempt .
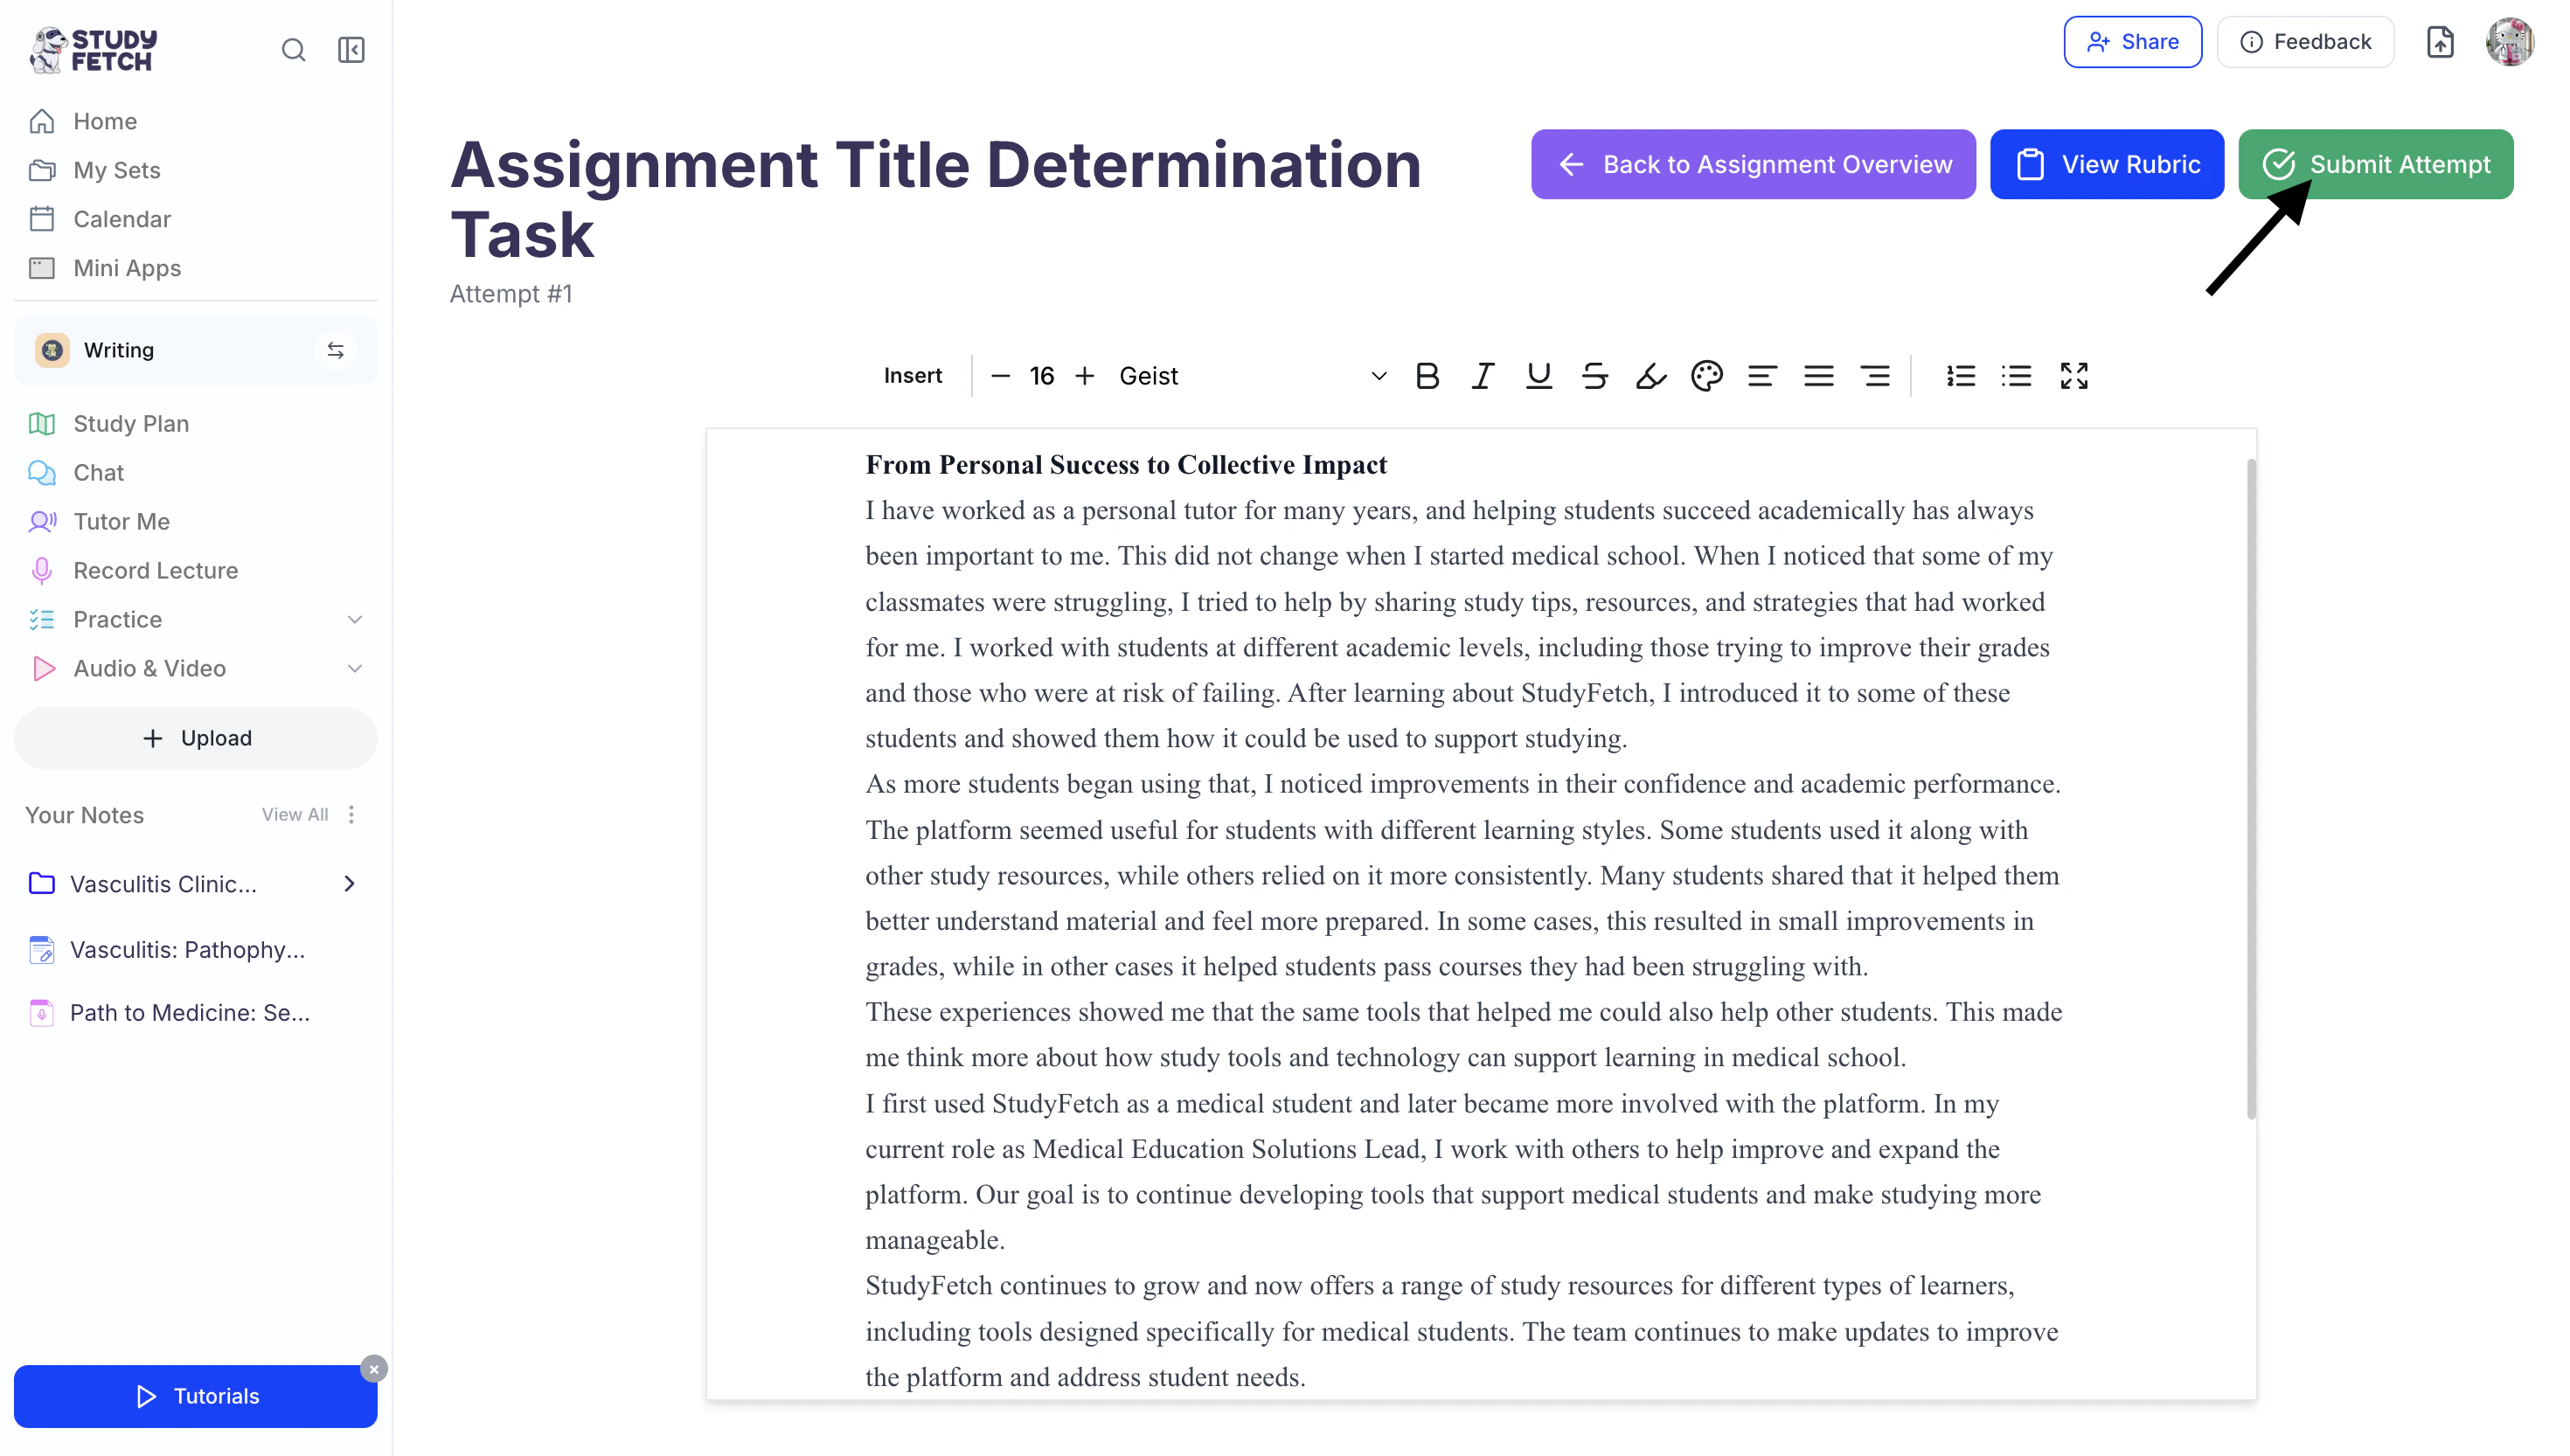
- Spark.E will start analyzing your work and provide your full grade breakdown along with detailed feedback and suggestions for improvement!
Method 3: Phone Camera
- After selecting Phone Camera, a QR code will appear on the screen.
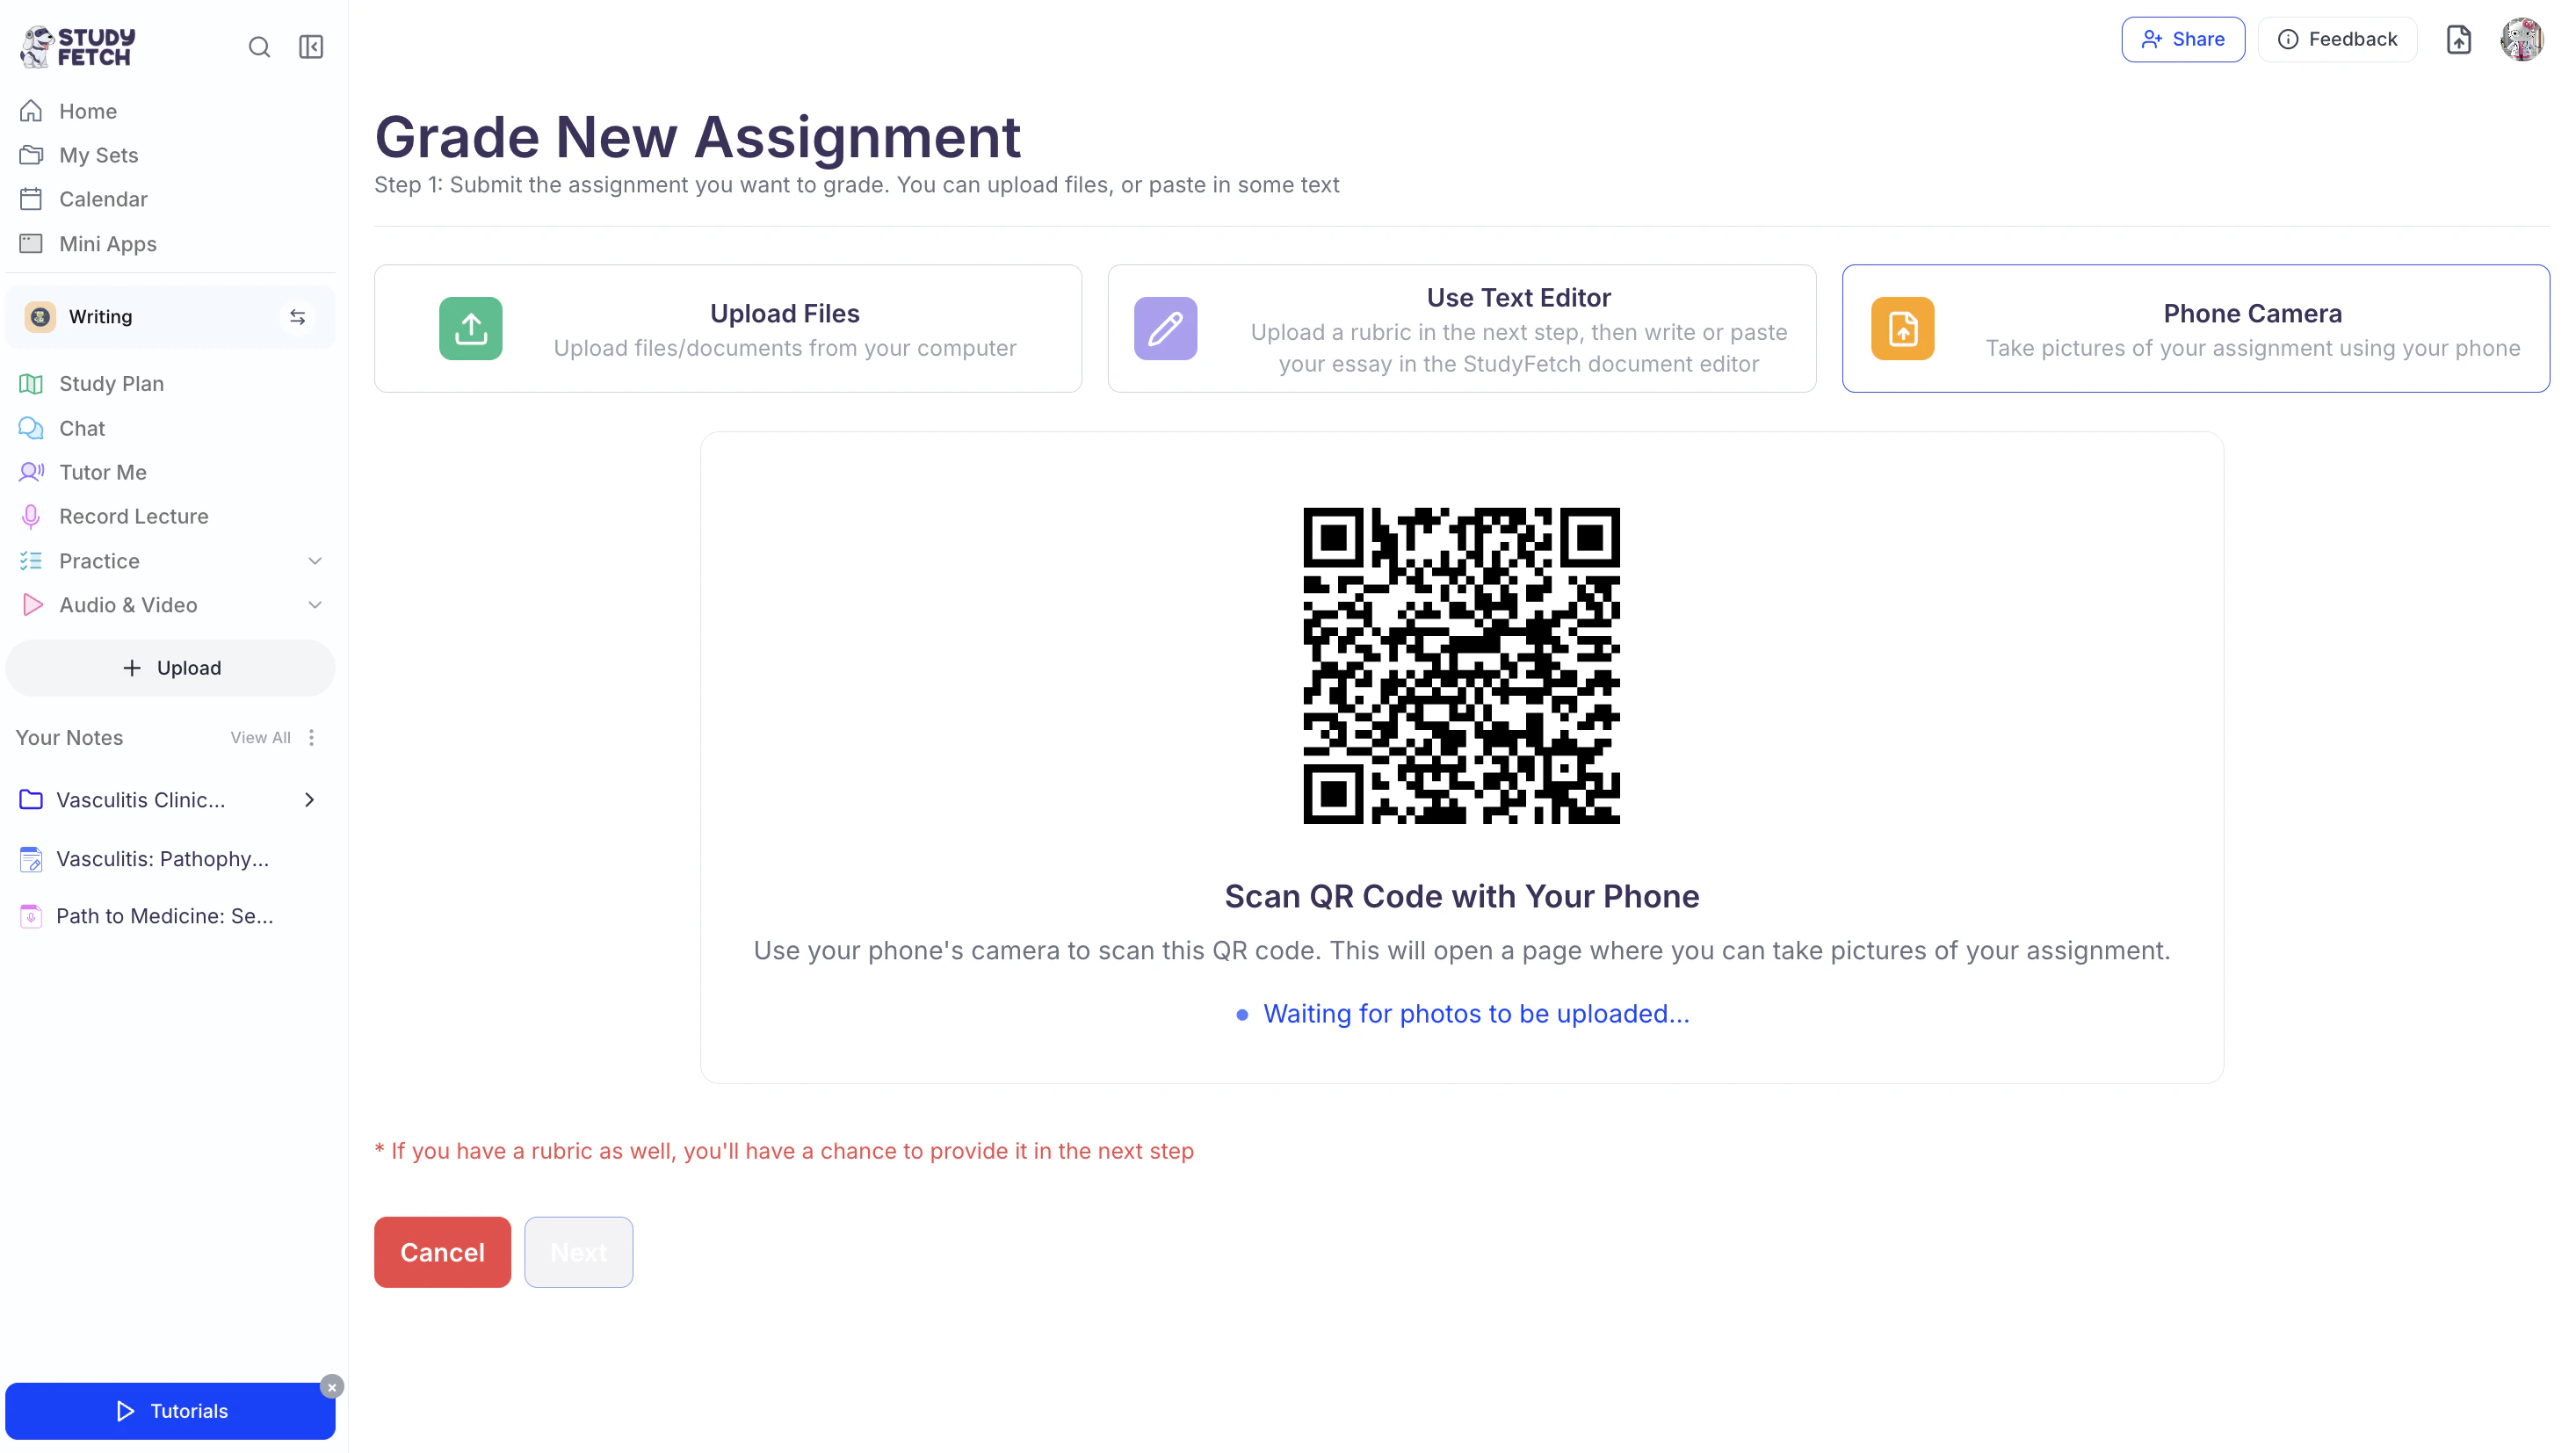
- Use your phone’s camera to scan the QR code.

- Open the QR code web page on your mobile device.
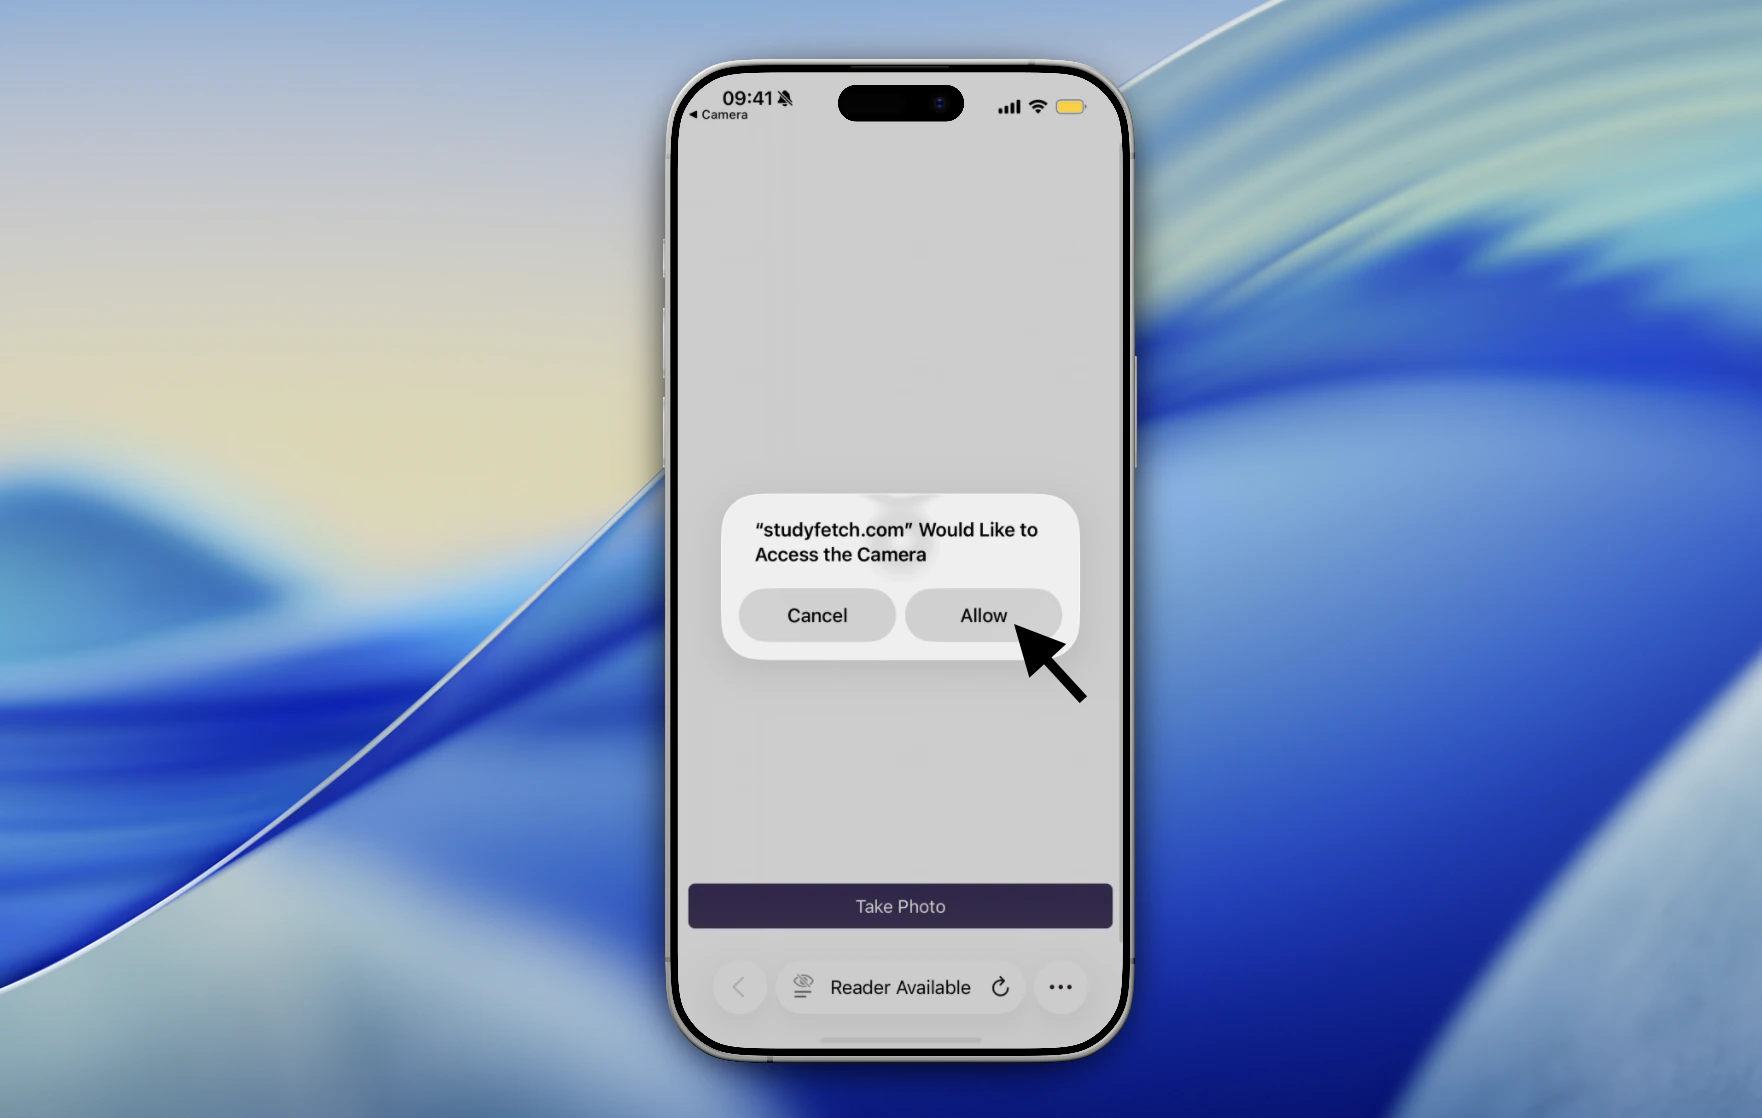
- A pop-up will appear requesting camera access. Select Allow to continue.
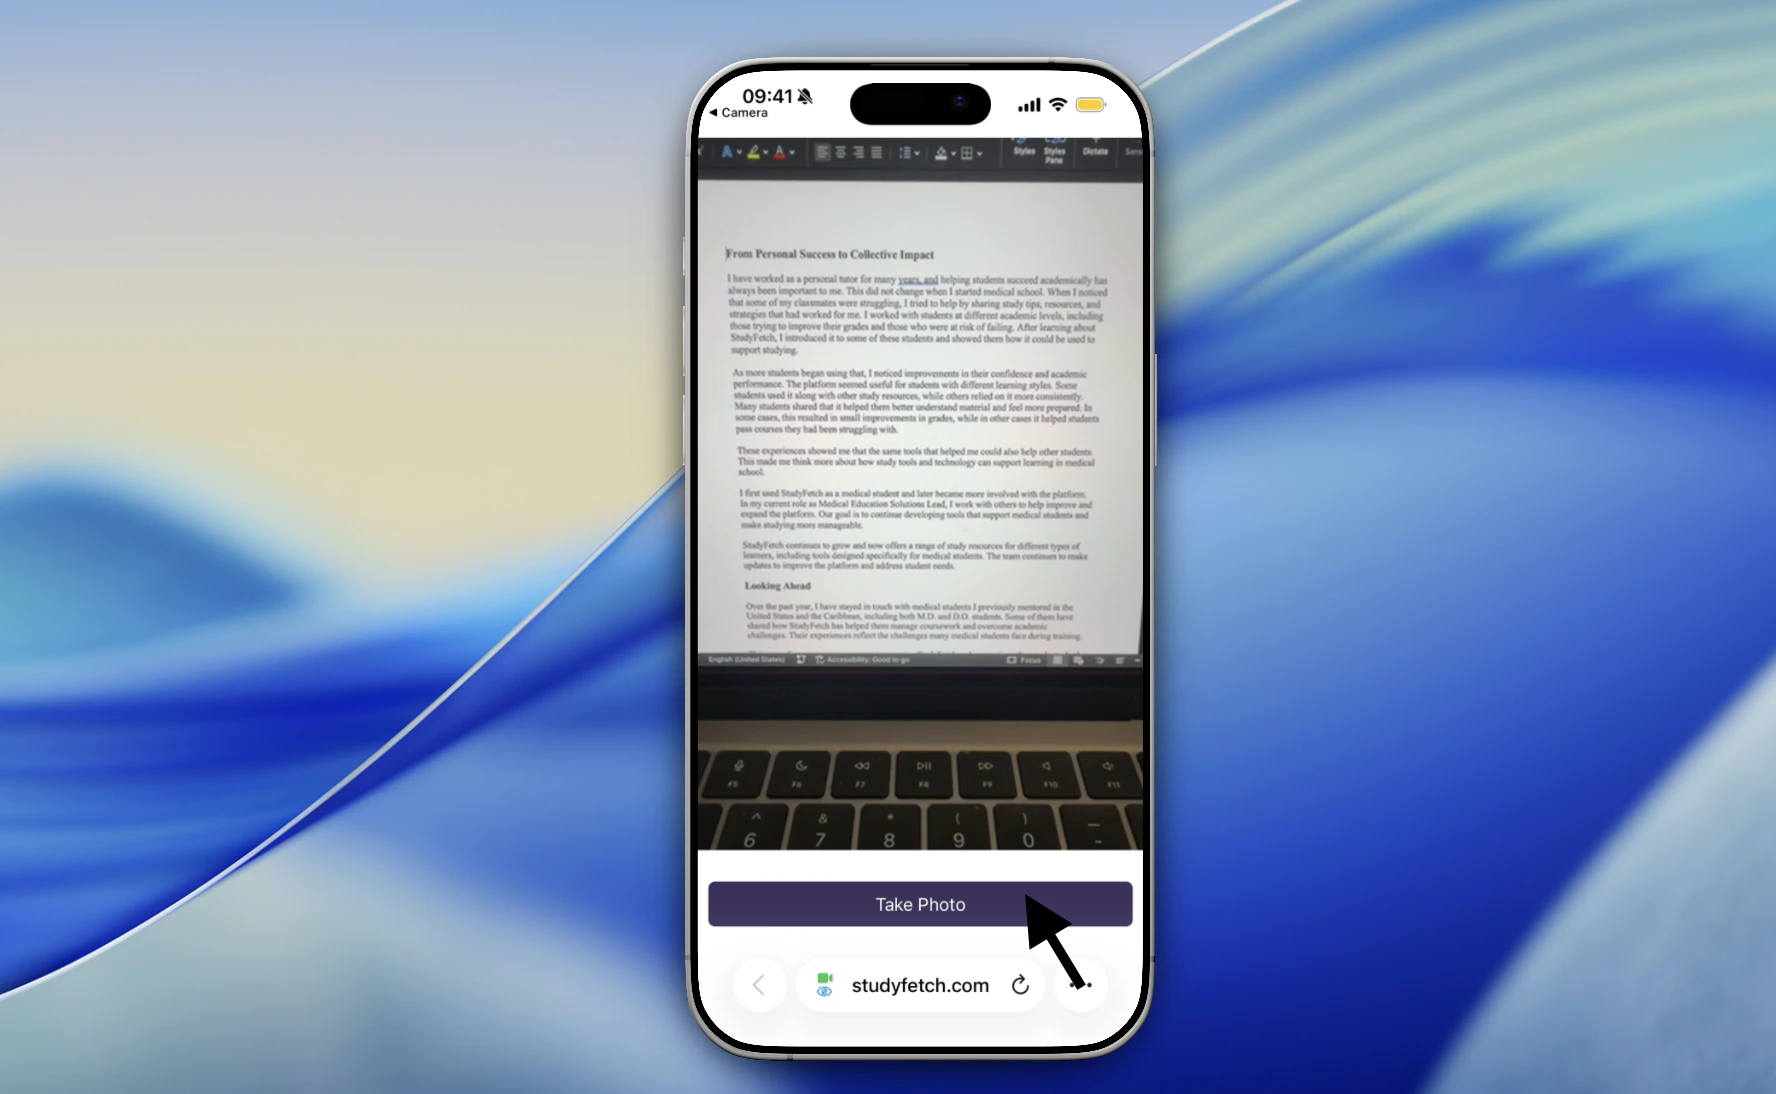
- Now click Take Photo to take a picture of the assignment you want to submit for grading.
- After taking your picture, you can capture additional photos of your assignment by clicking Add Another.
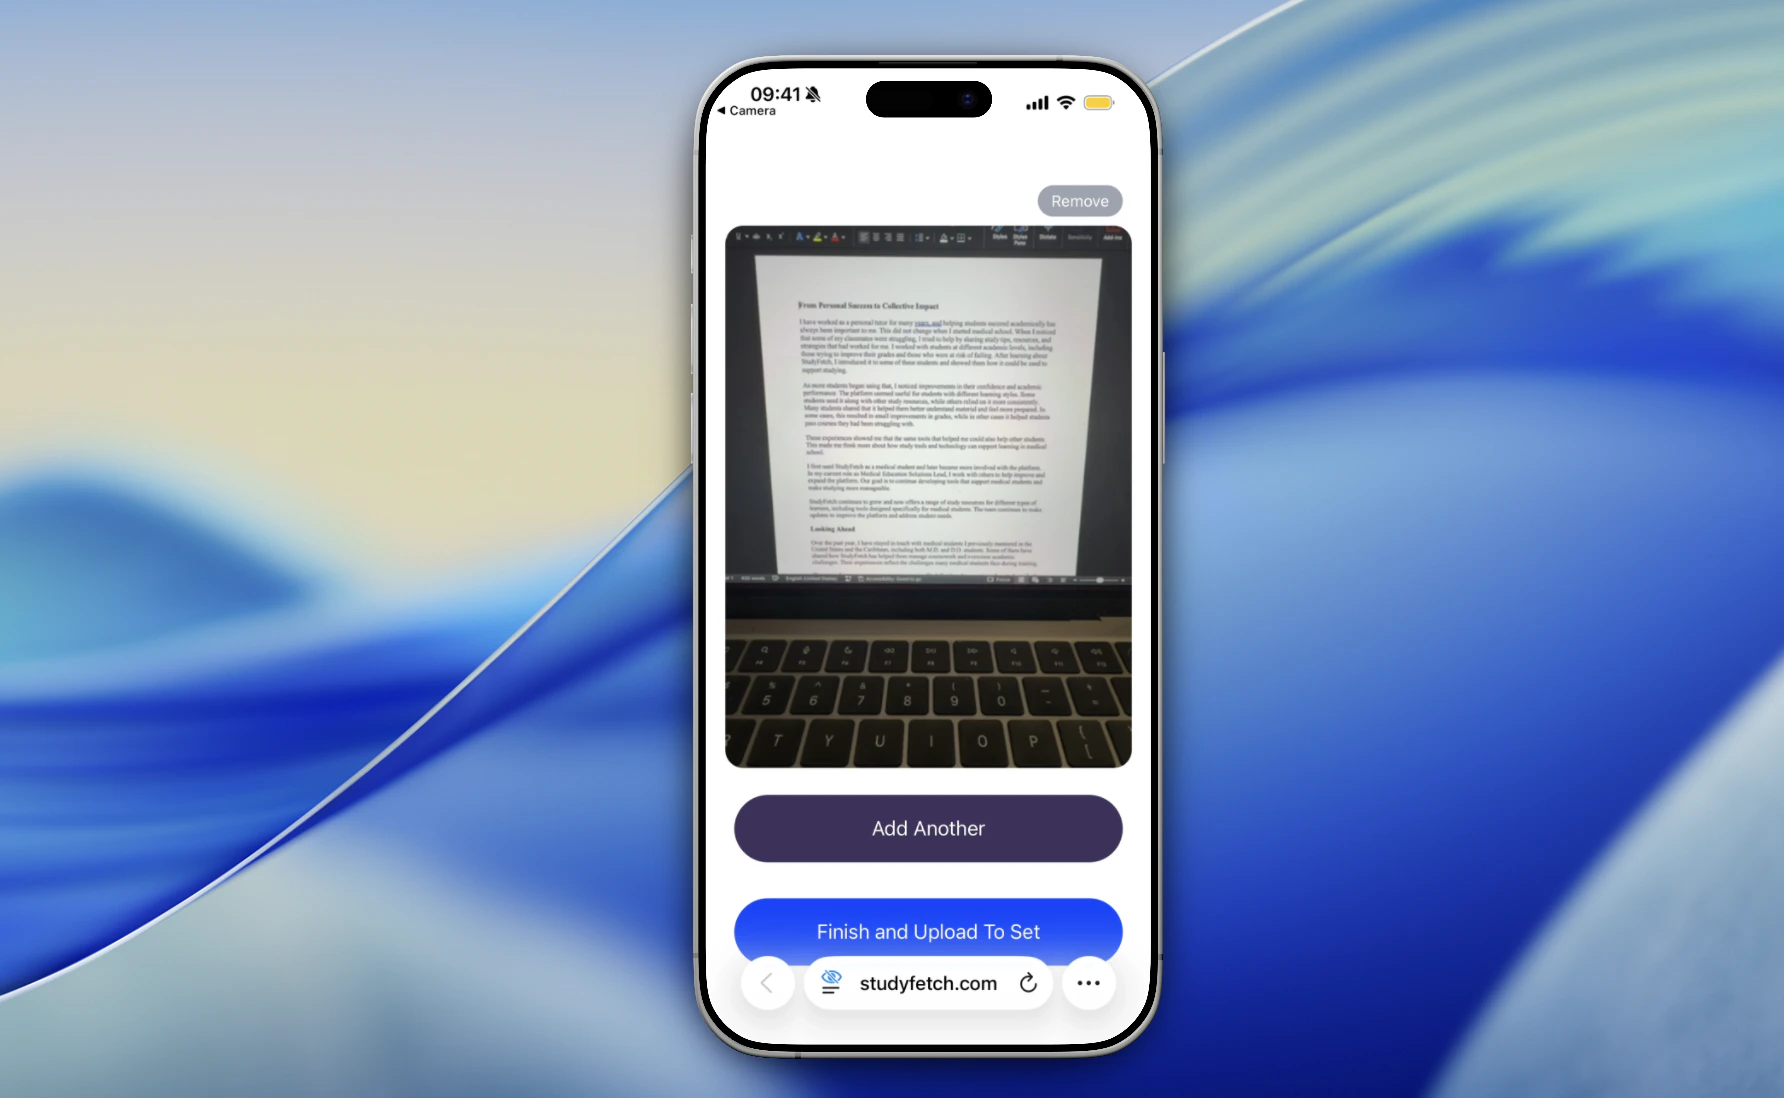
- To remove any photo, click Remove from the top right corner.
- Once you’ve finished capturing all required pages, select Finish and Upload to Set.
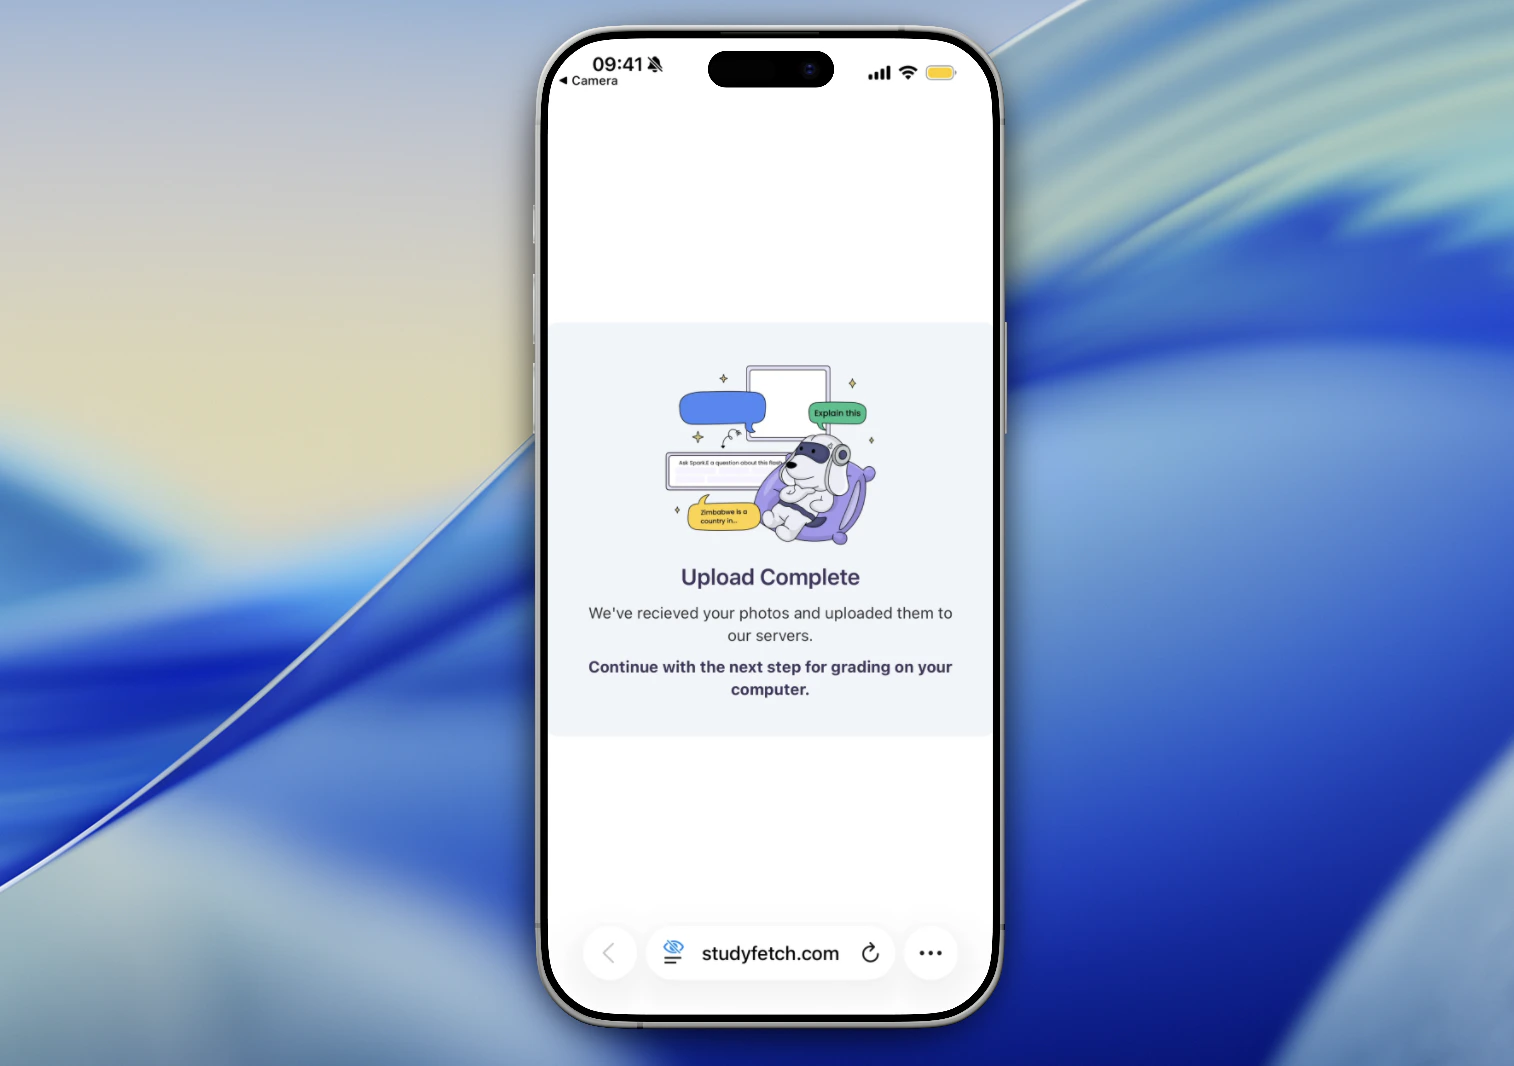
- After your phone confirms Upload Complete,
return to your desktop to continue submitting your assignment.
- All uploaded photos will then appear on the screen.
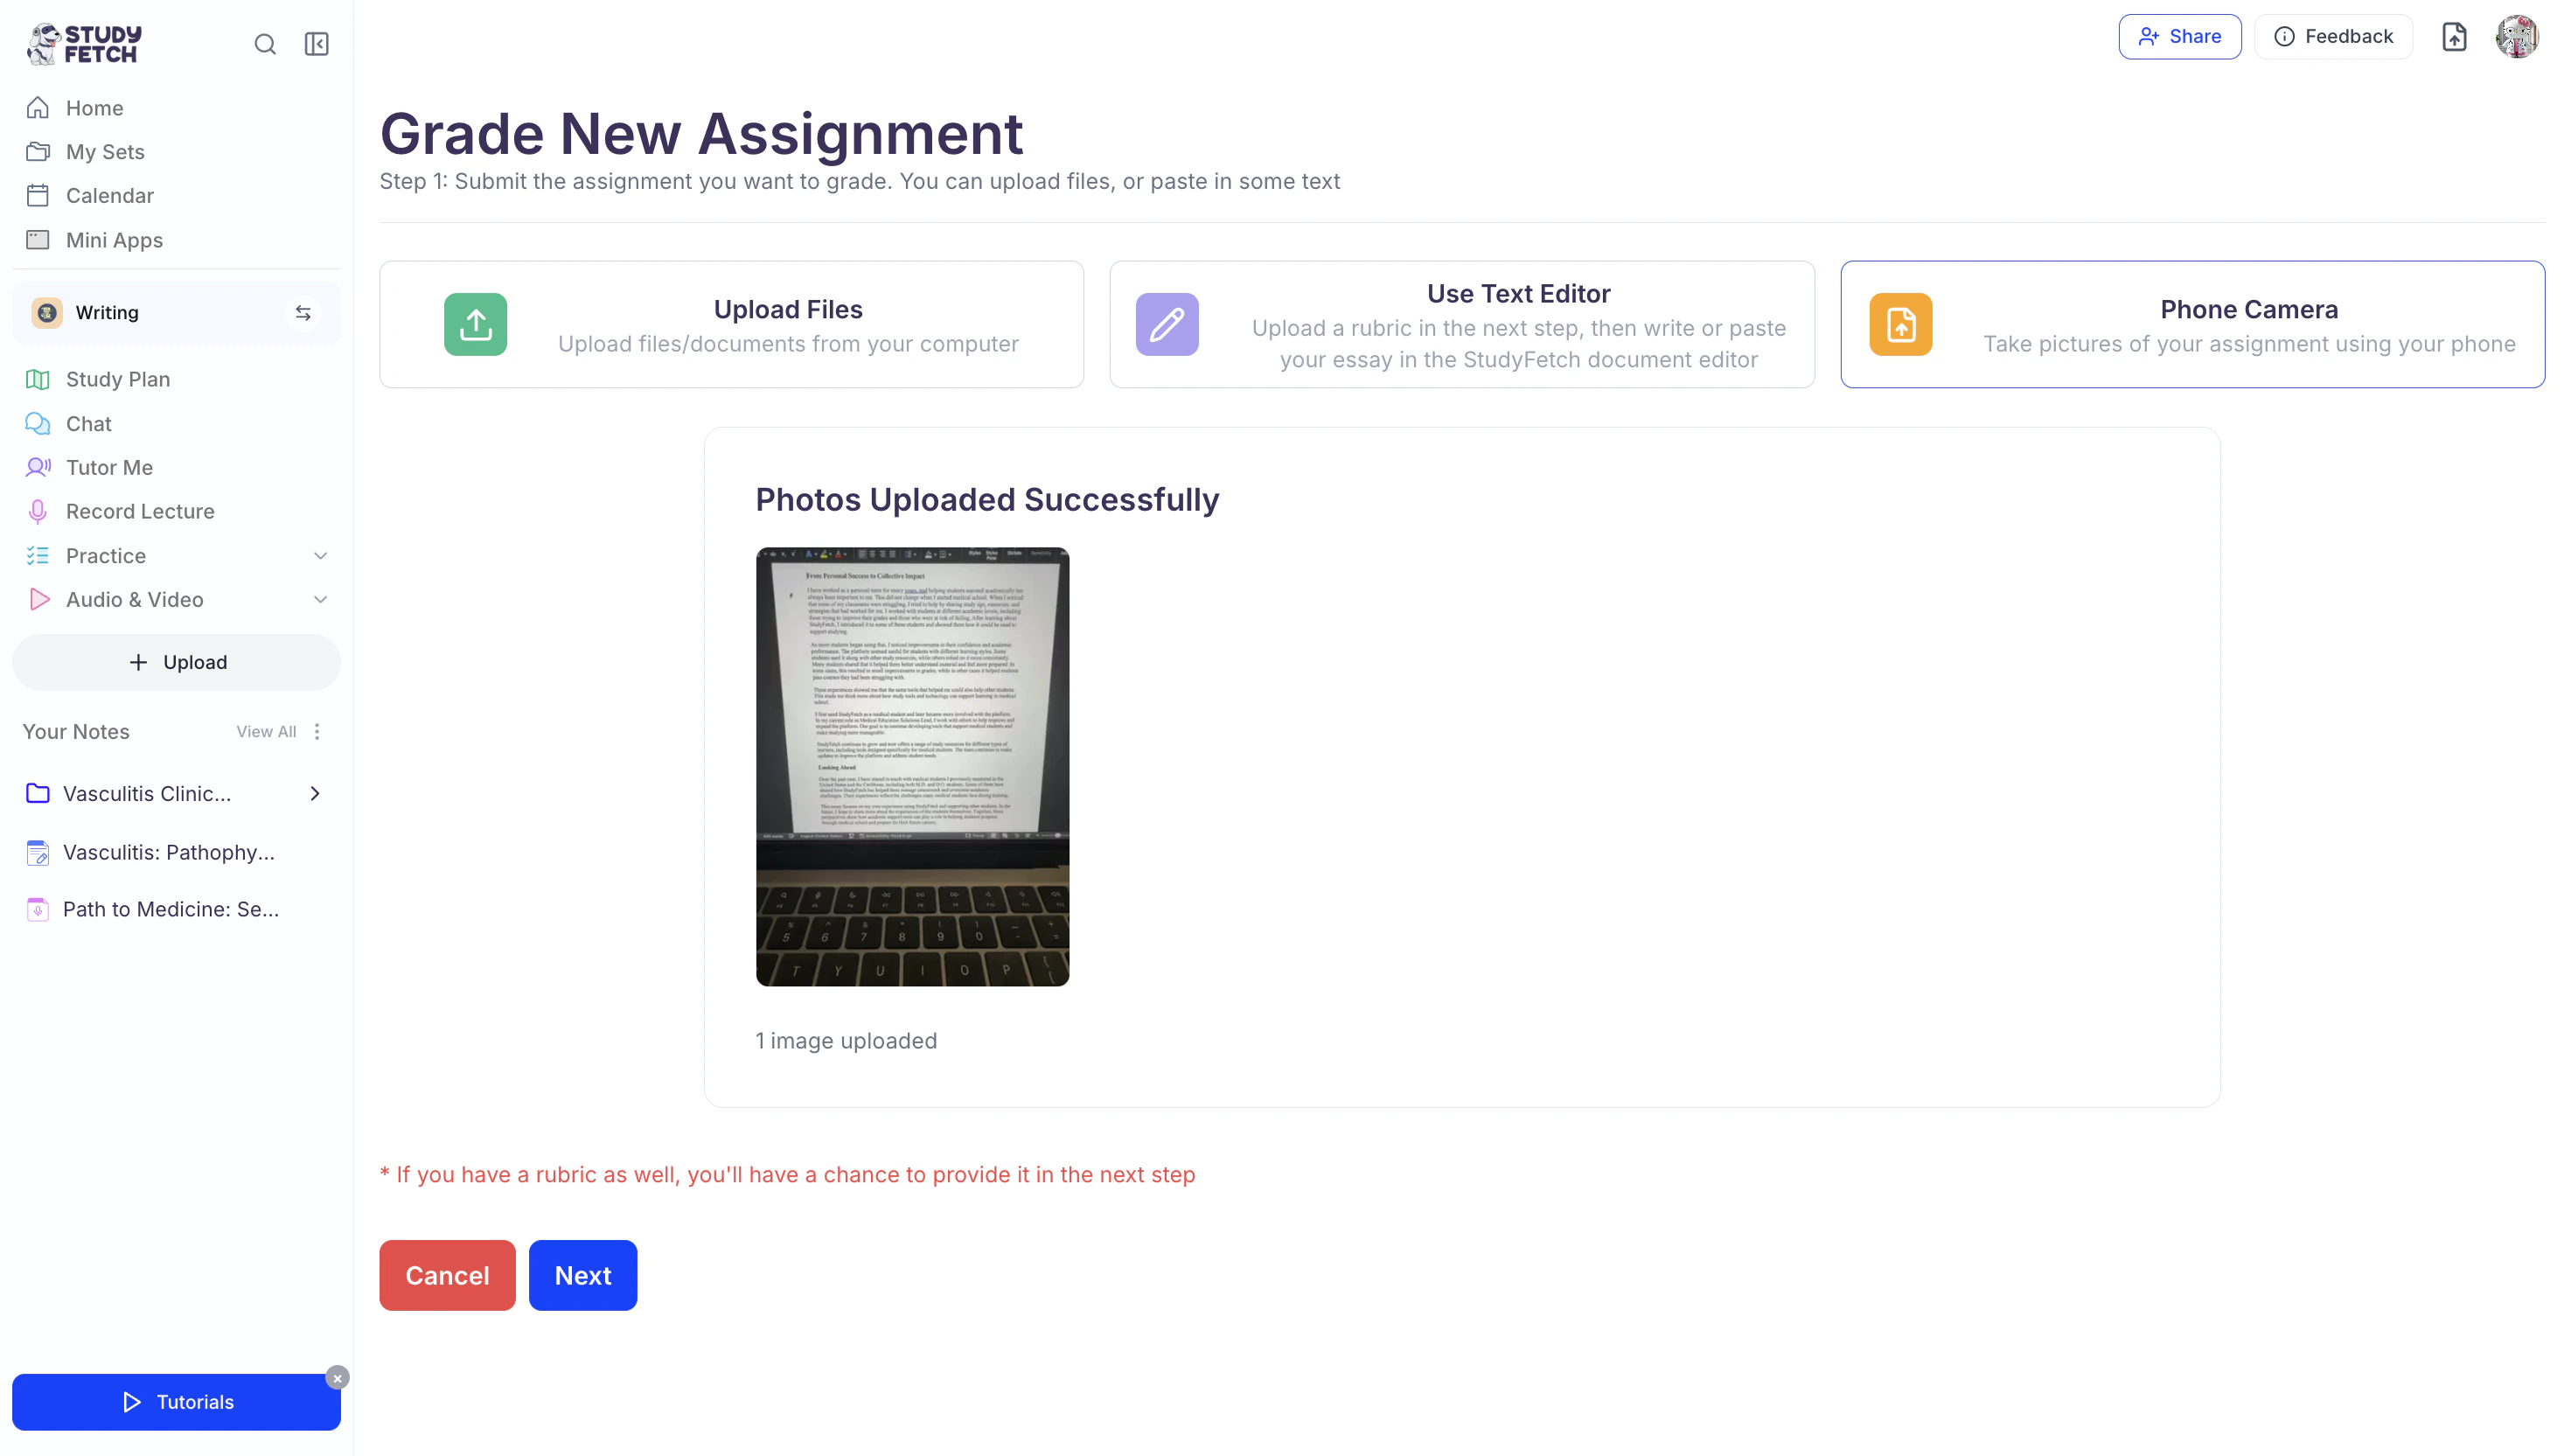
- Click Next to proceed to Step 2: Upload a Rubric.
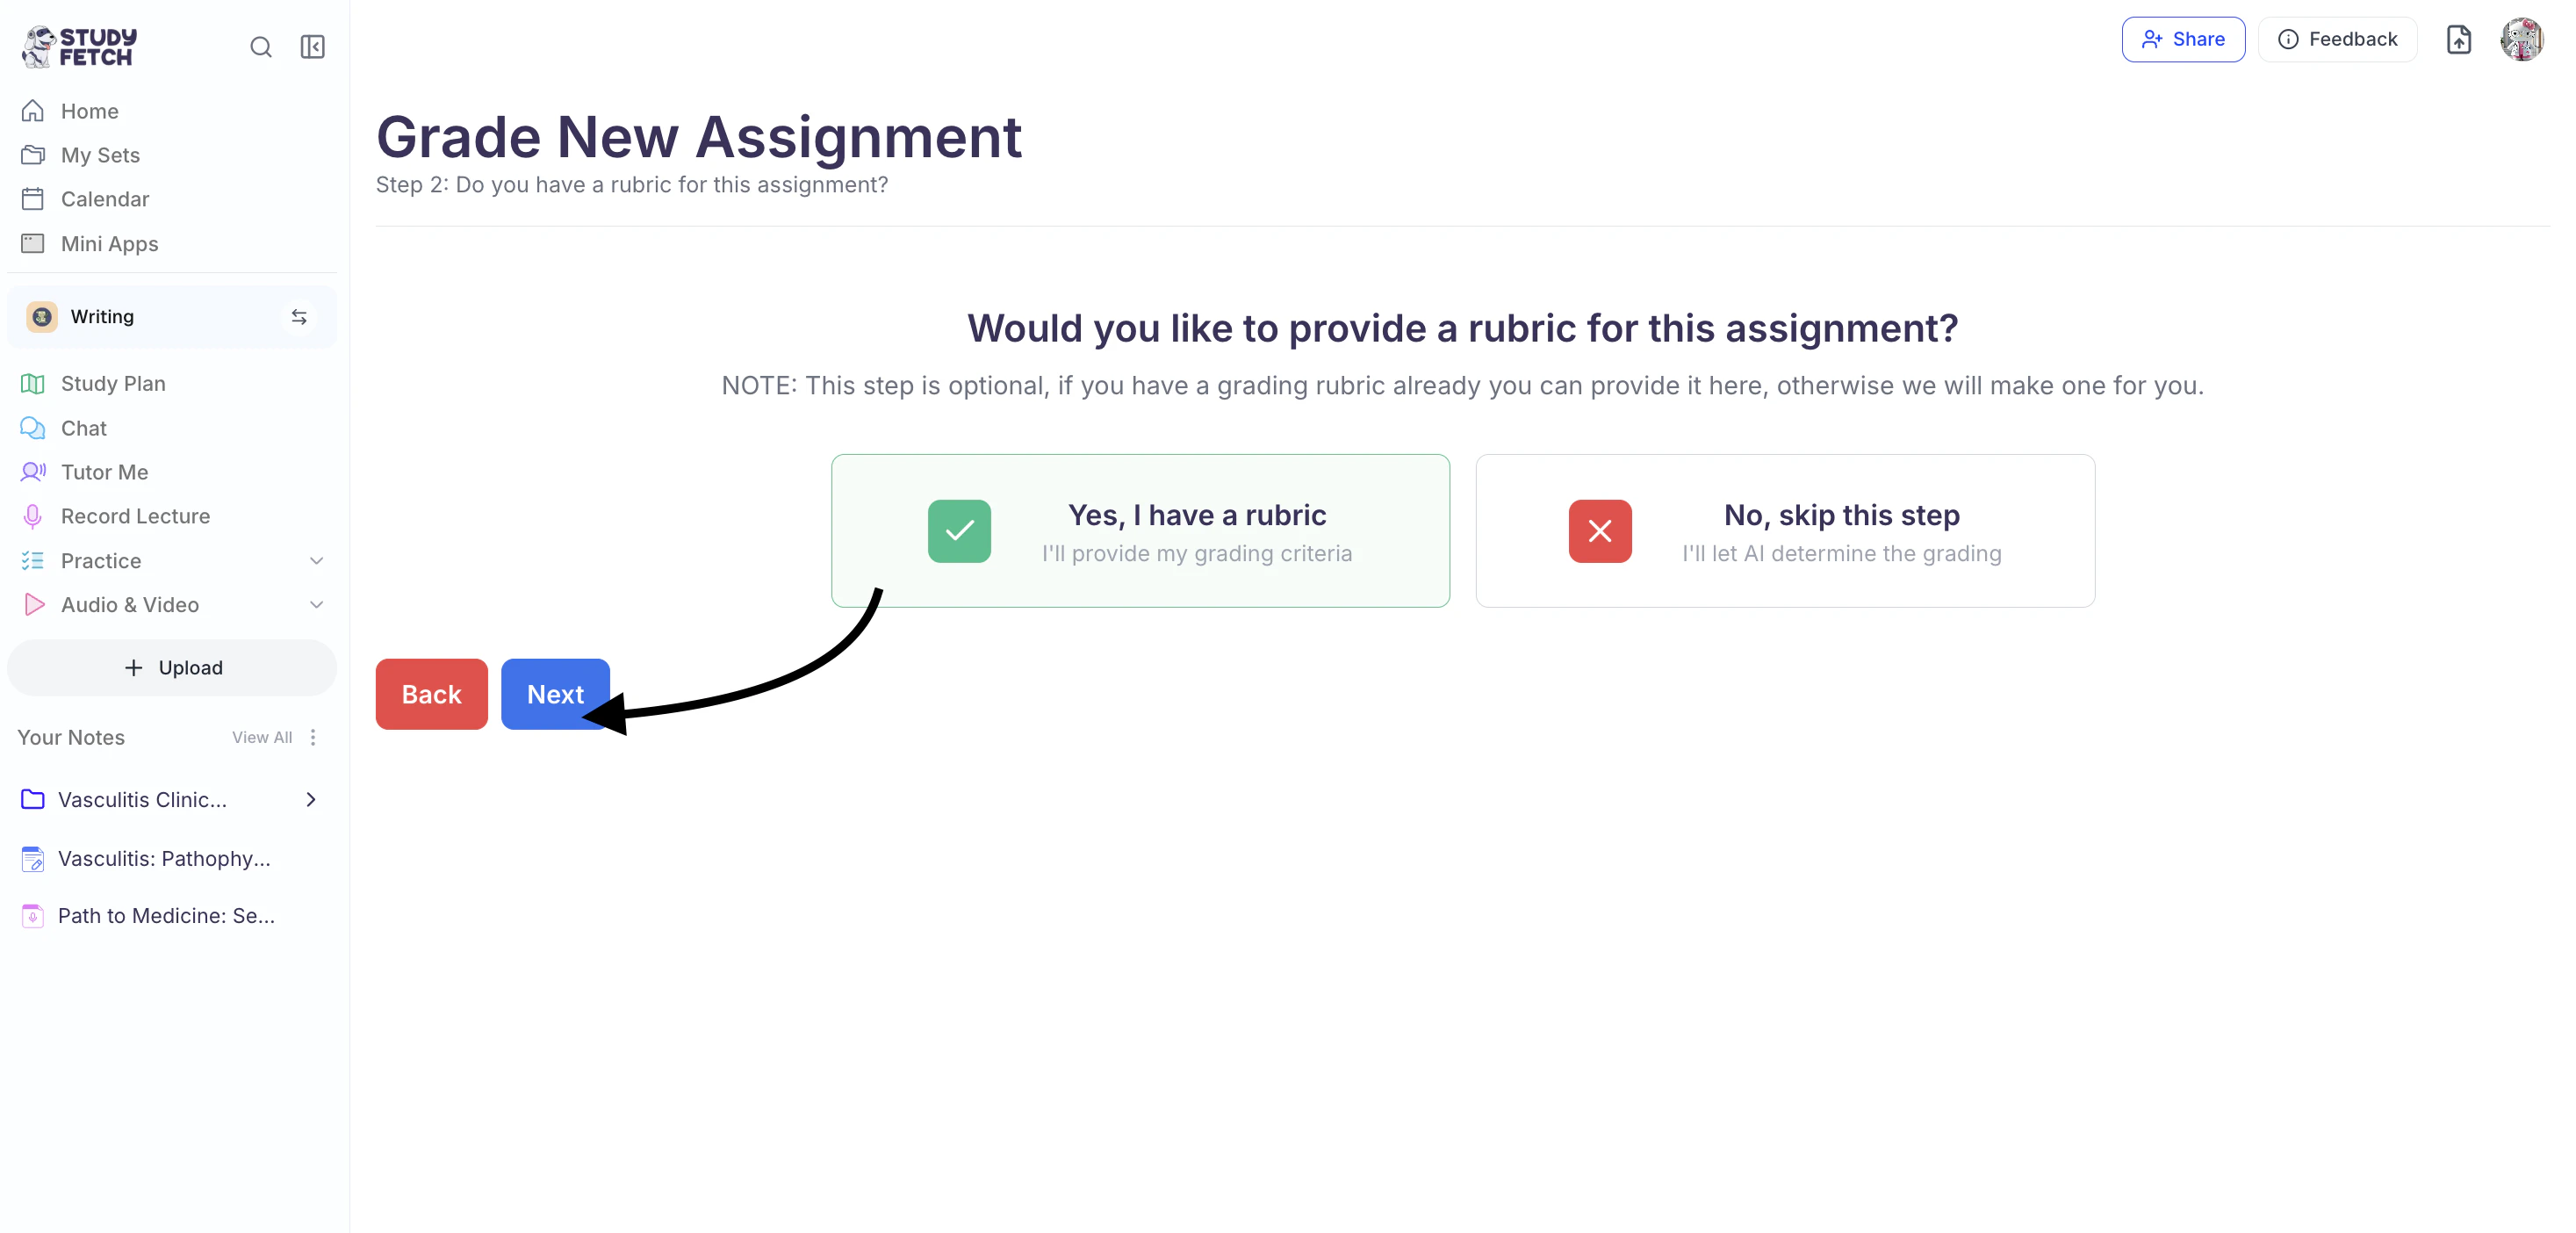
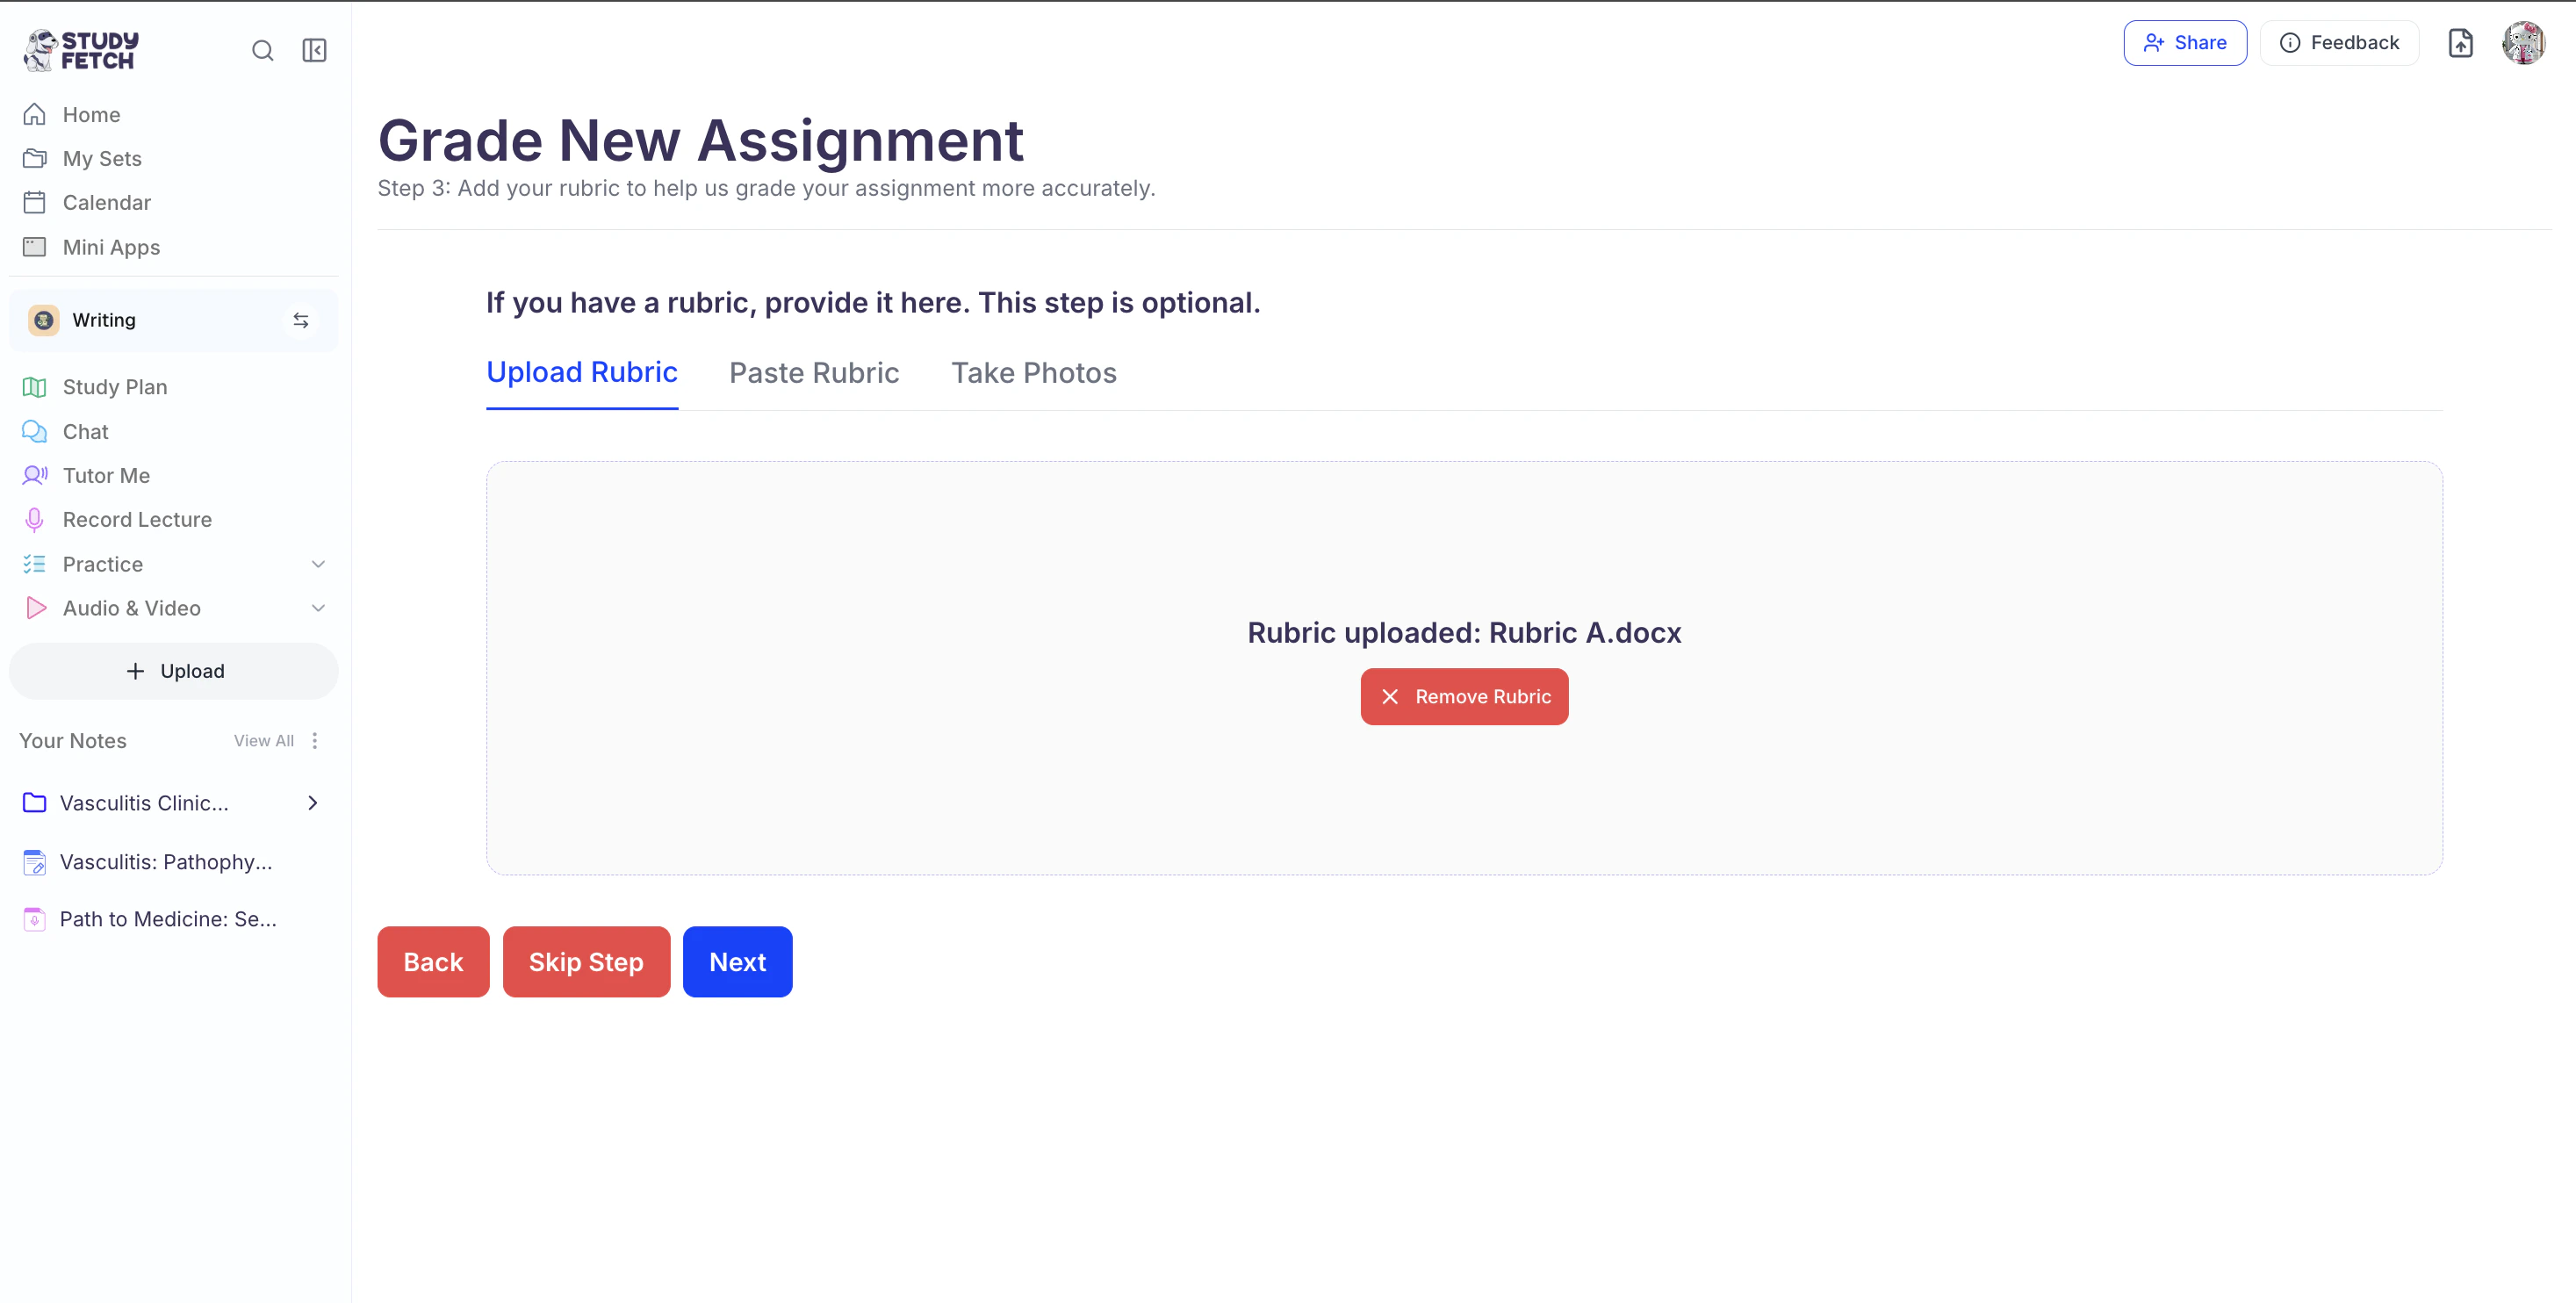
Step 2: Upload a Rubric
I Have a Rubric- To add your own rubric, click Yes, I have a rubric, then click Next.
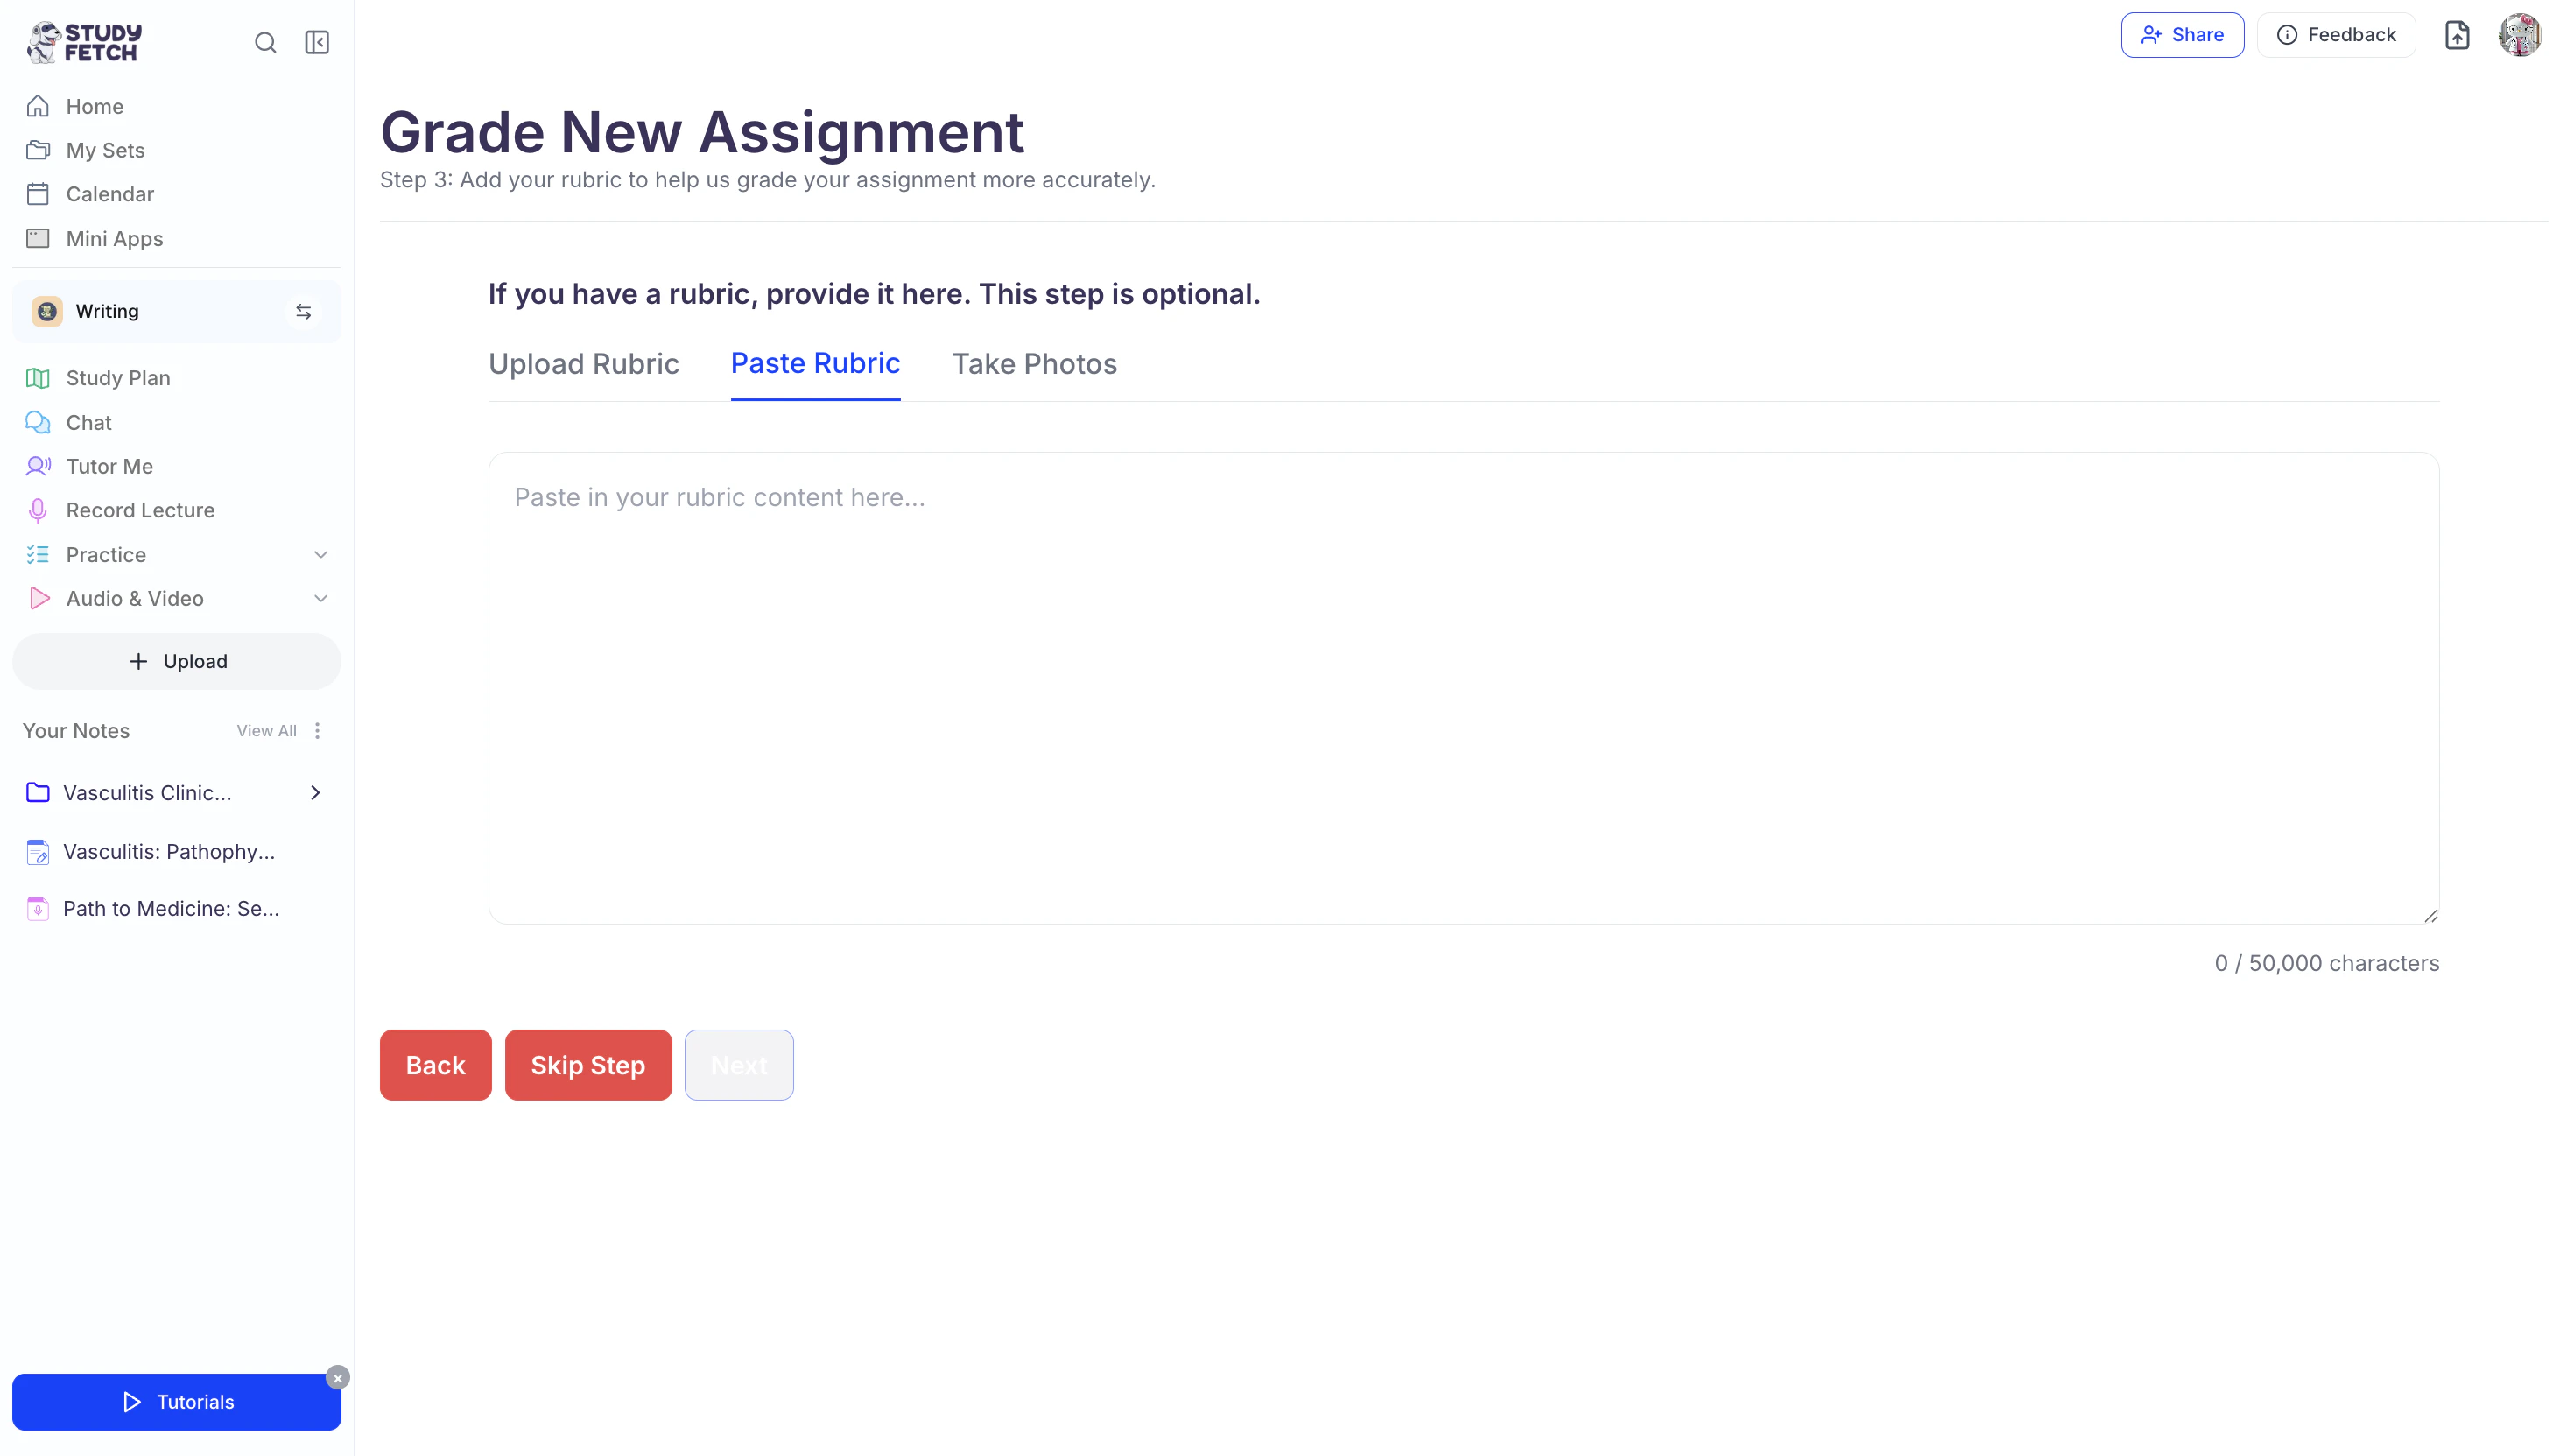
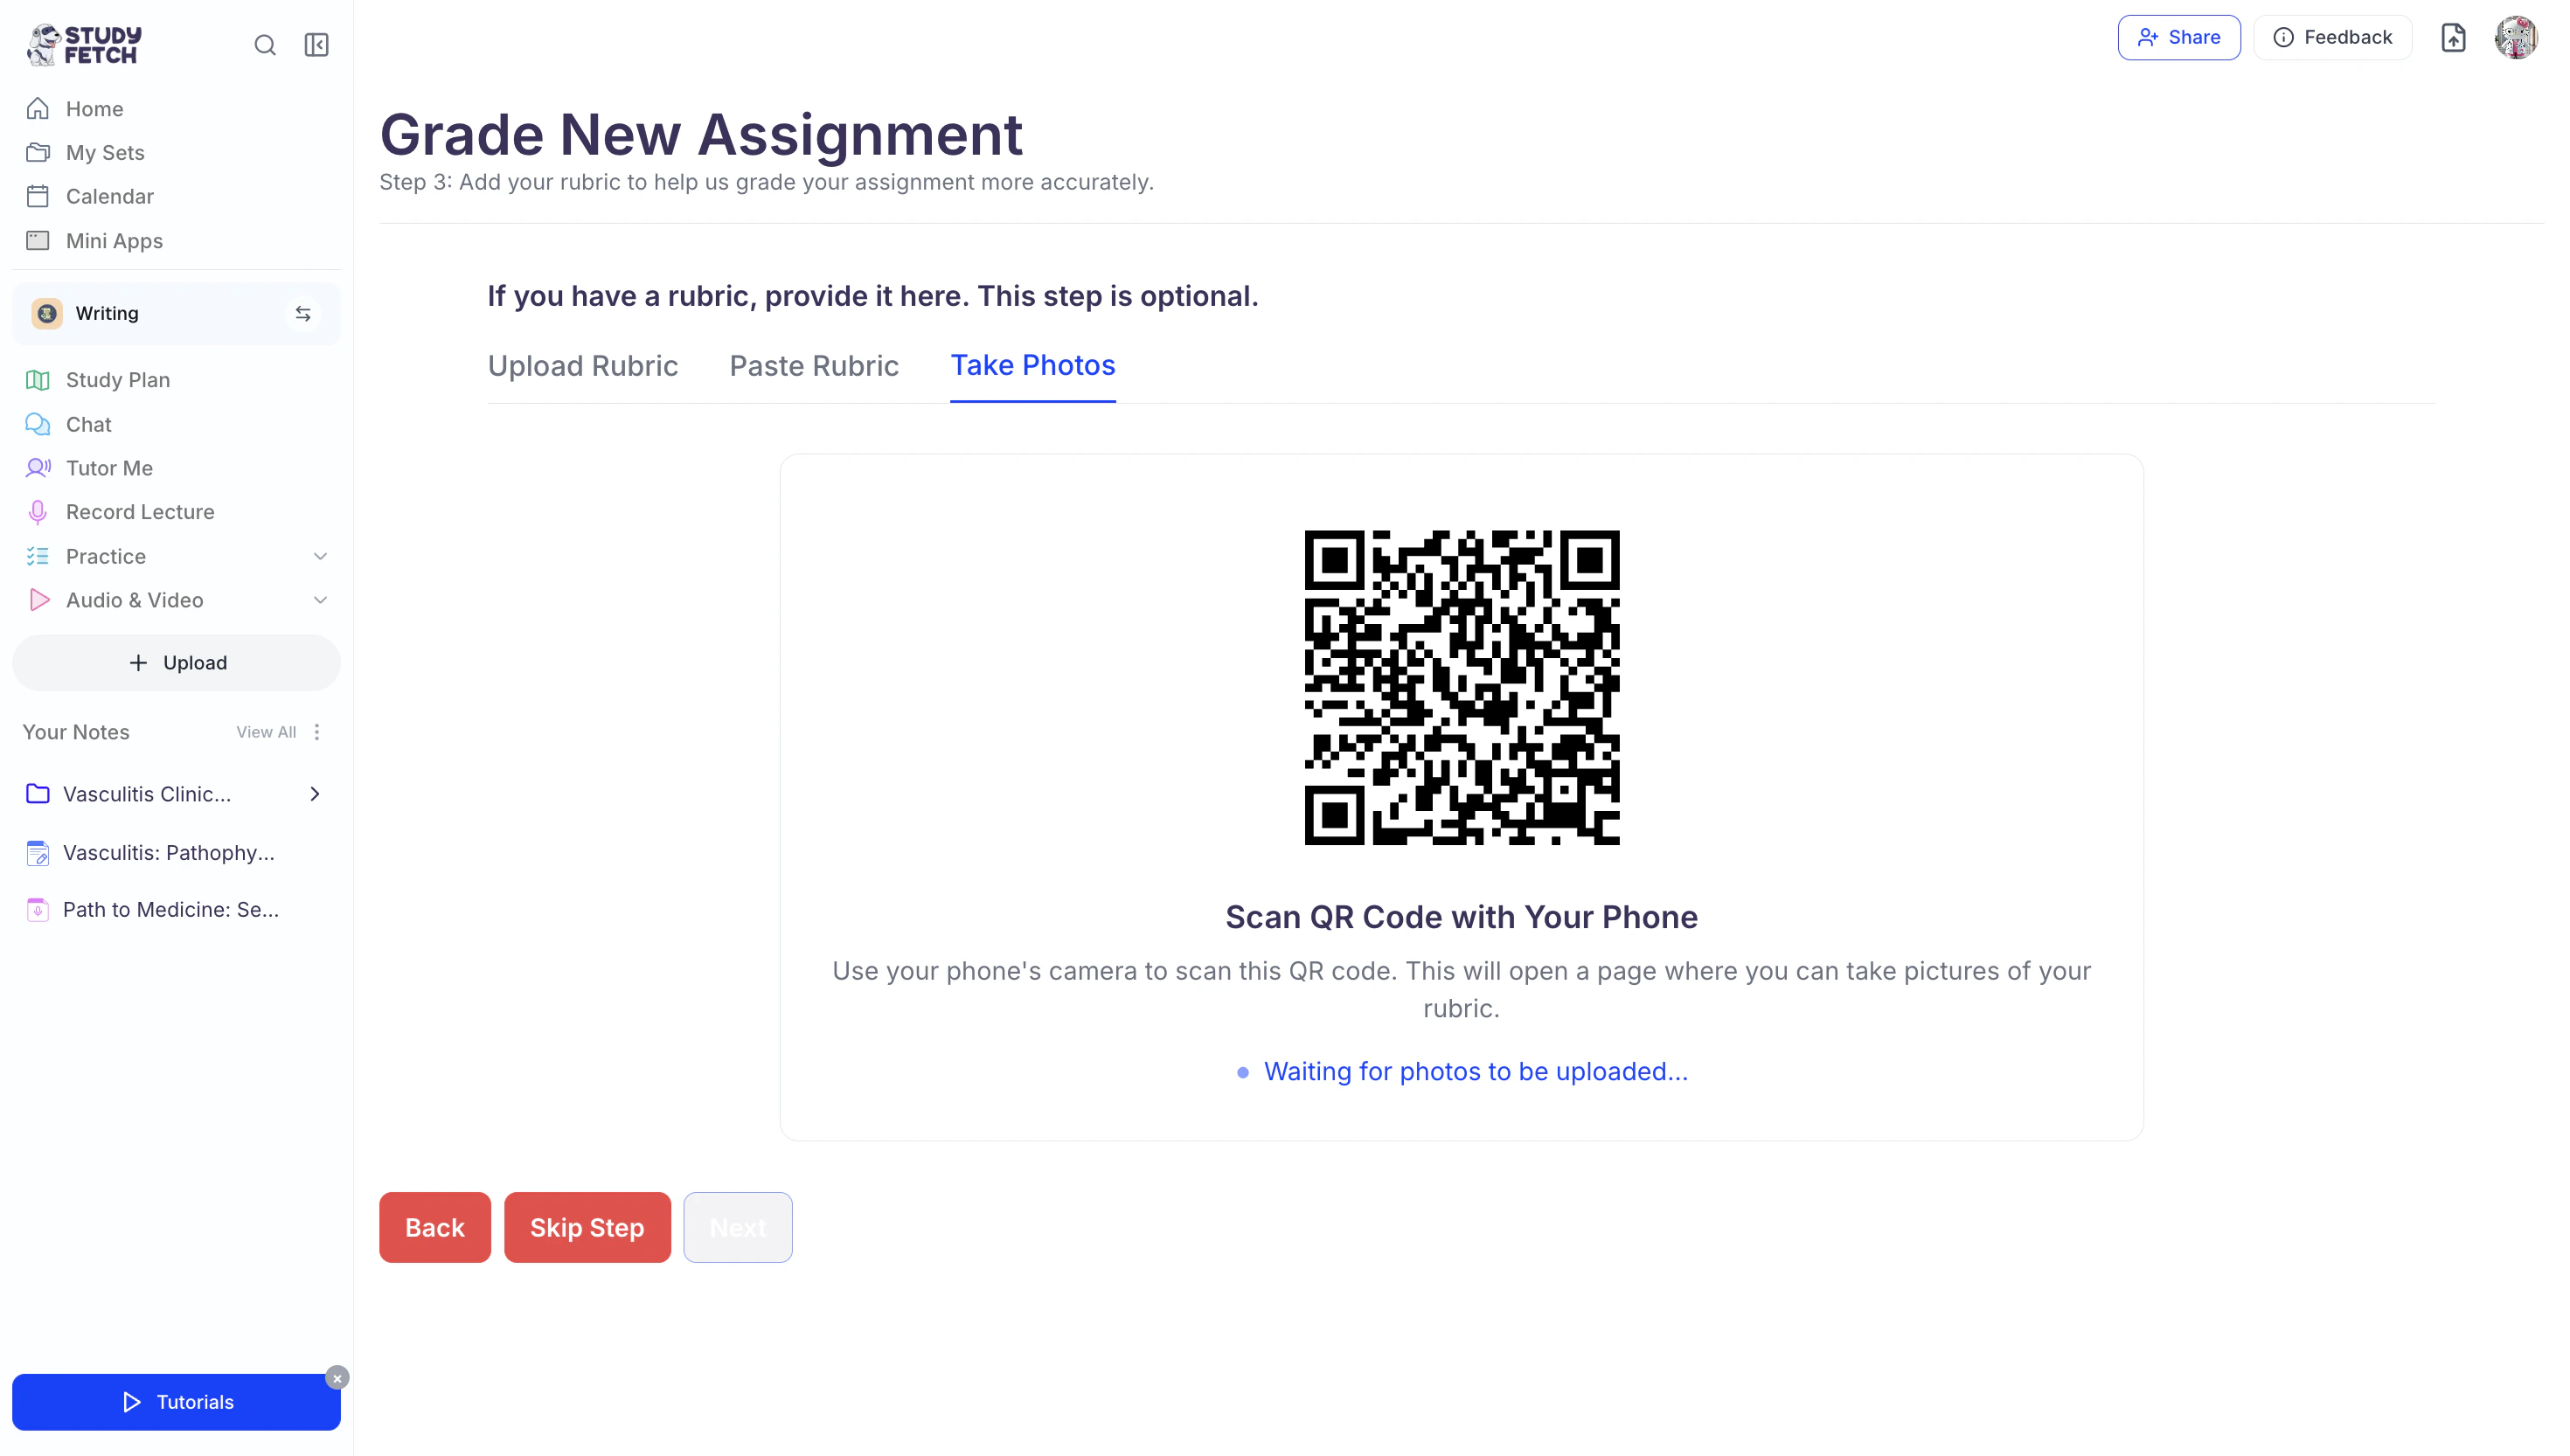
- Add your rubric by choosing one of the following options:
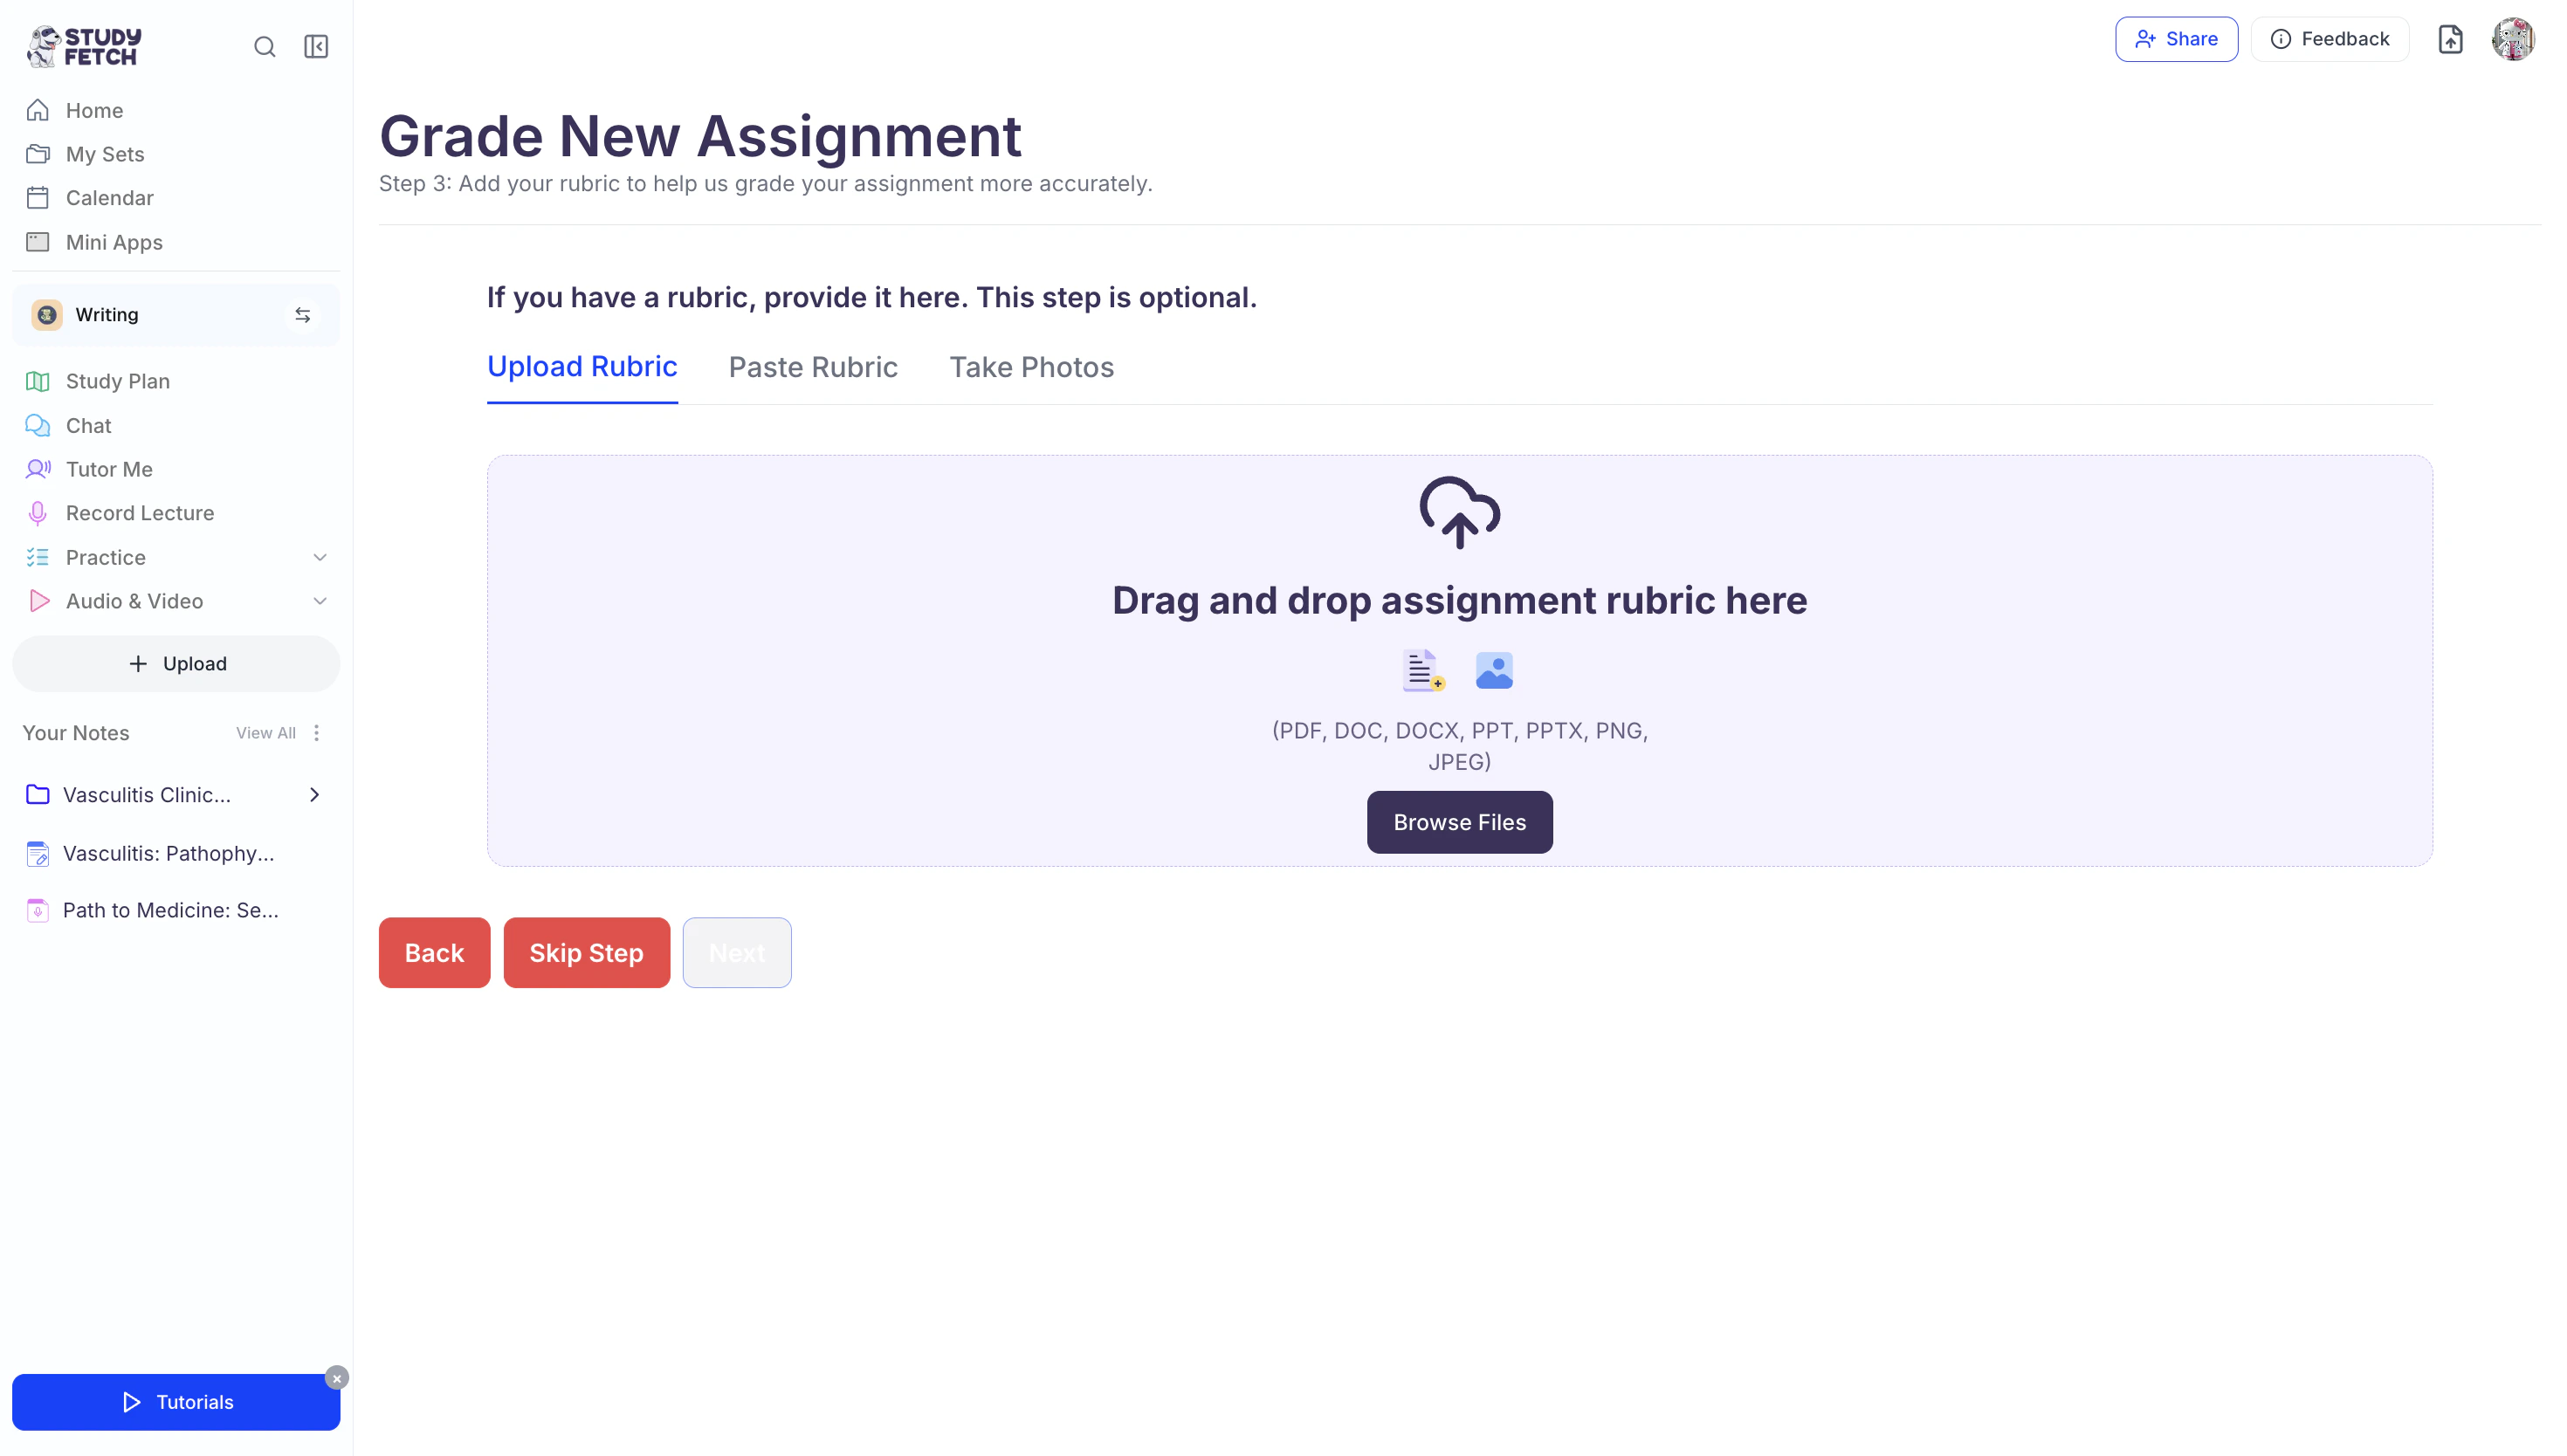
- Select Upload Files to upload any rubric file (PDF, DOC, DOCX, PPT, PPTX, PNG, or JPEG) or document from your computer.
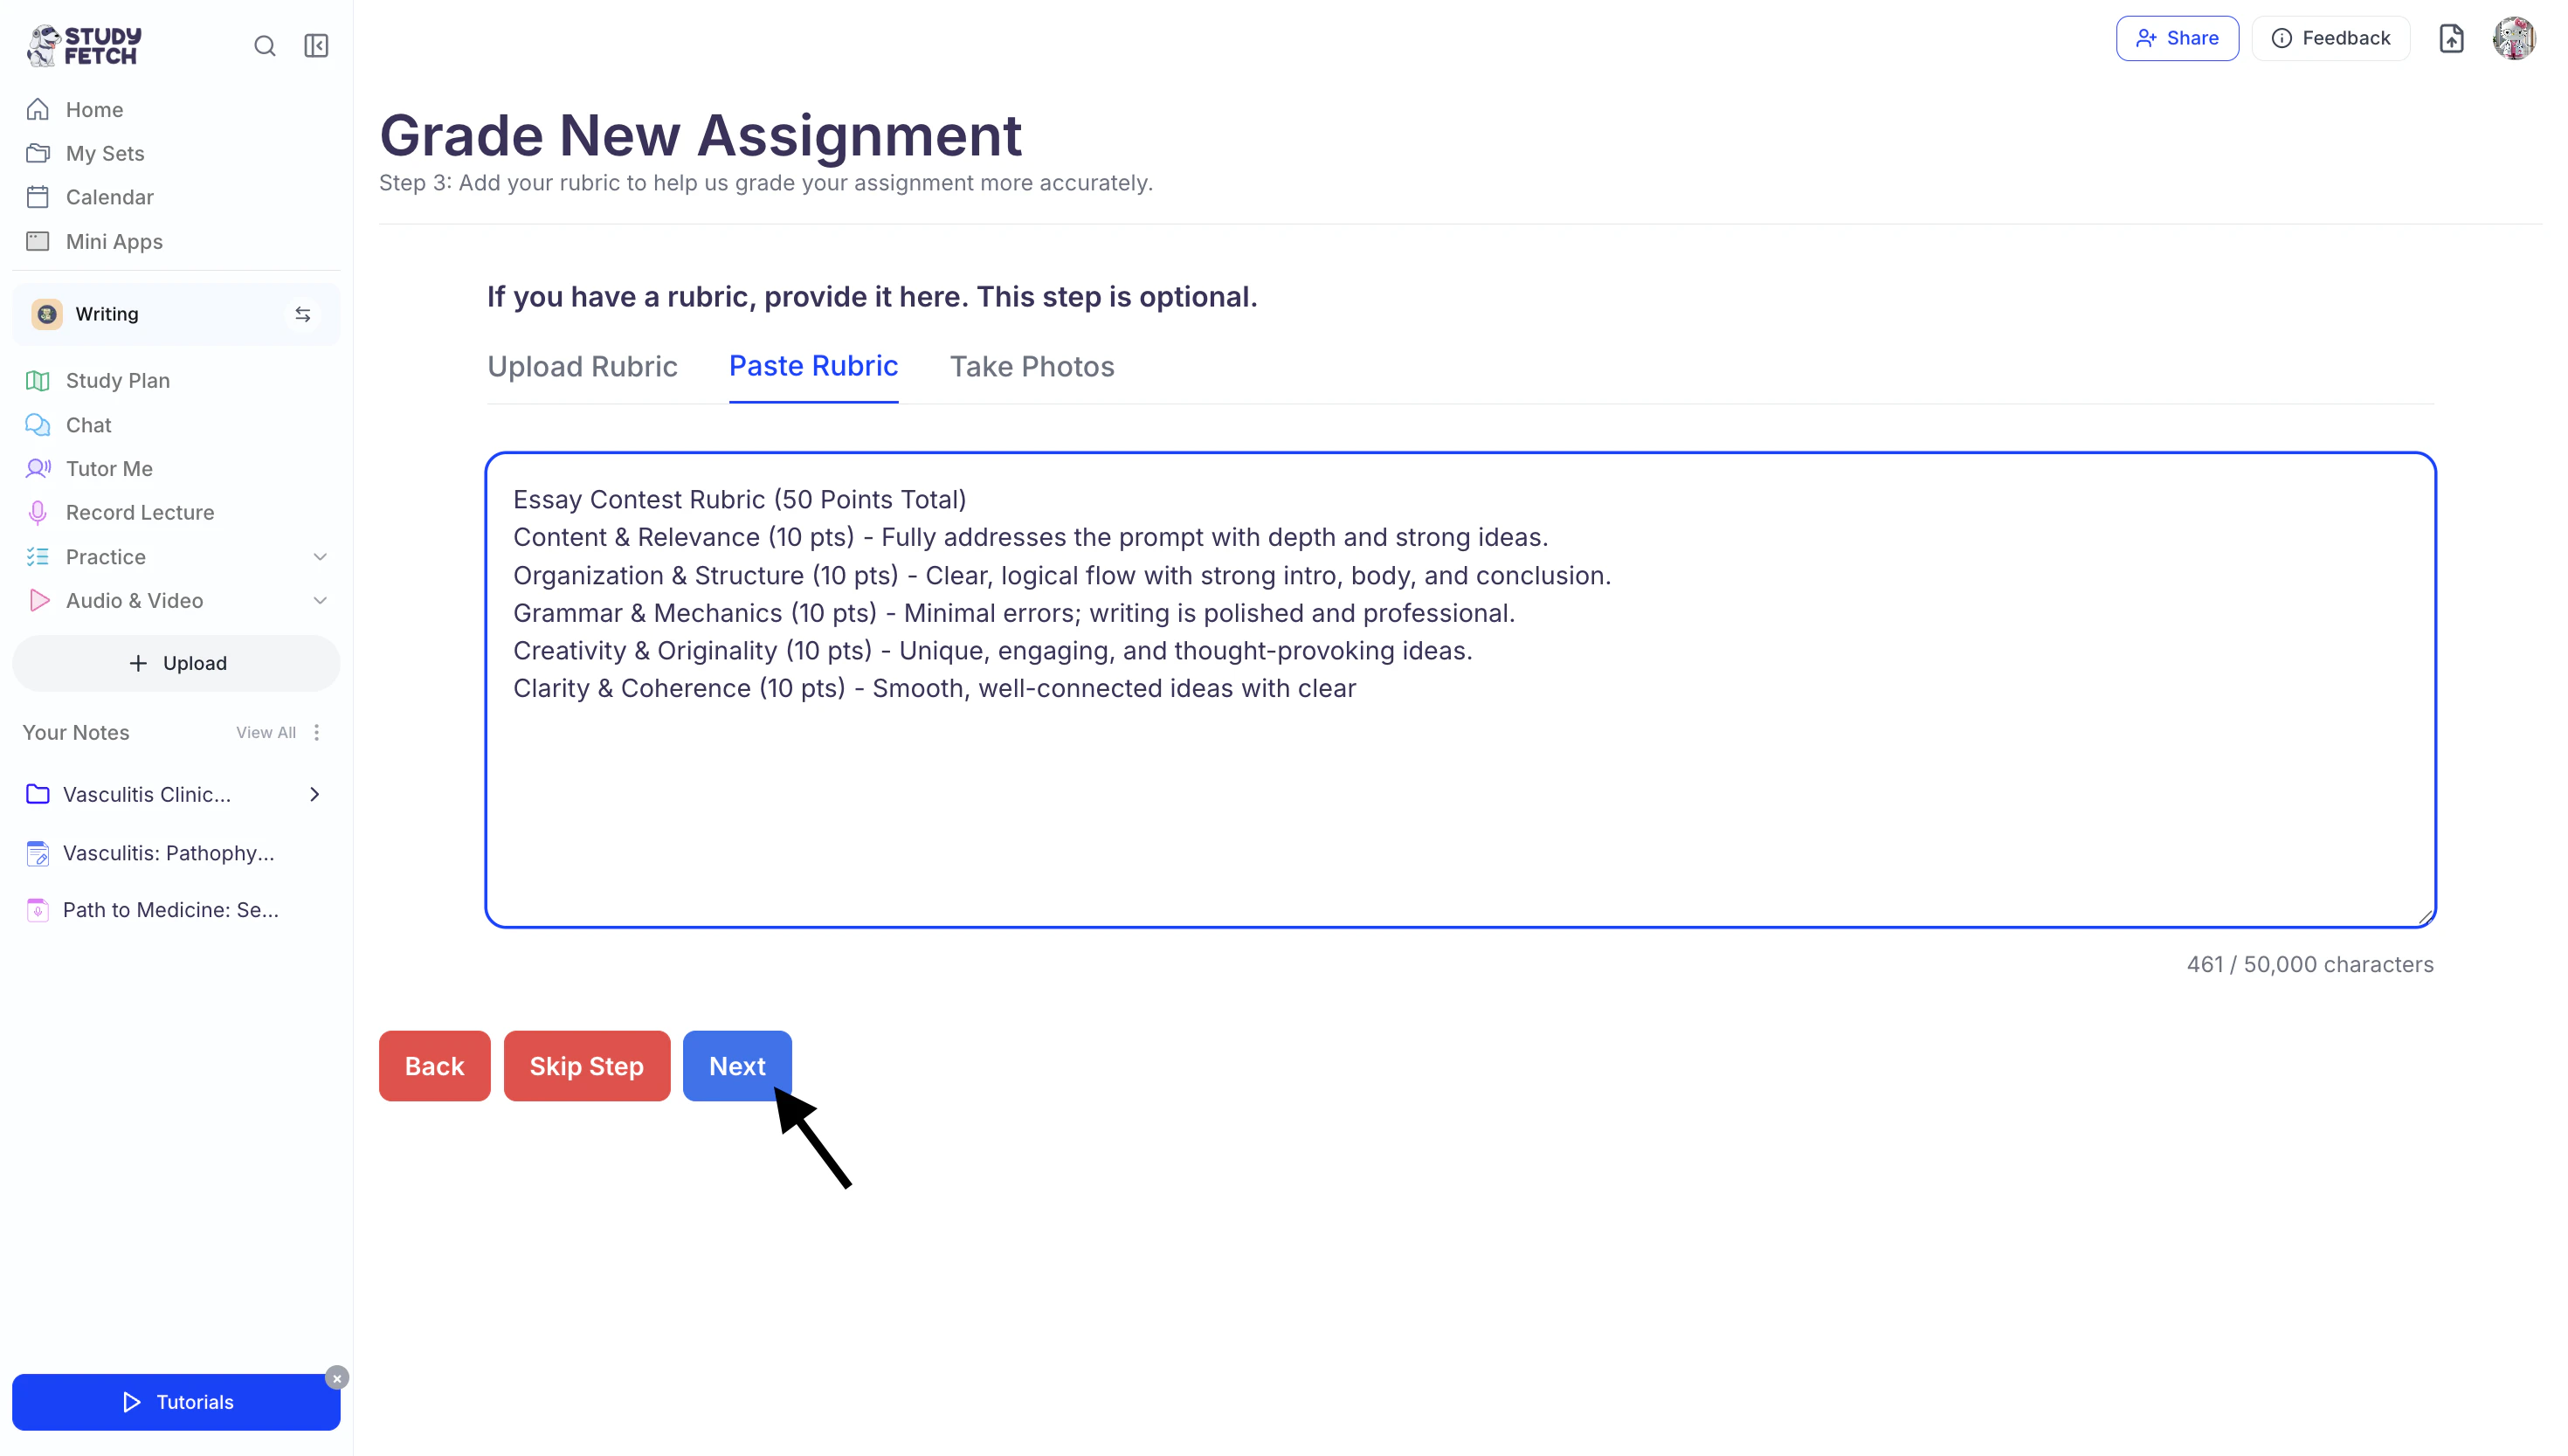
- Or, select Paste Rubric to write or paste your rubric in the text editor that says Paste in your rubric content here…
- Or, select Take Photos to scan the QR code and take pictures of your rubric using your mobile device.
- Select Upload Files to upload any rubric file (PDF, DOC, DOCX, PPT, PPTX, PNG, or JPEG) or document from your computer.
- Once you’ve added your rubric, click Next and proceed to Step 3: Review Assignment Details and Submit .
- If you do not have a rubric to upload, choose No, skip this step to let AI determine the grading.
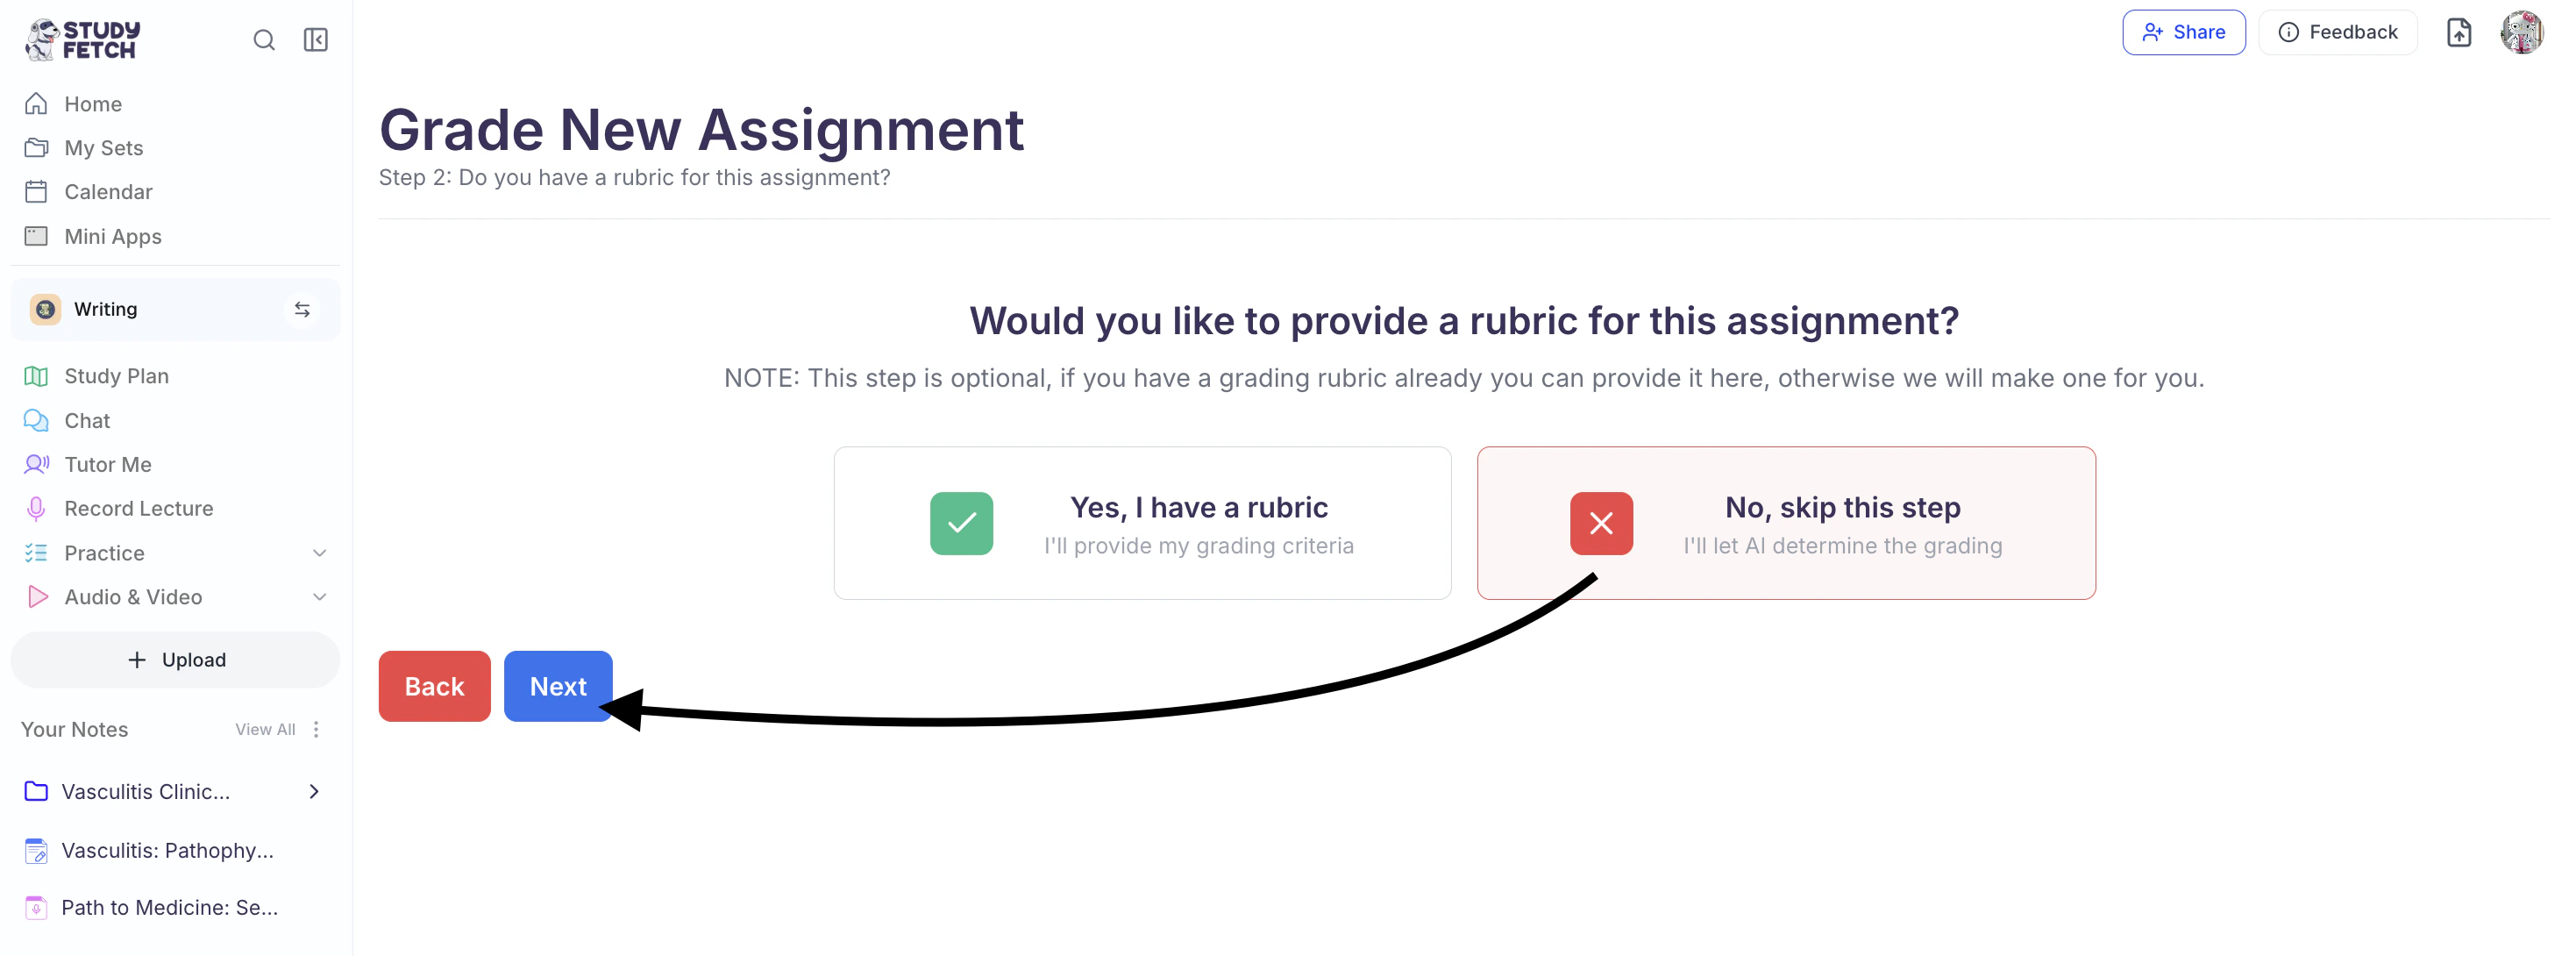
- Then click Next and proceed to Step 3: Review Assignment Details and Submit .
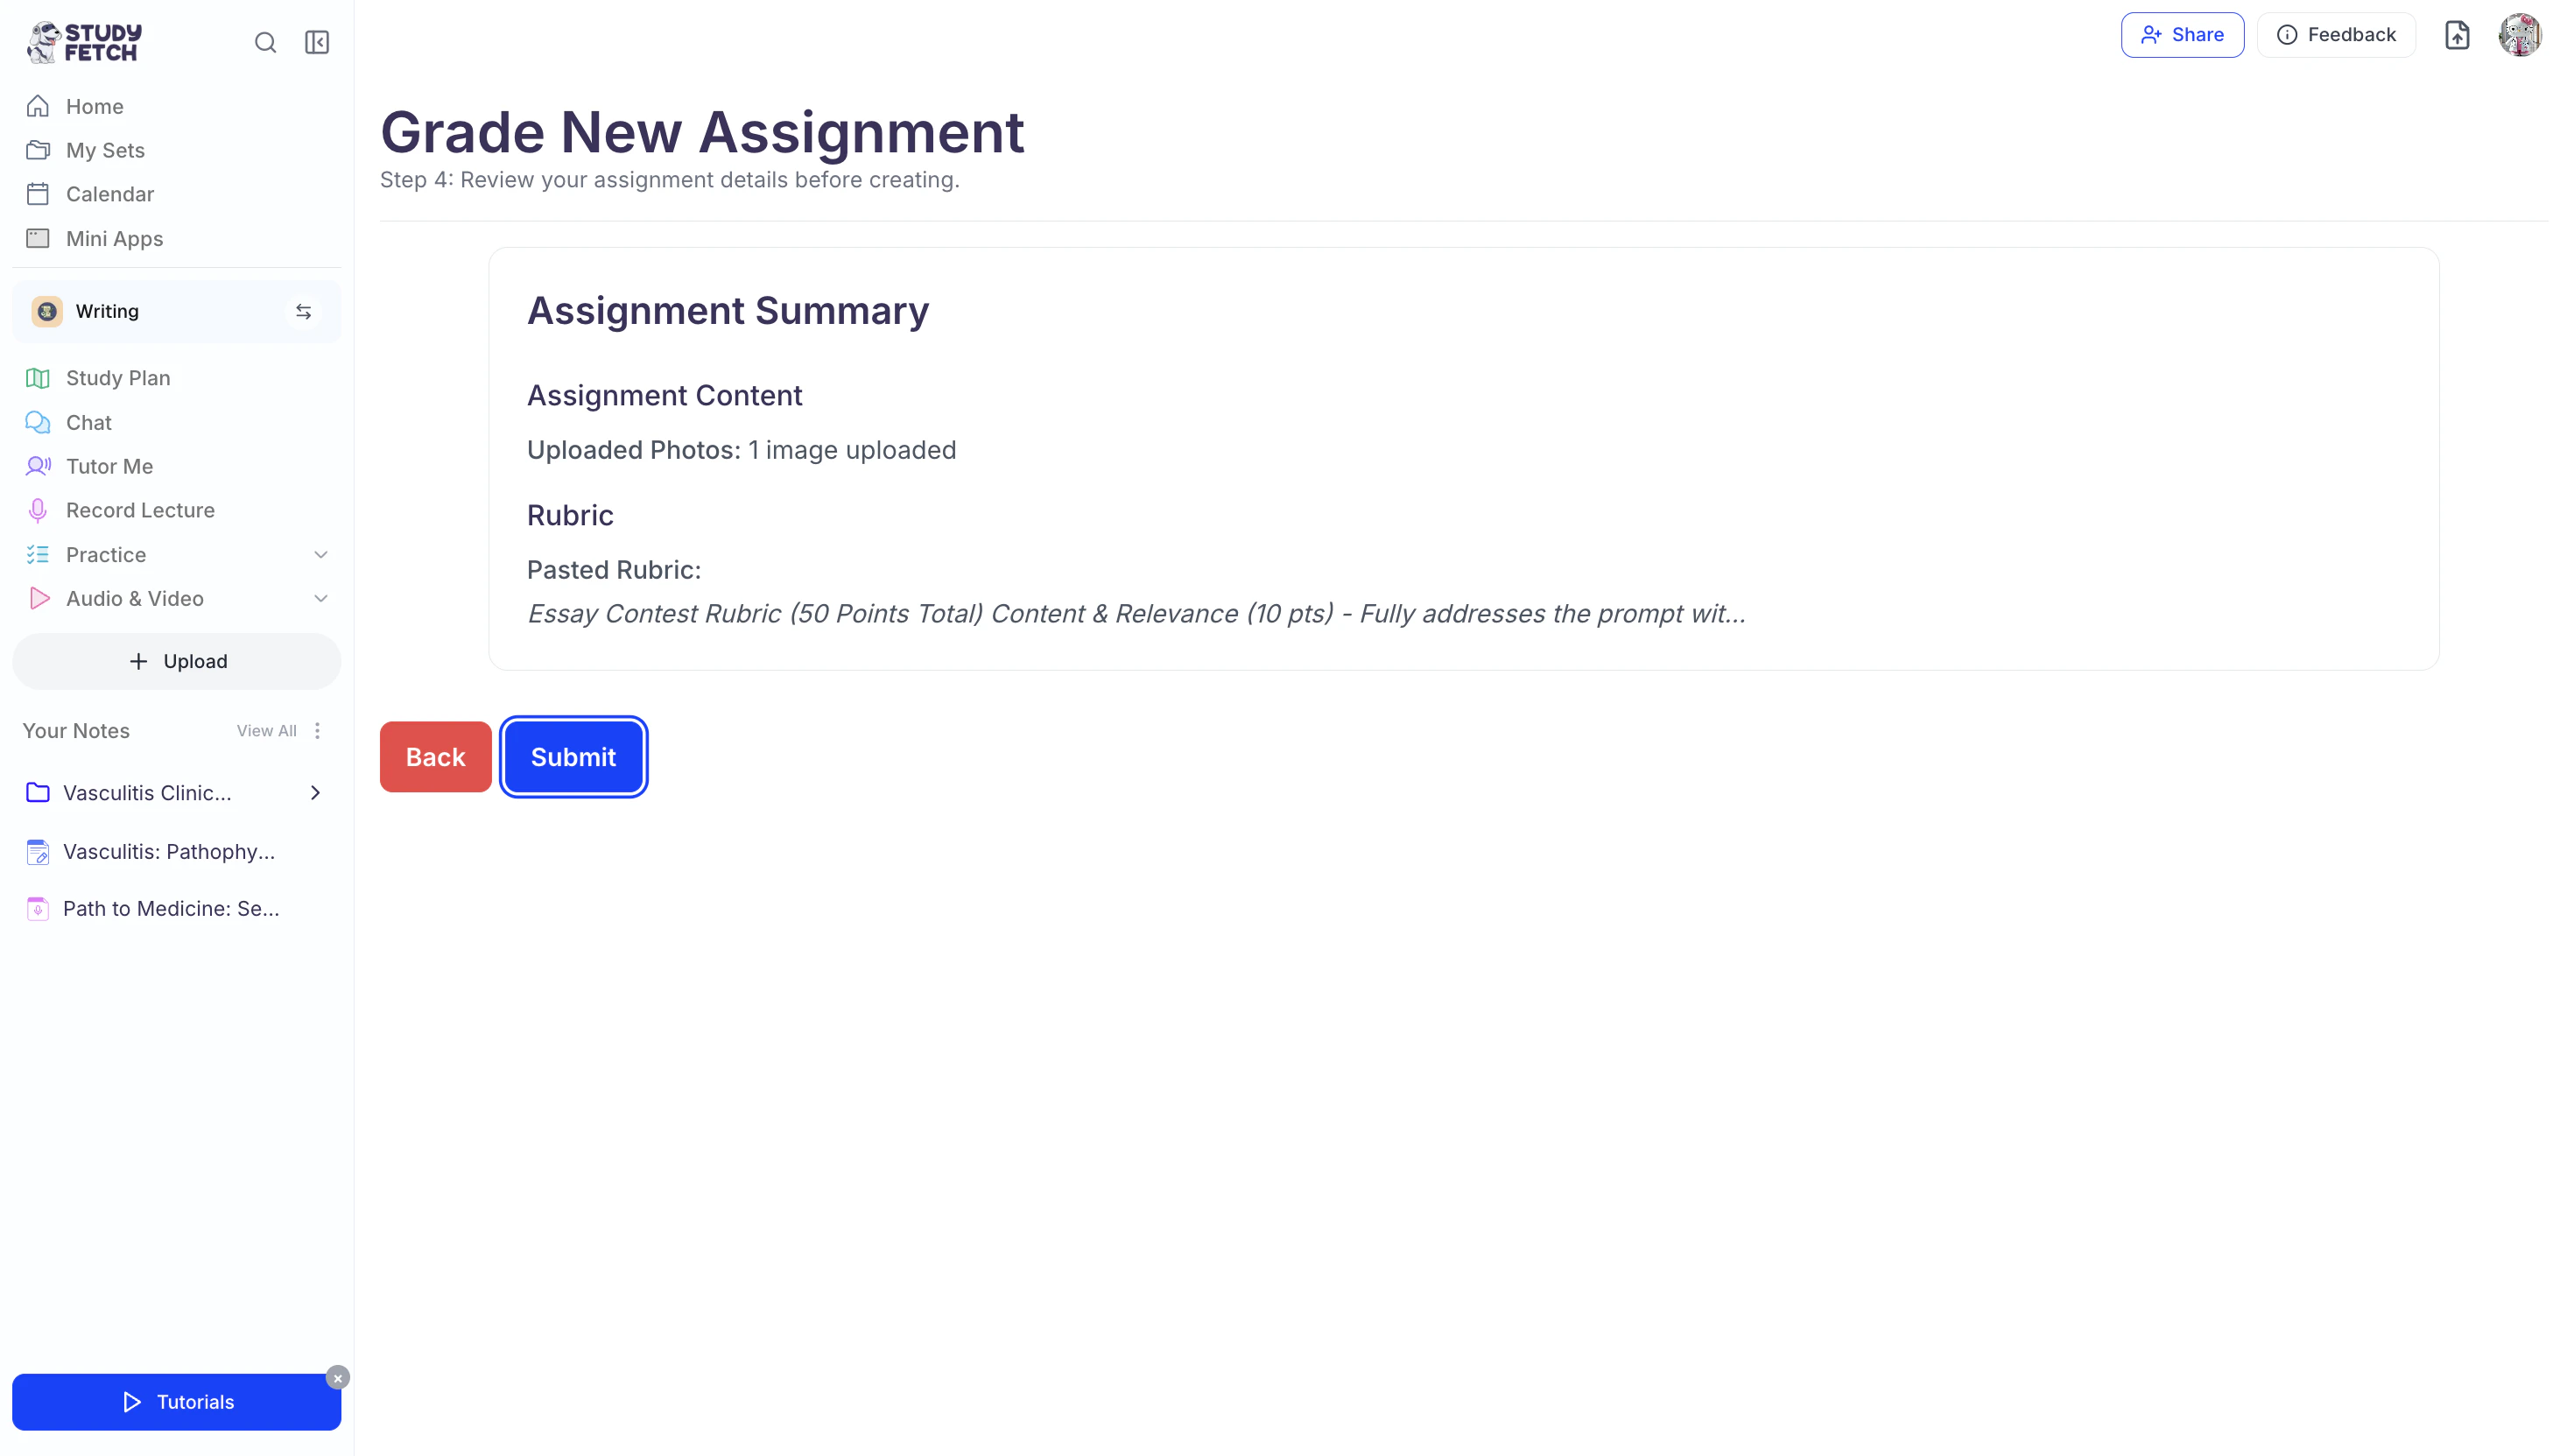
Step 3: Review Assignment Details and Submit
- Review your assignment details, including the assignment content and rubric. Once everything is correct, click Submit.
- Spark.E will start analyzing your work and provide your full grade breakdown along with detailed feedback and suggestions for improvement!
Accessing Your Performance
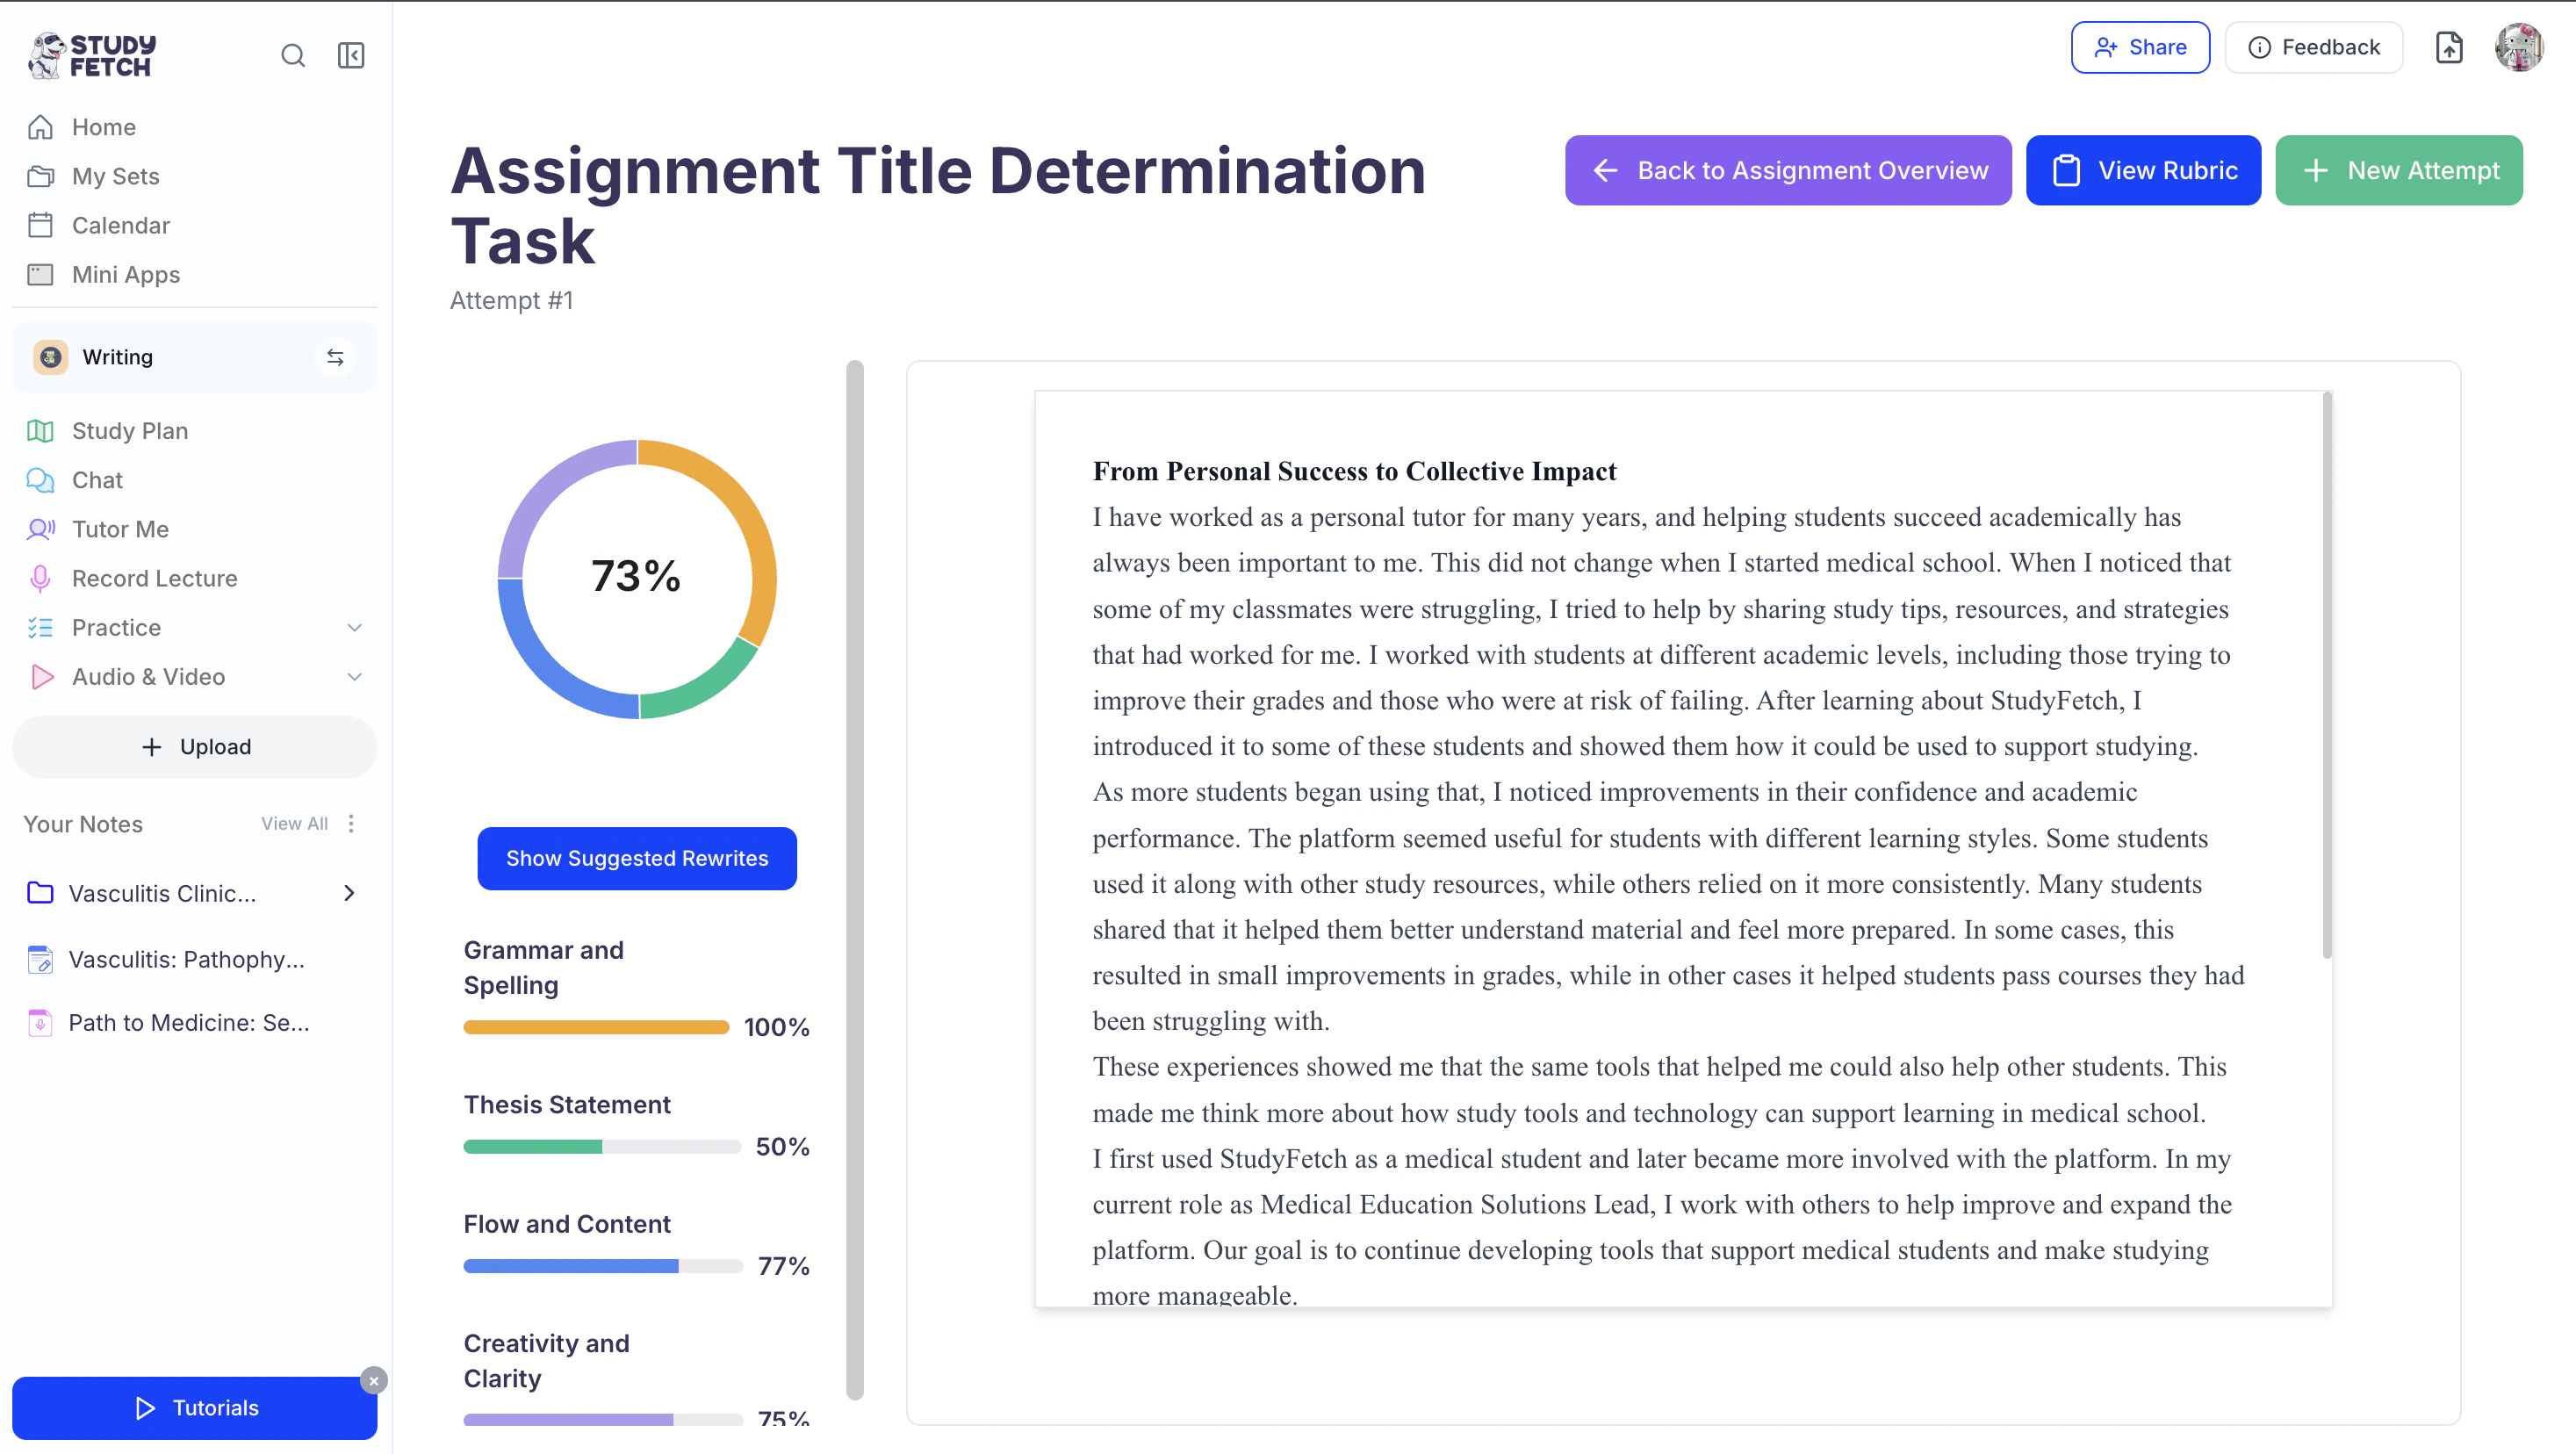
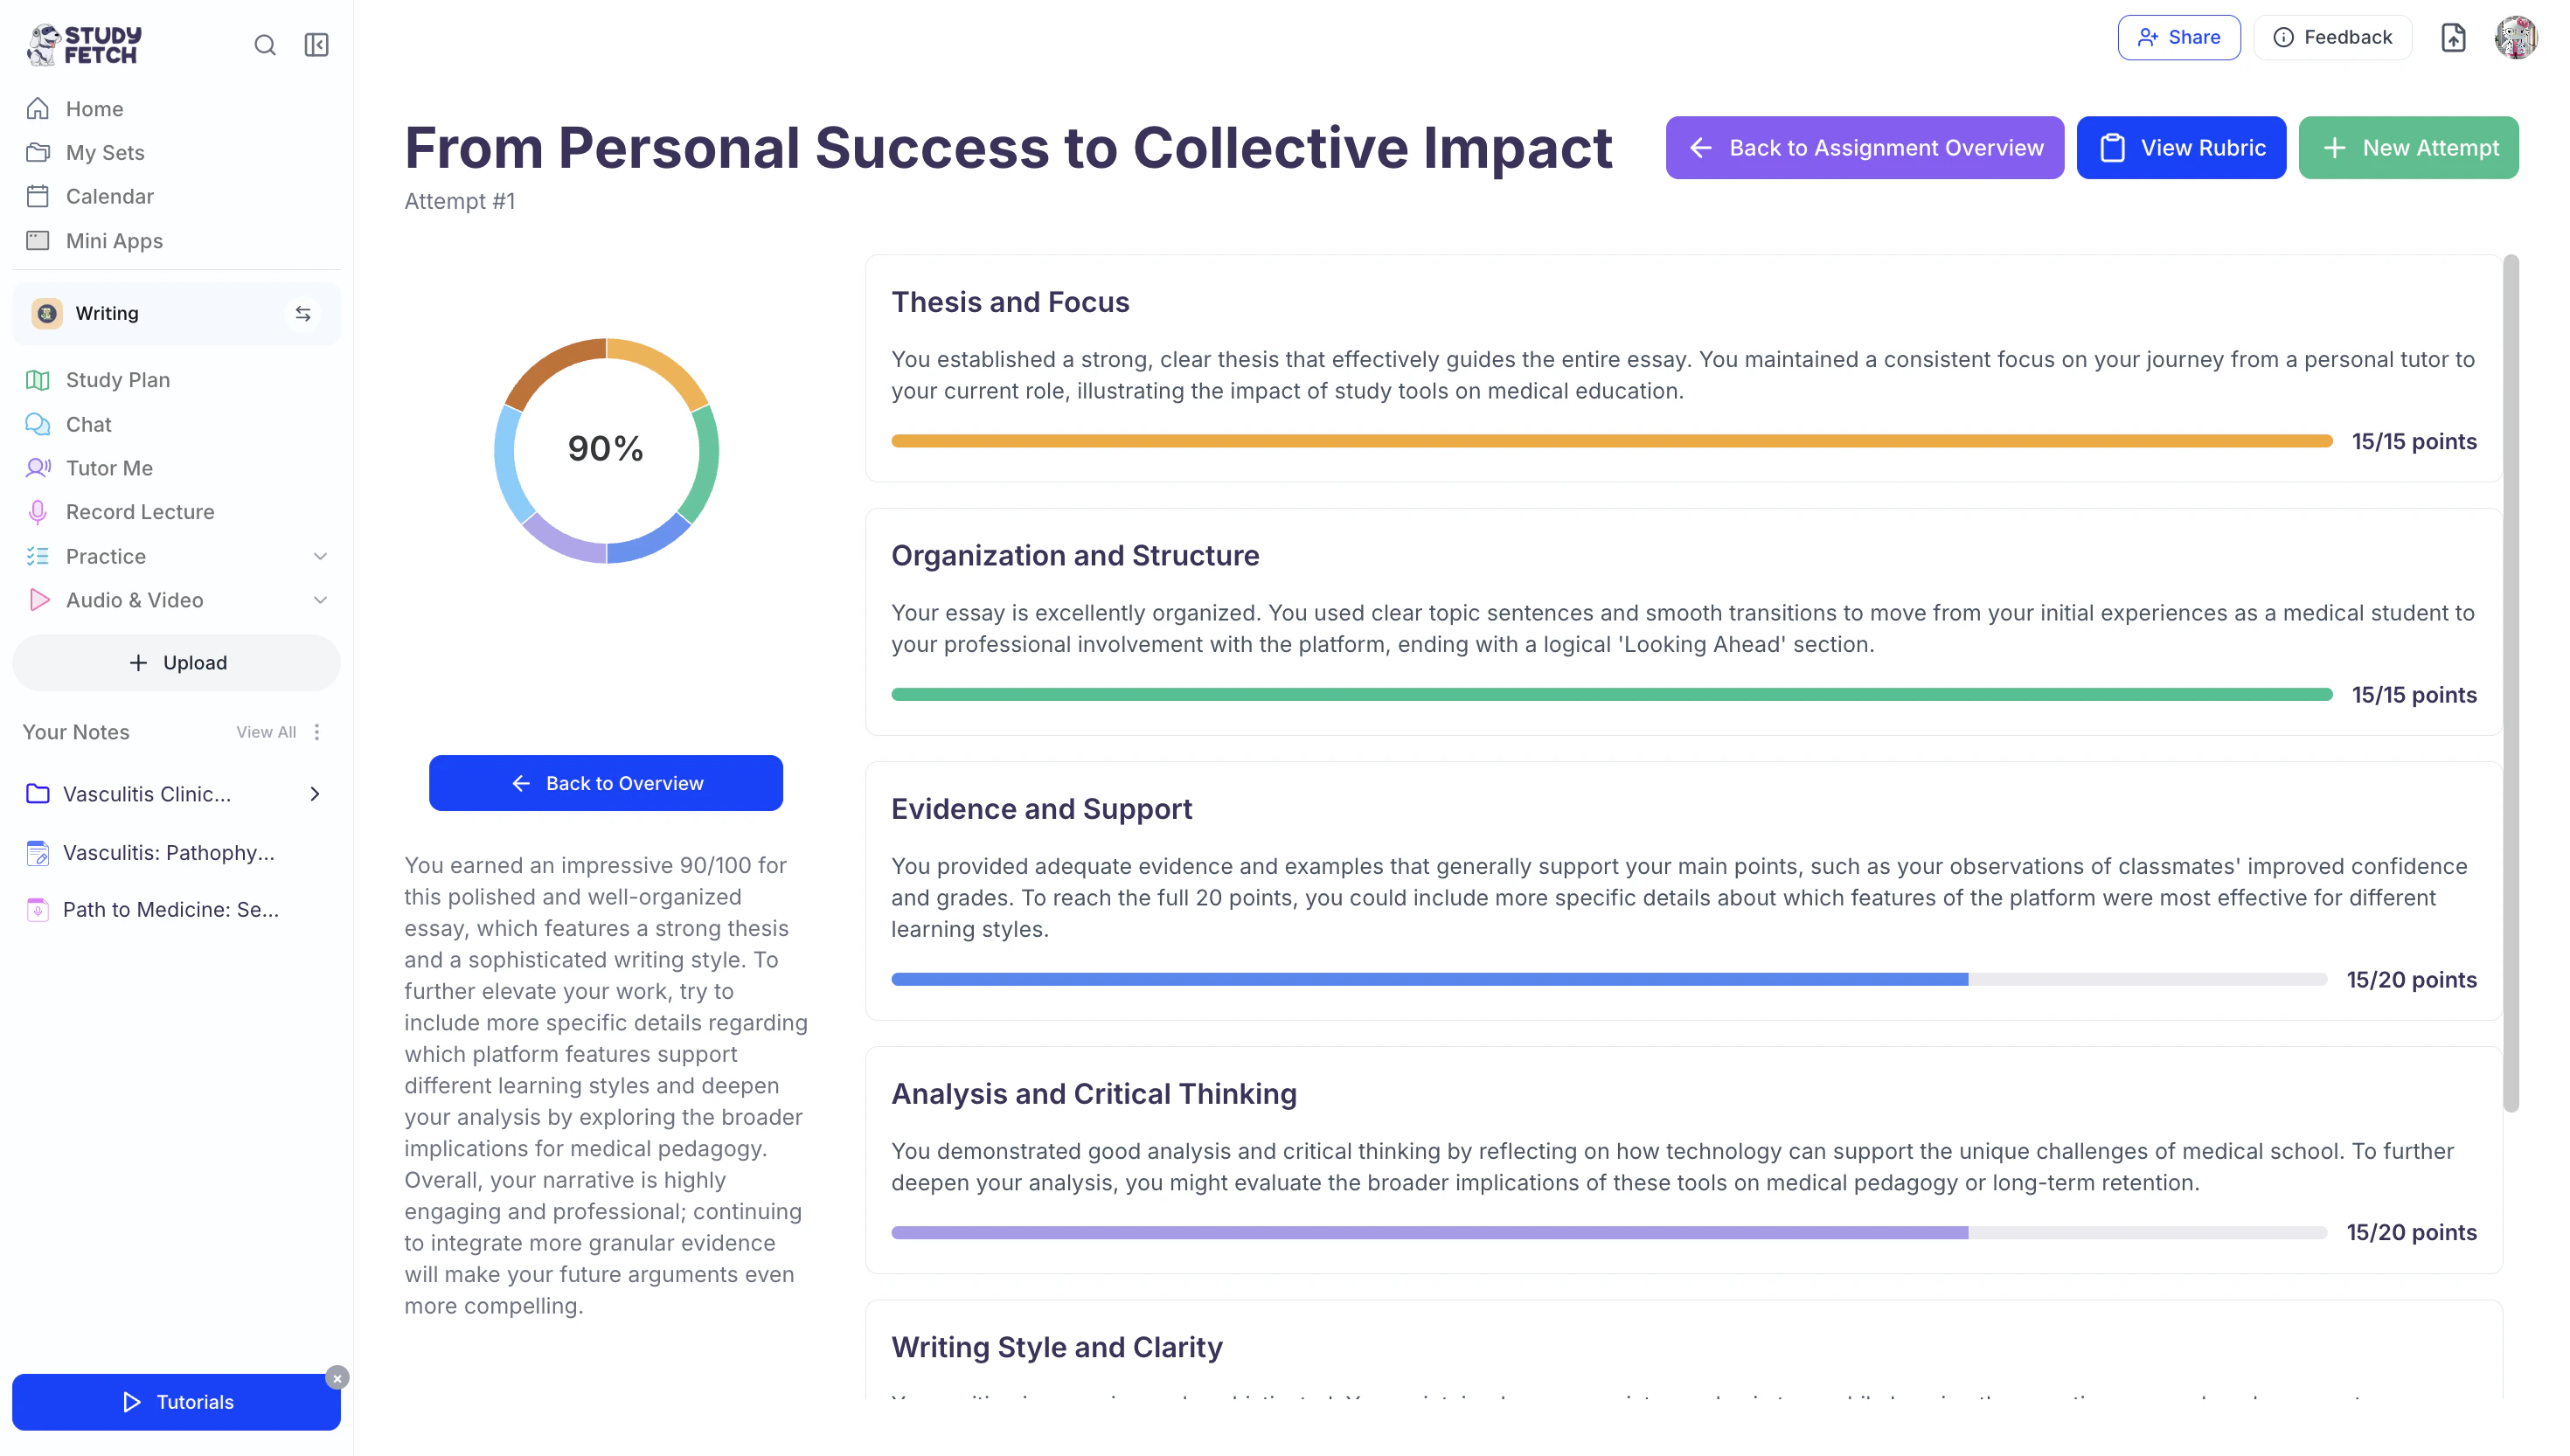
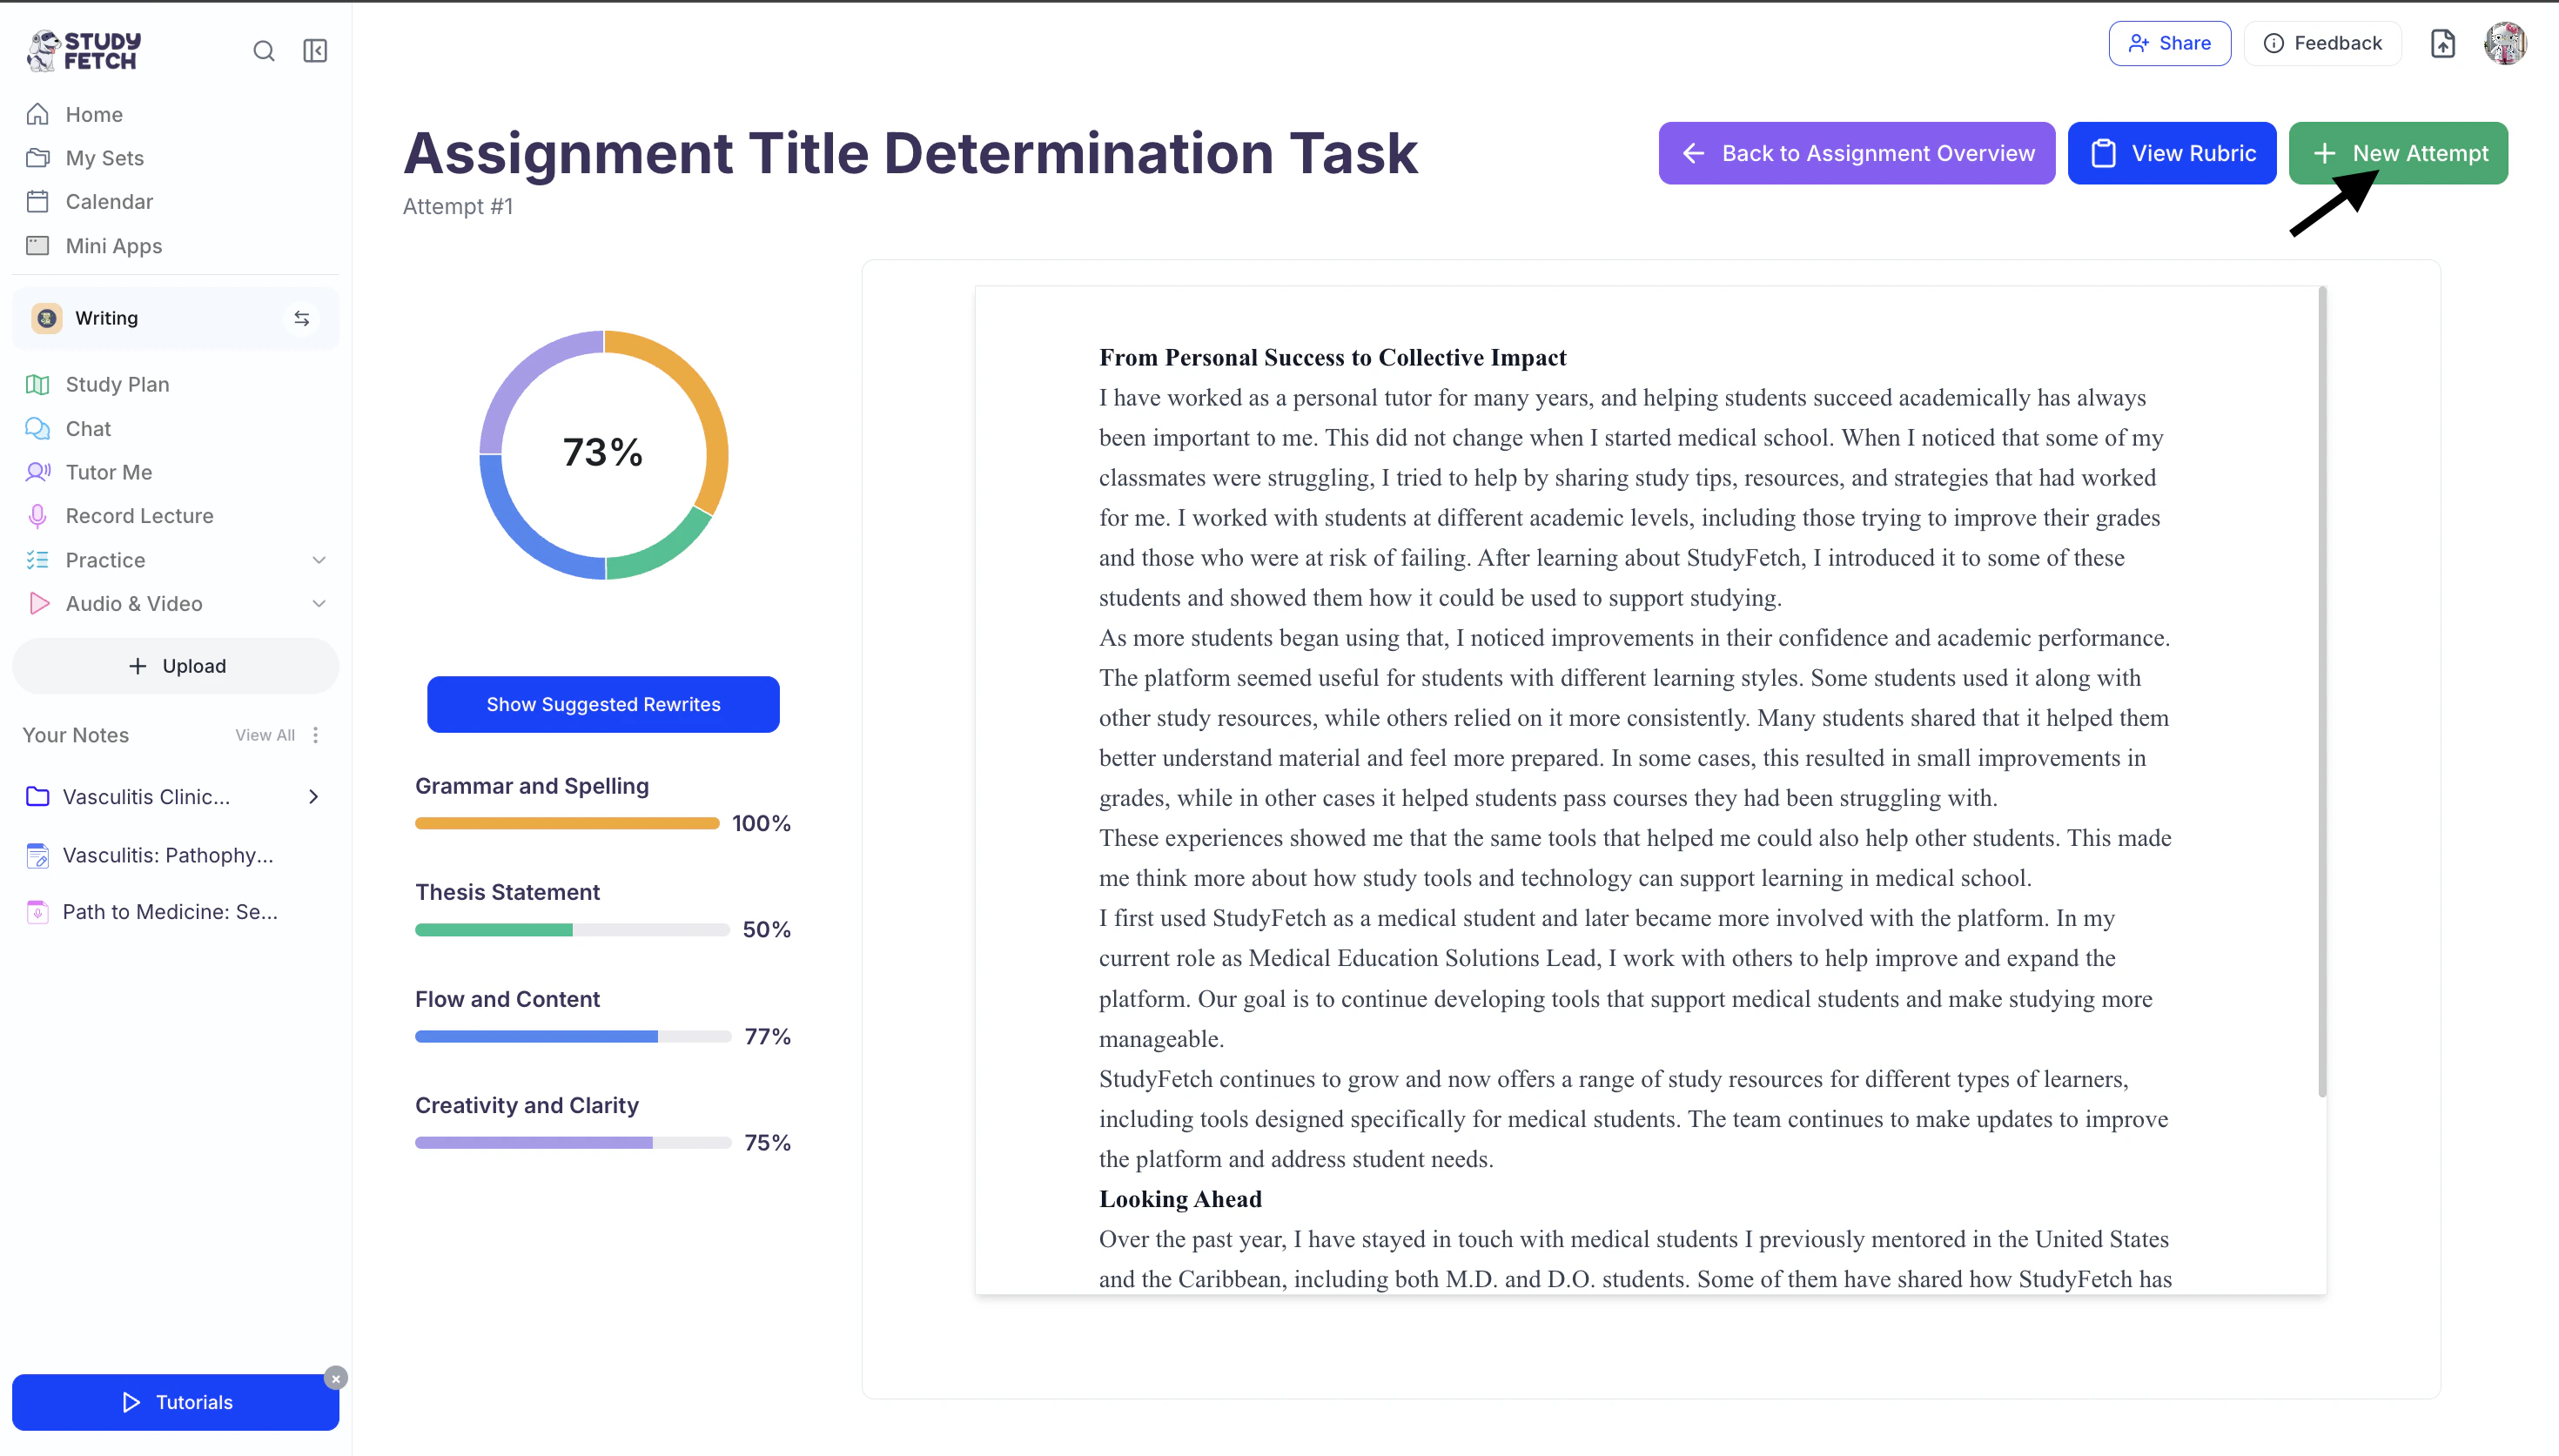
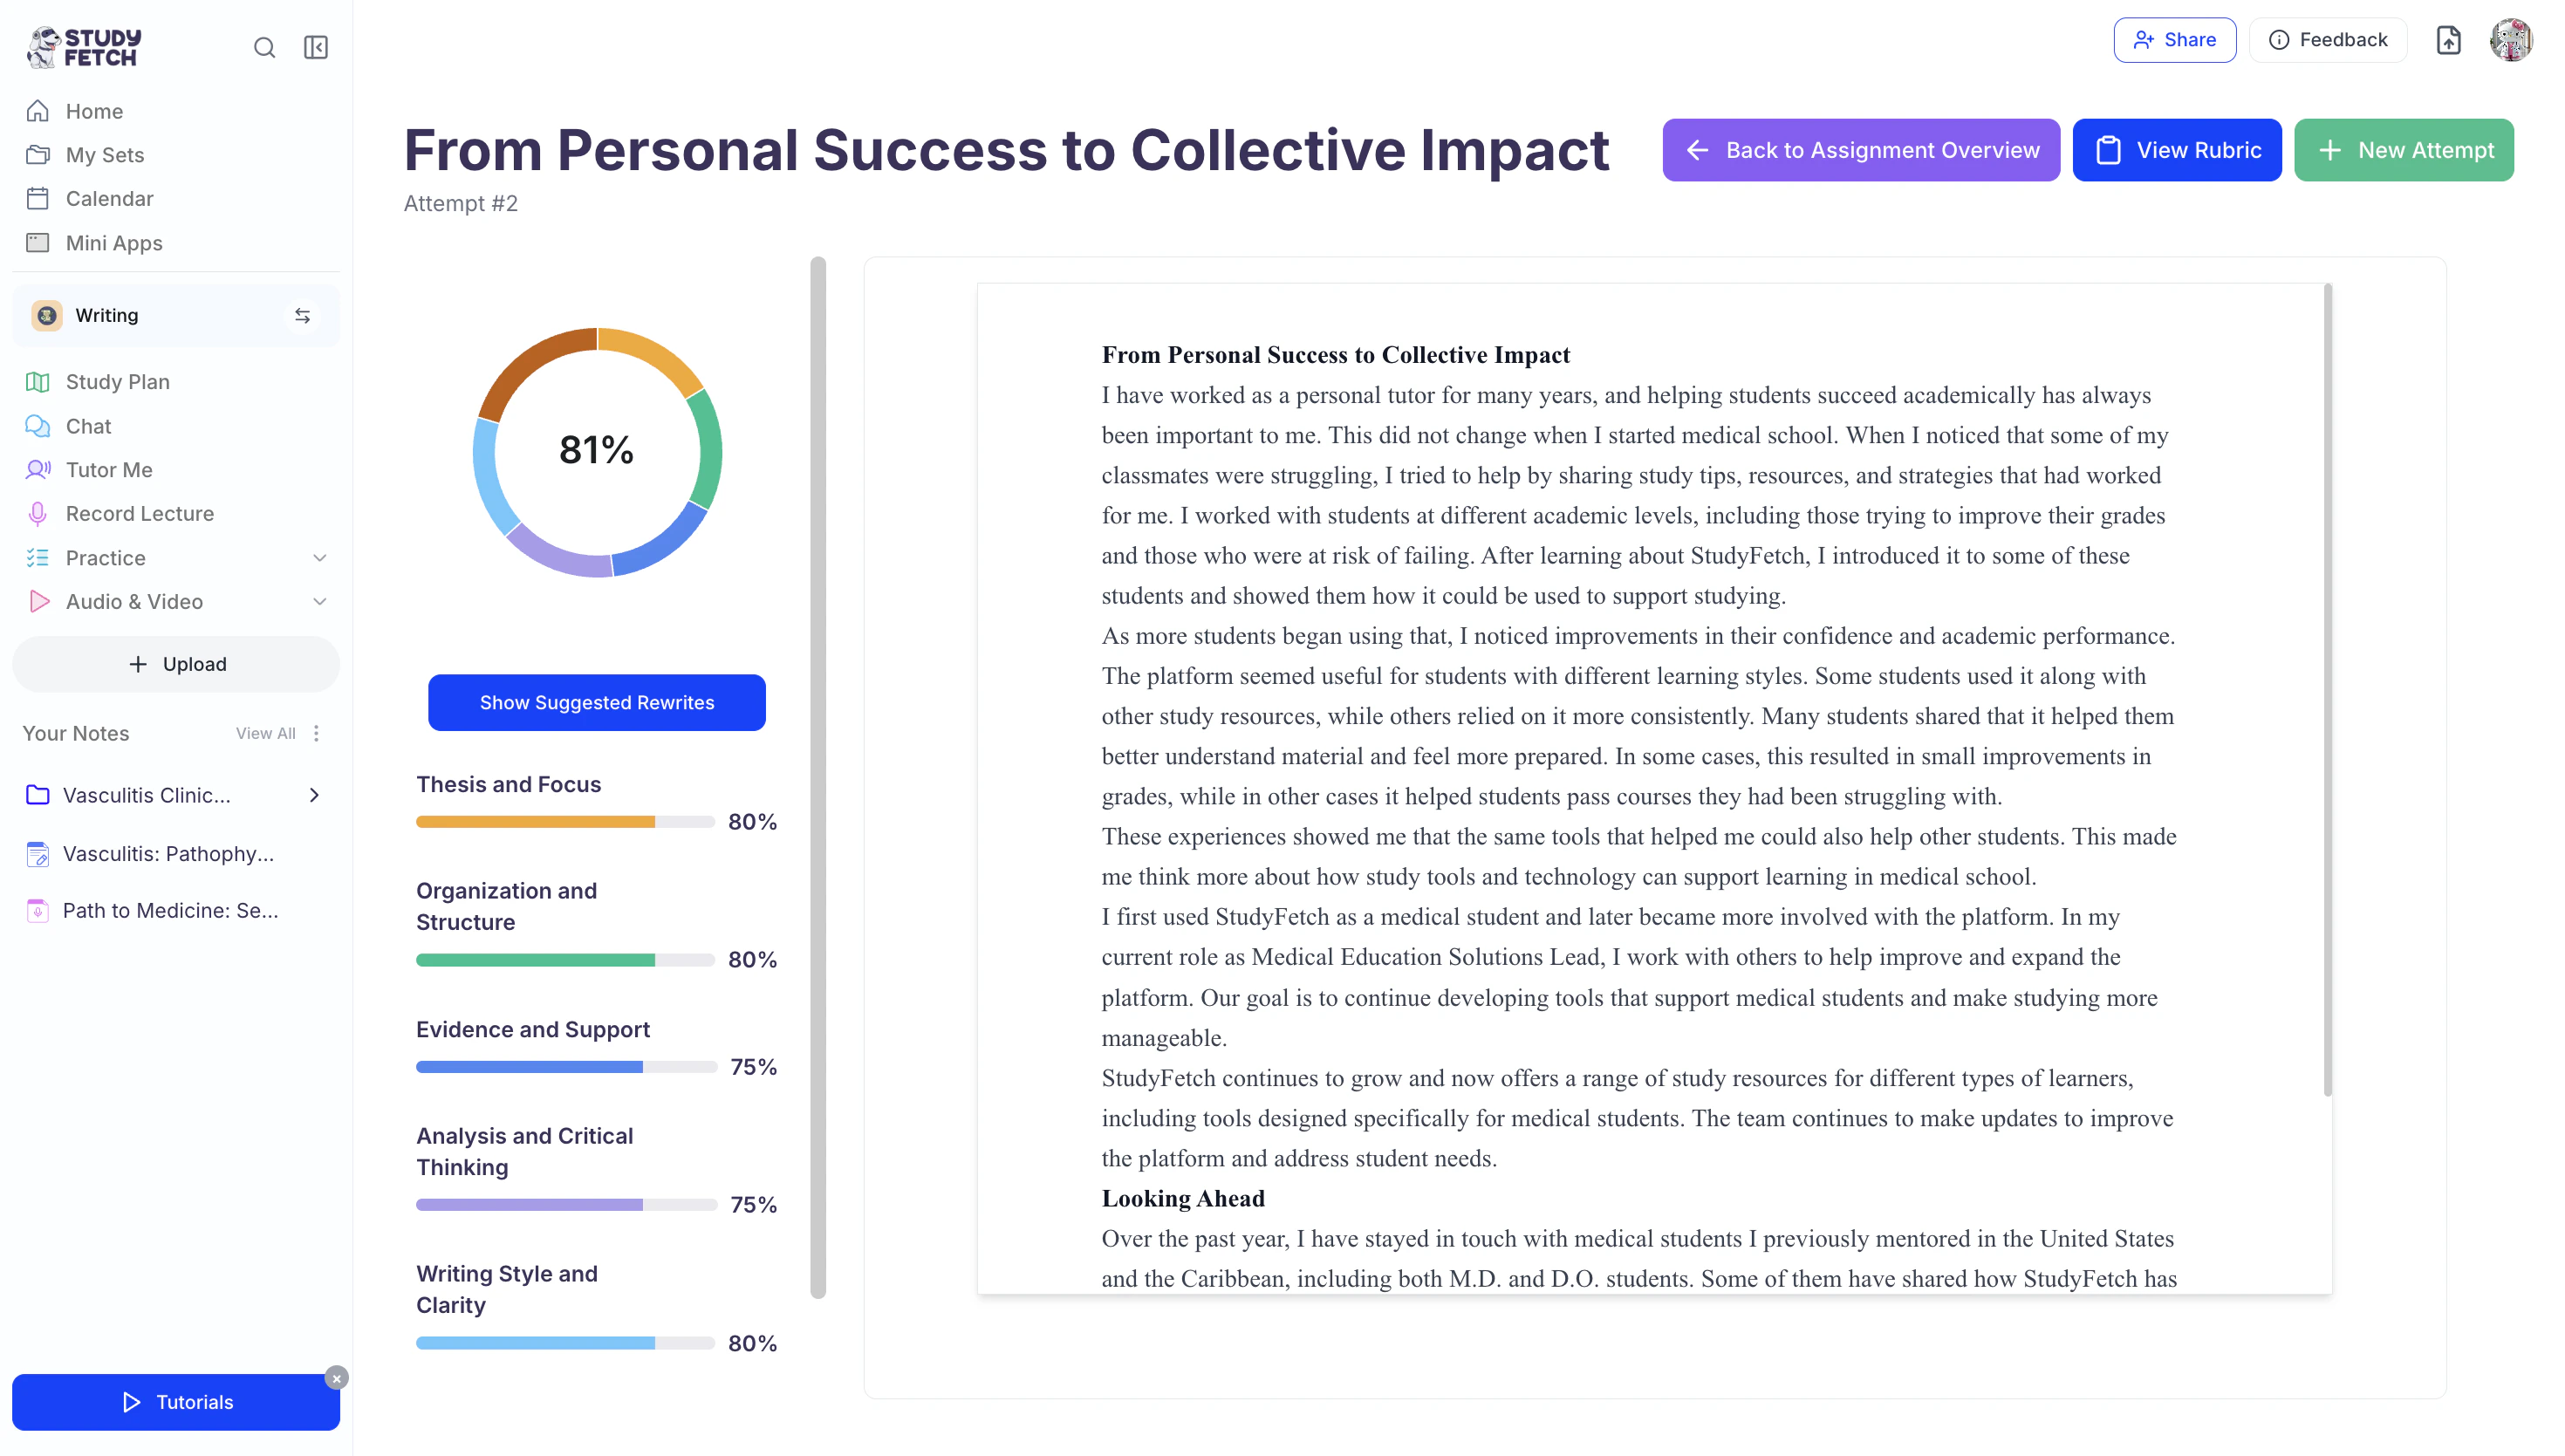
After your submission is complete, you’ll be taken to your results page where you can review your overall performance in detail. Here, you’ll see your final grade along with a full breakdown of how your work was evaluated against each rubric category.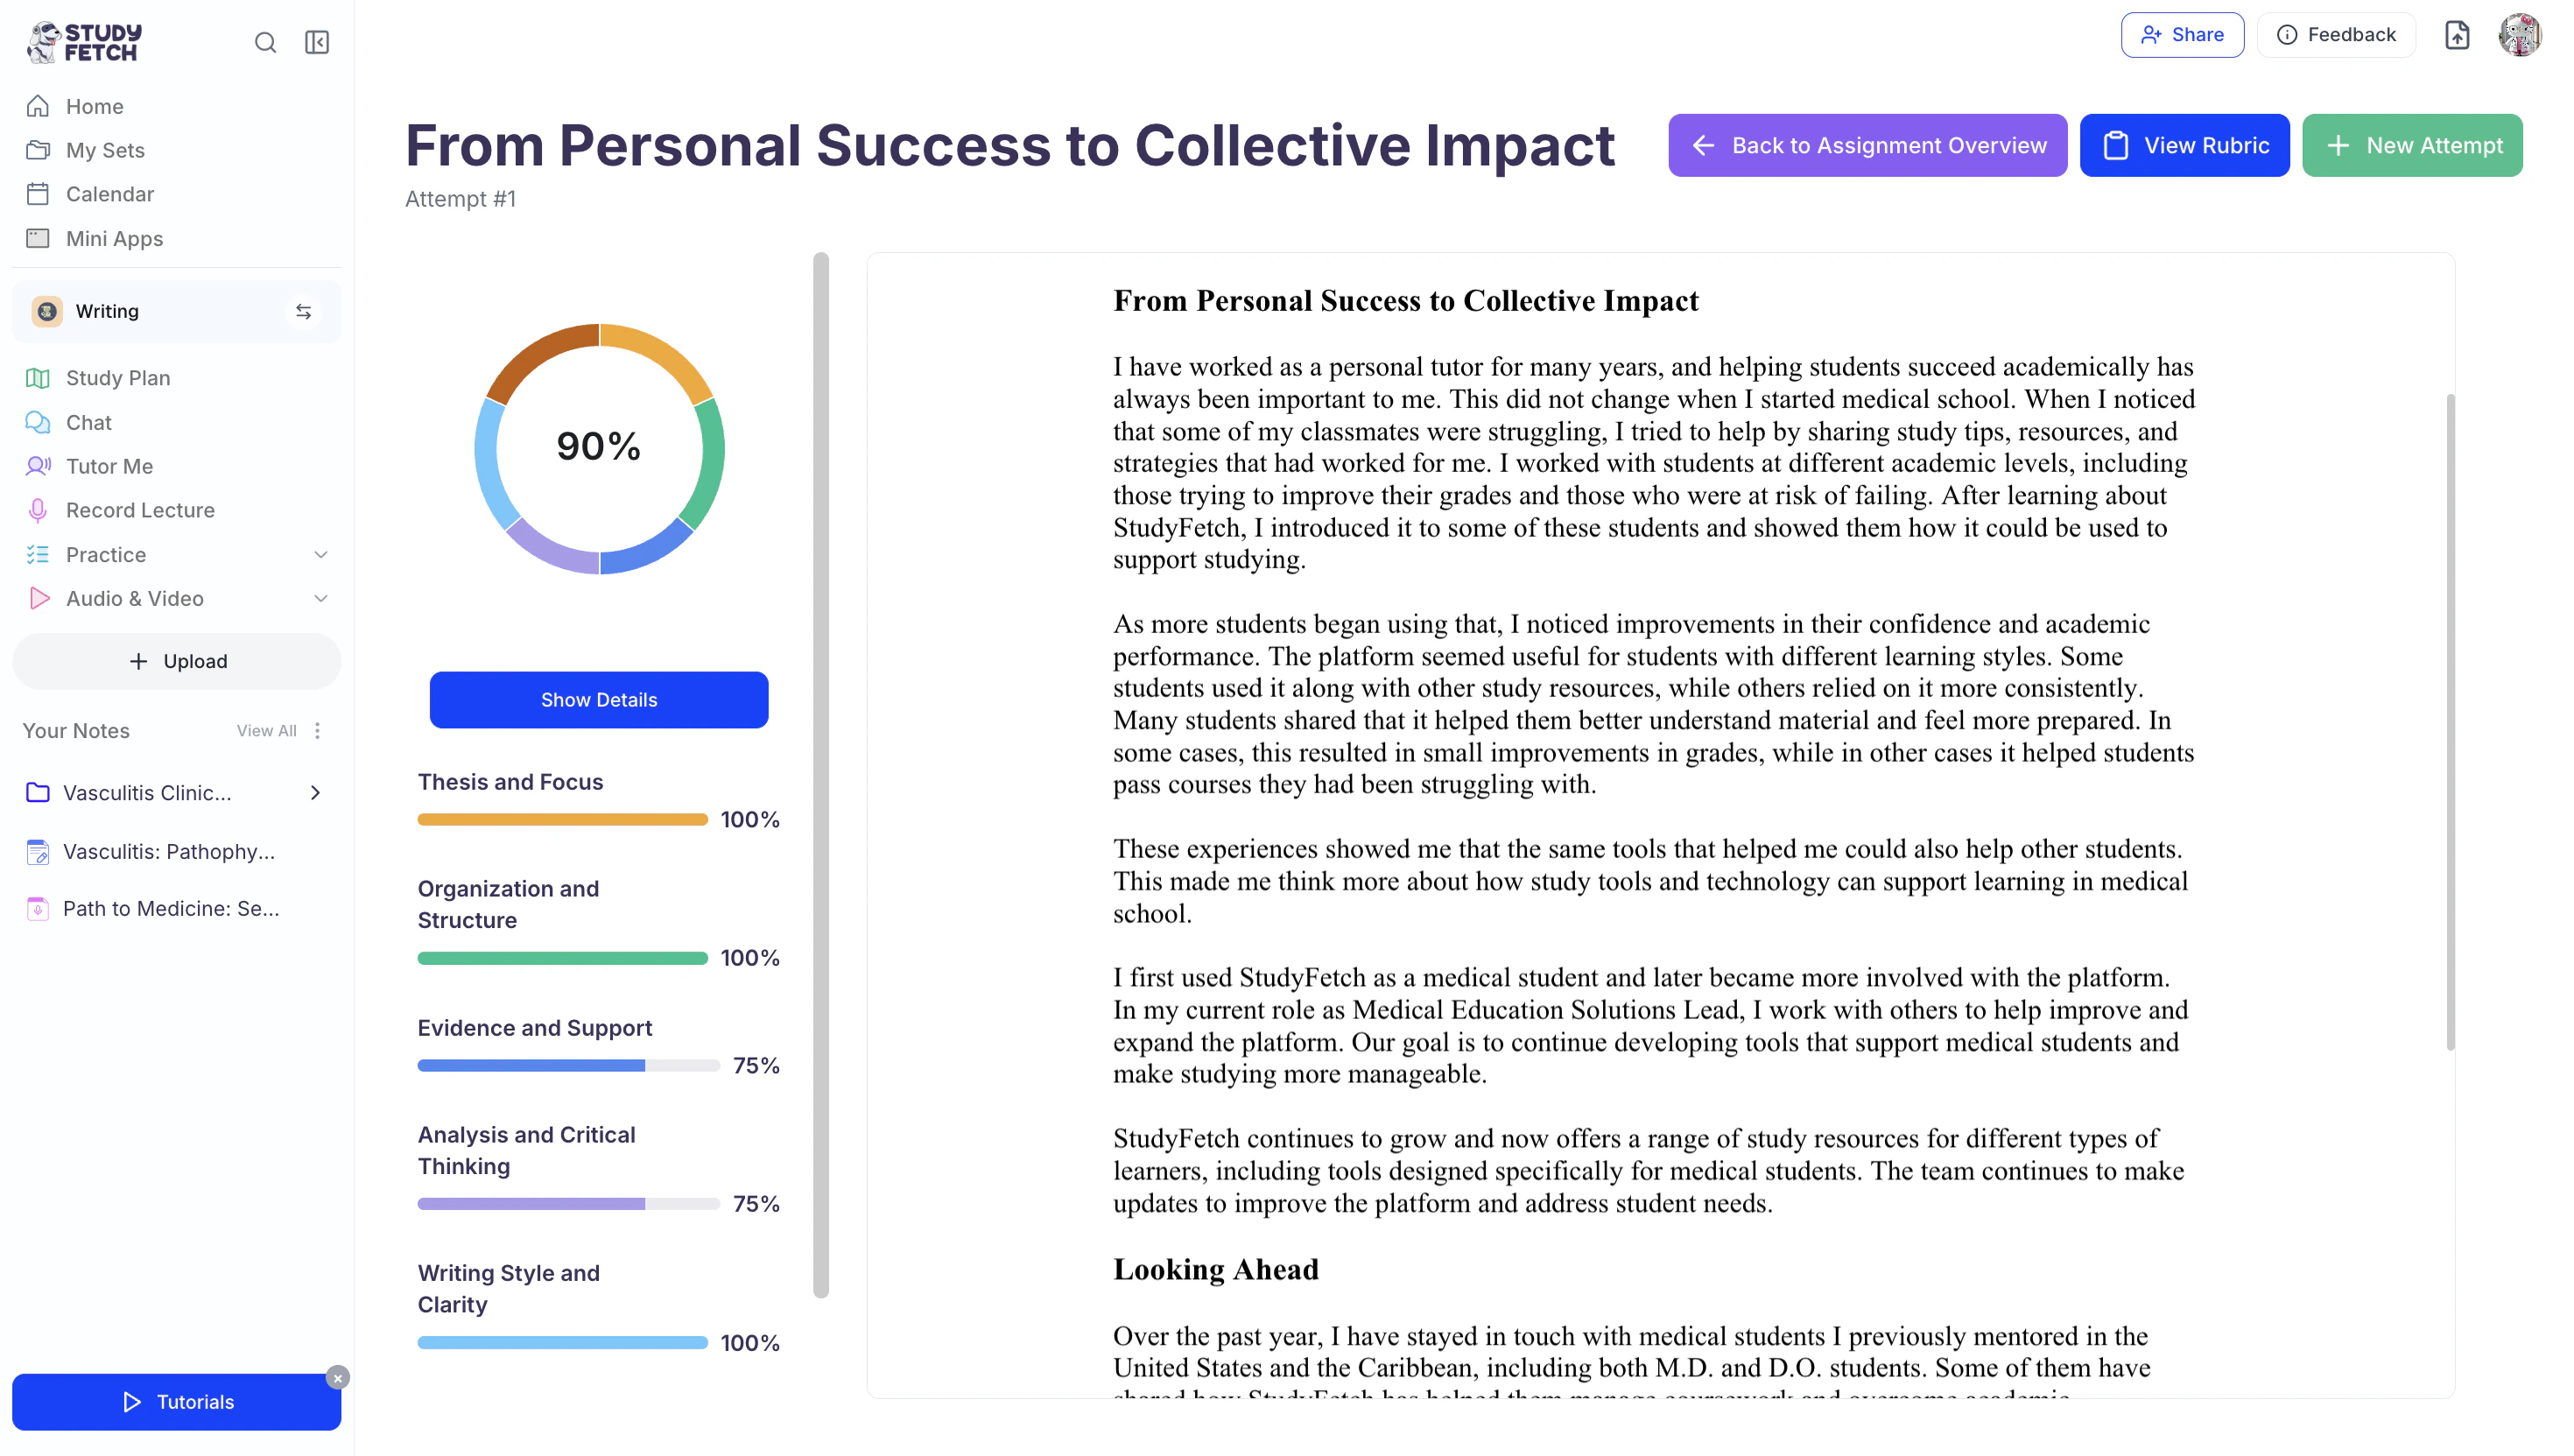
Viewing Your Grade Breakdown
- At the top left of the screen, you will see your overall percentage score.
- Below your overall grade, you will find a breakdown of your performance across each rubric category.
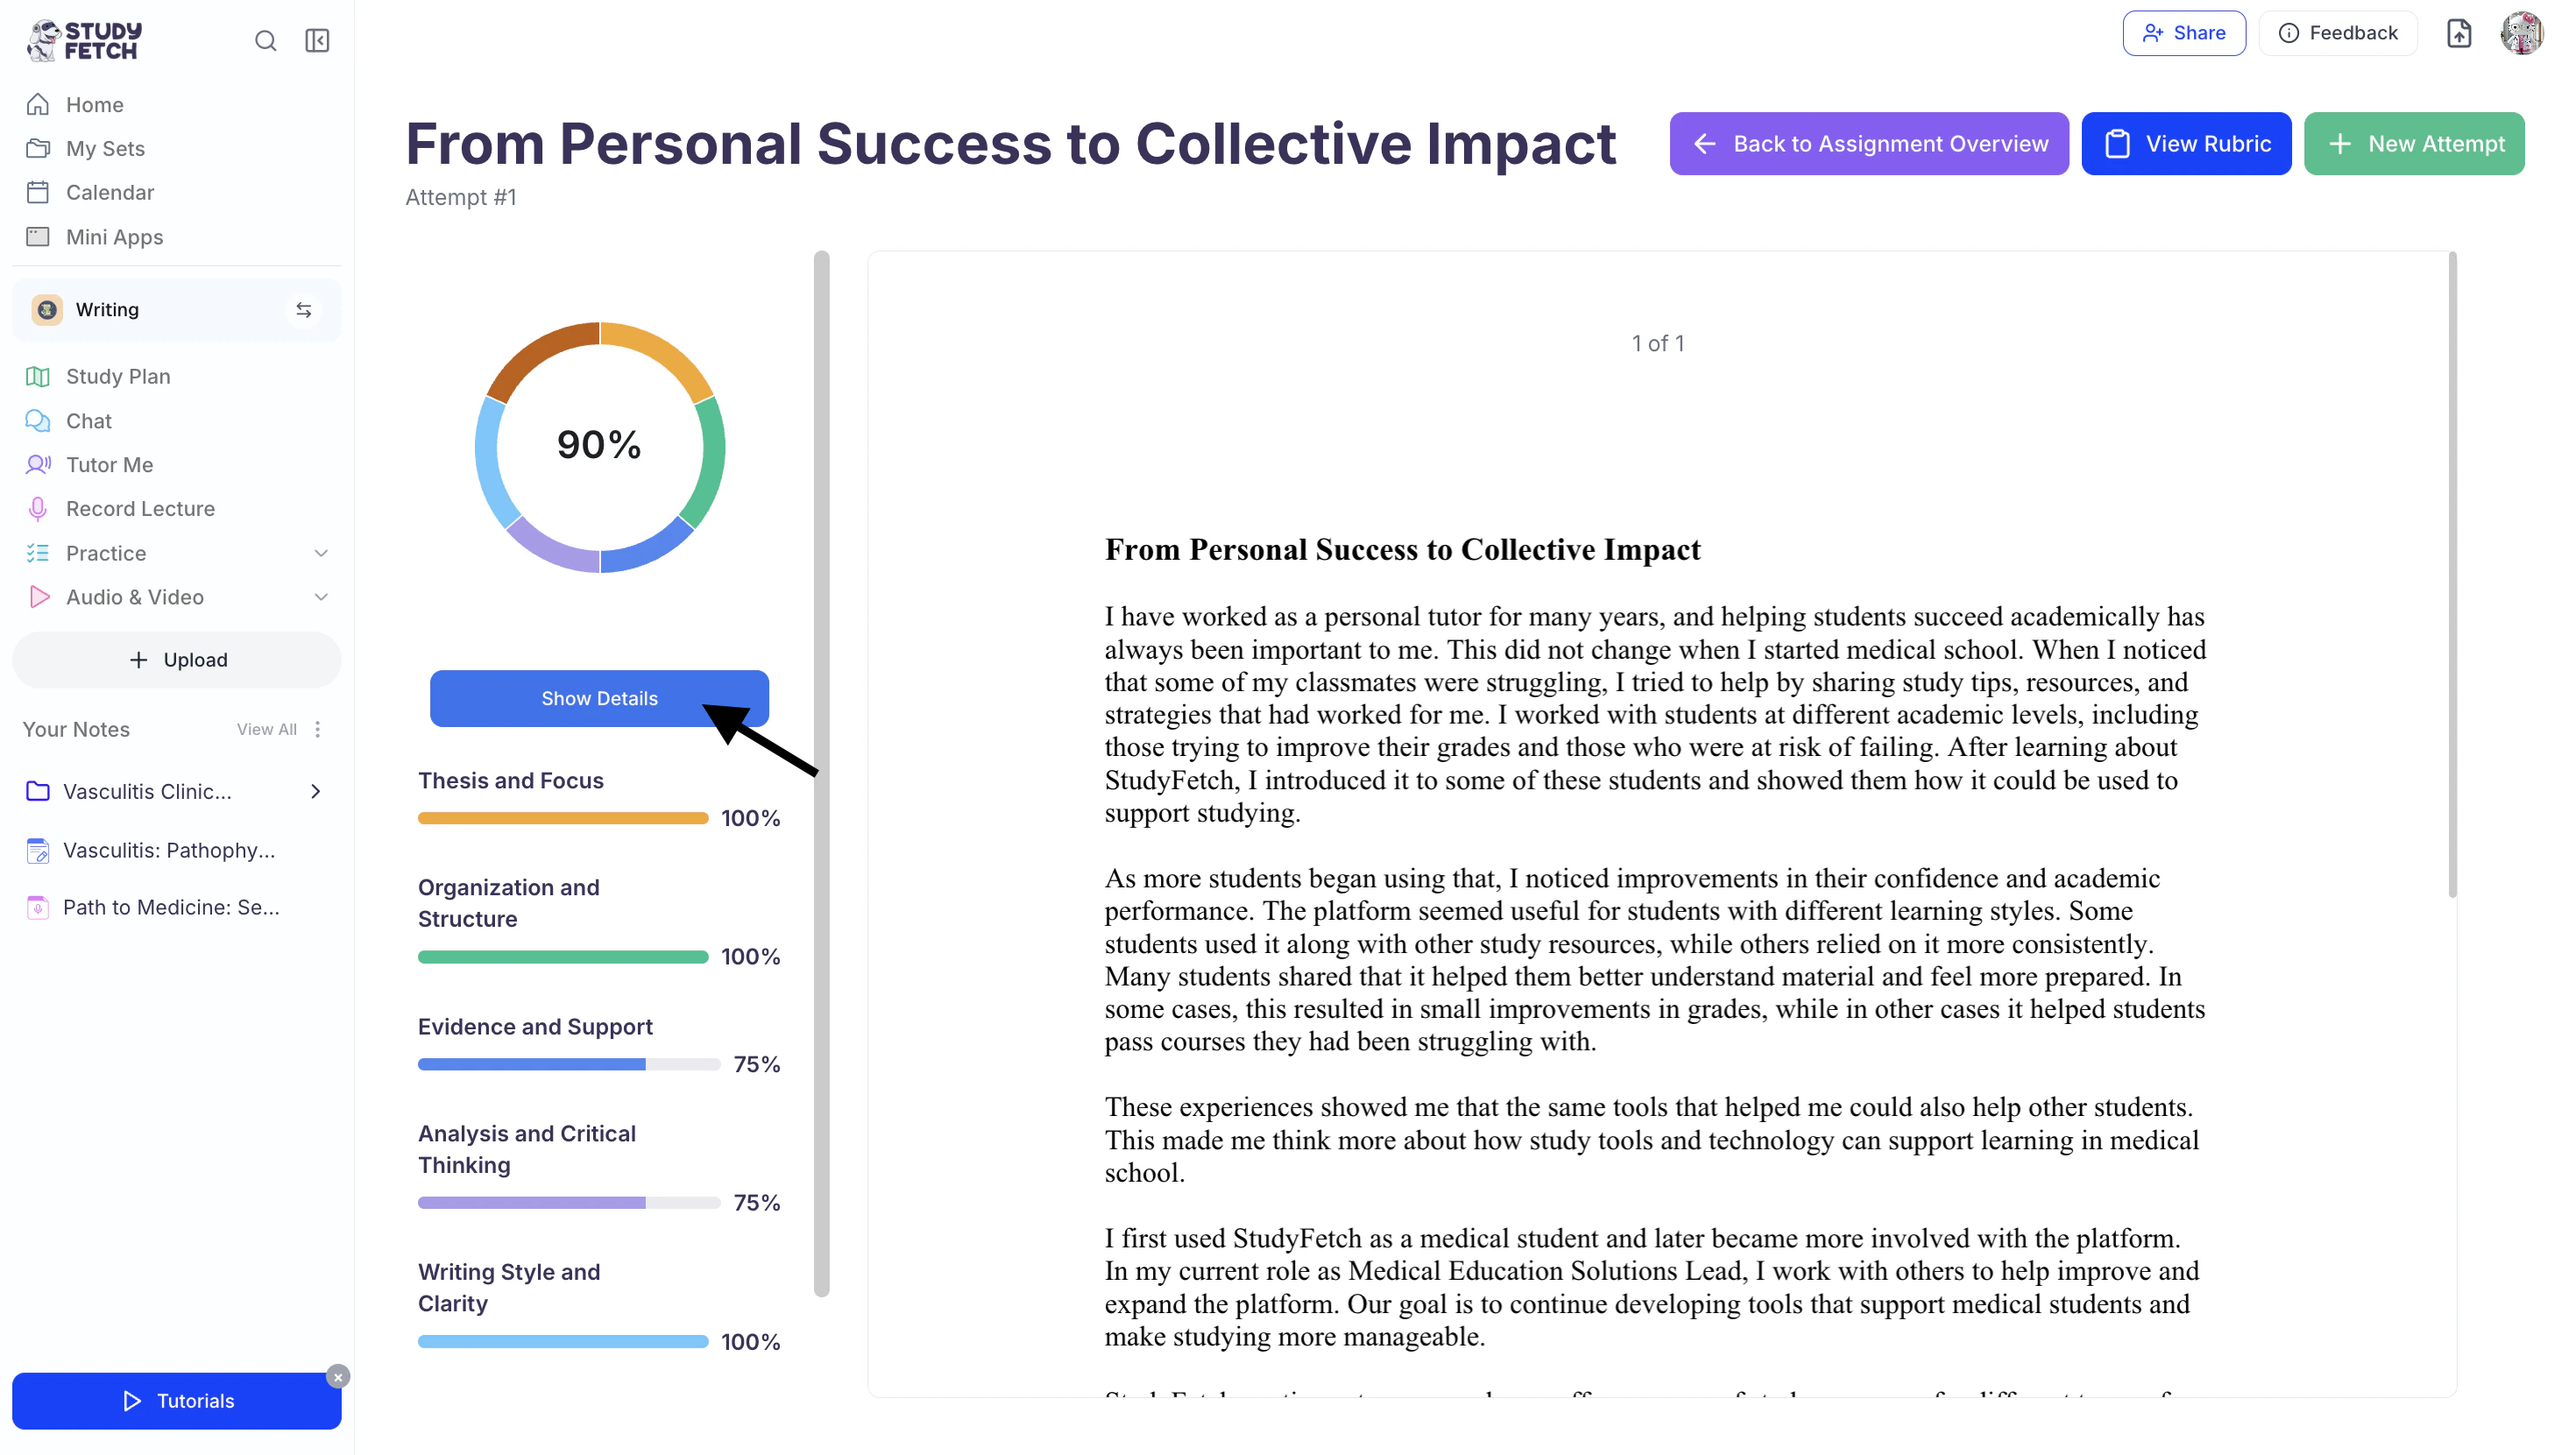
- To view more detailed feedback for all rubric categories select Show Details button below your assignment grade.
This will expand a full explanation of how your work was evaluated in each rubric section.
- After you are done reviewing your feedback you can return to the previous screen by selecting ← Back to Overview .
Viewing and Editing Your Assignment Rubric
- You can view the rubric that was used to grade your assignment at any time by clicking View Rubric from the top right of the screen.
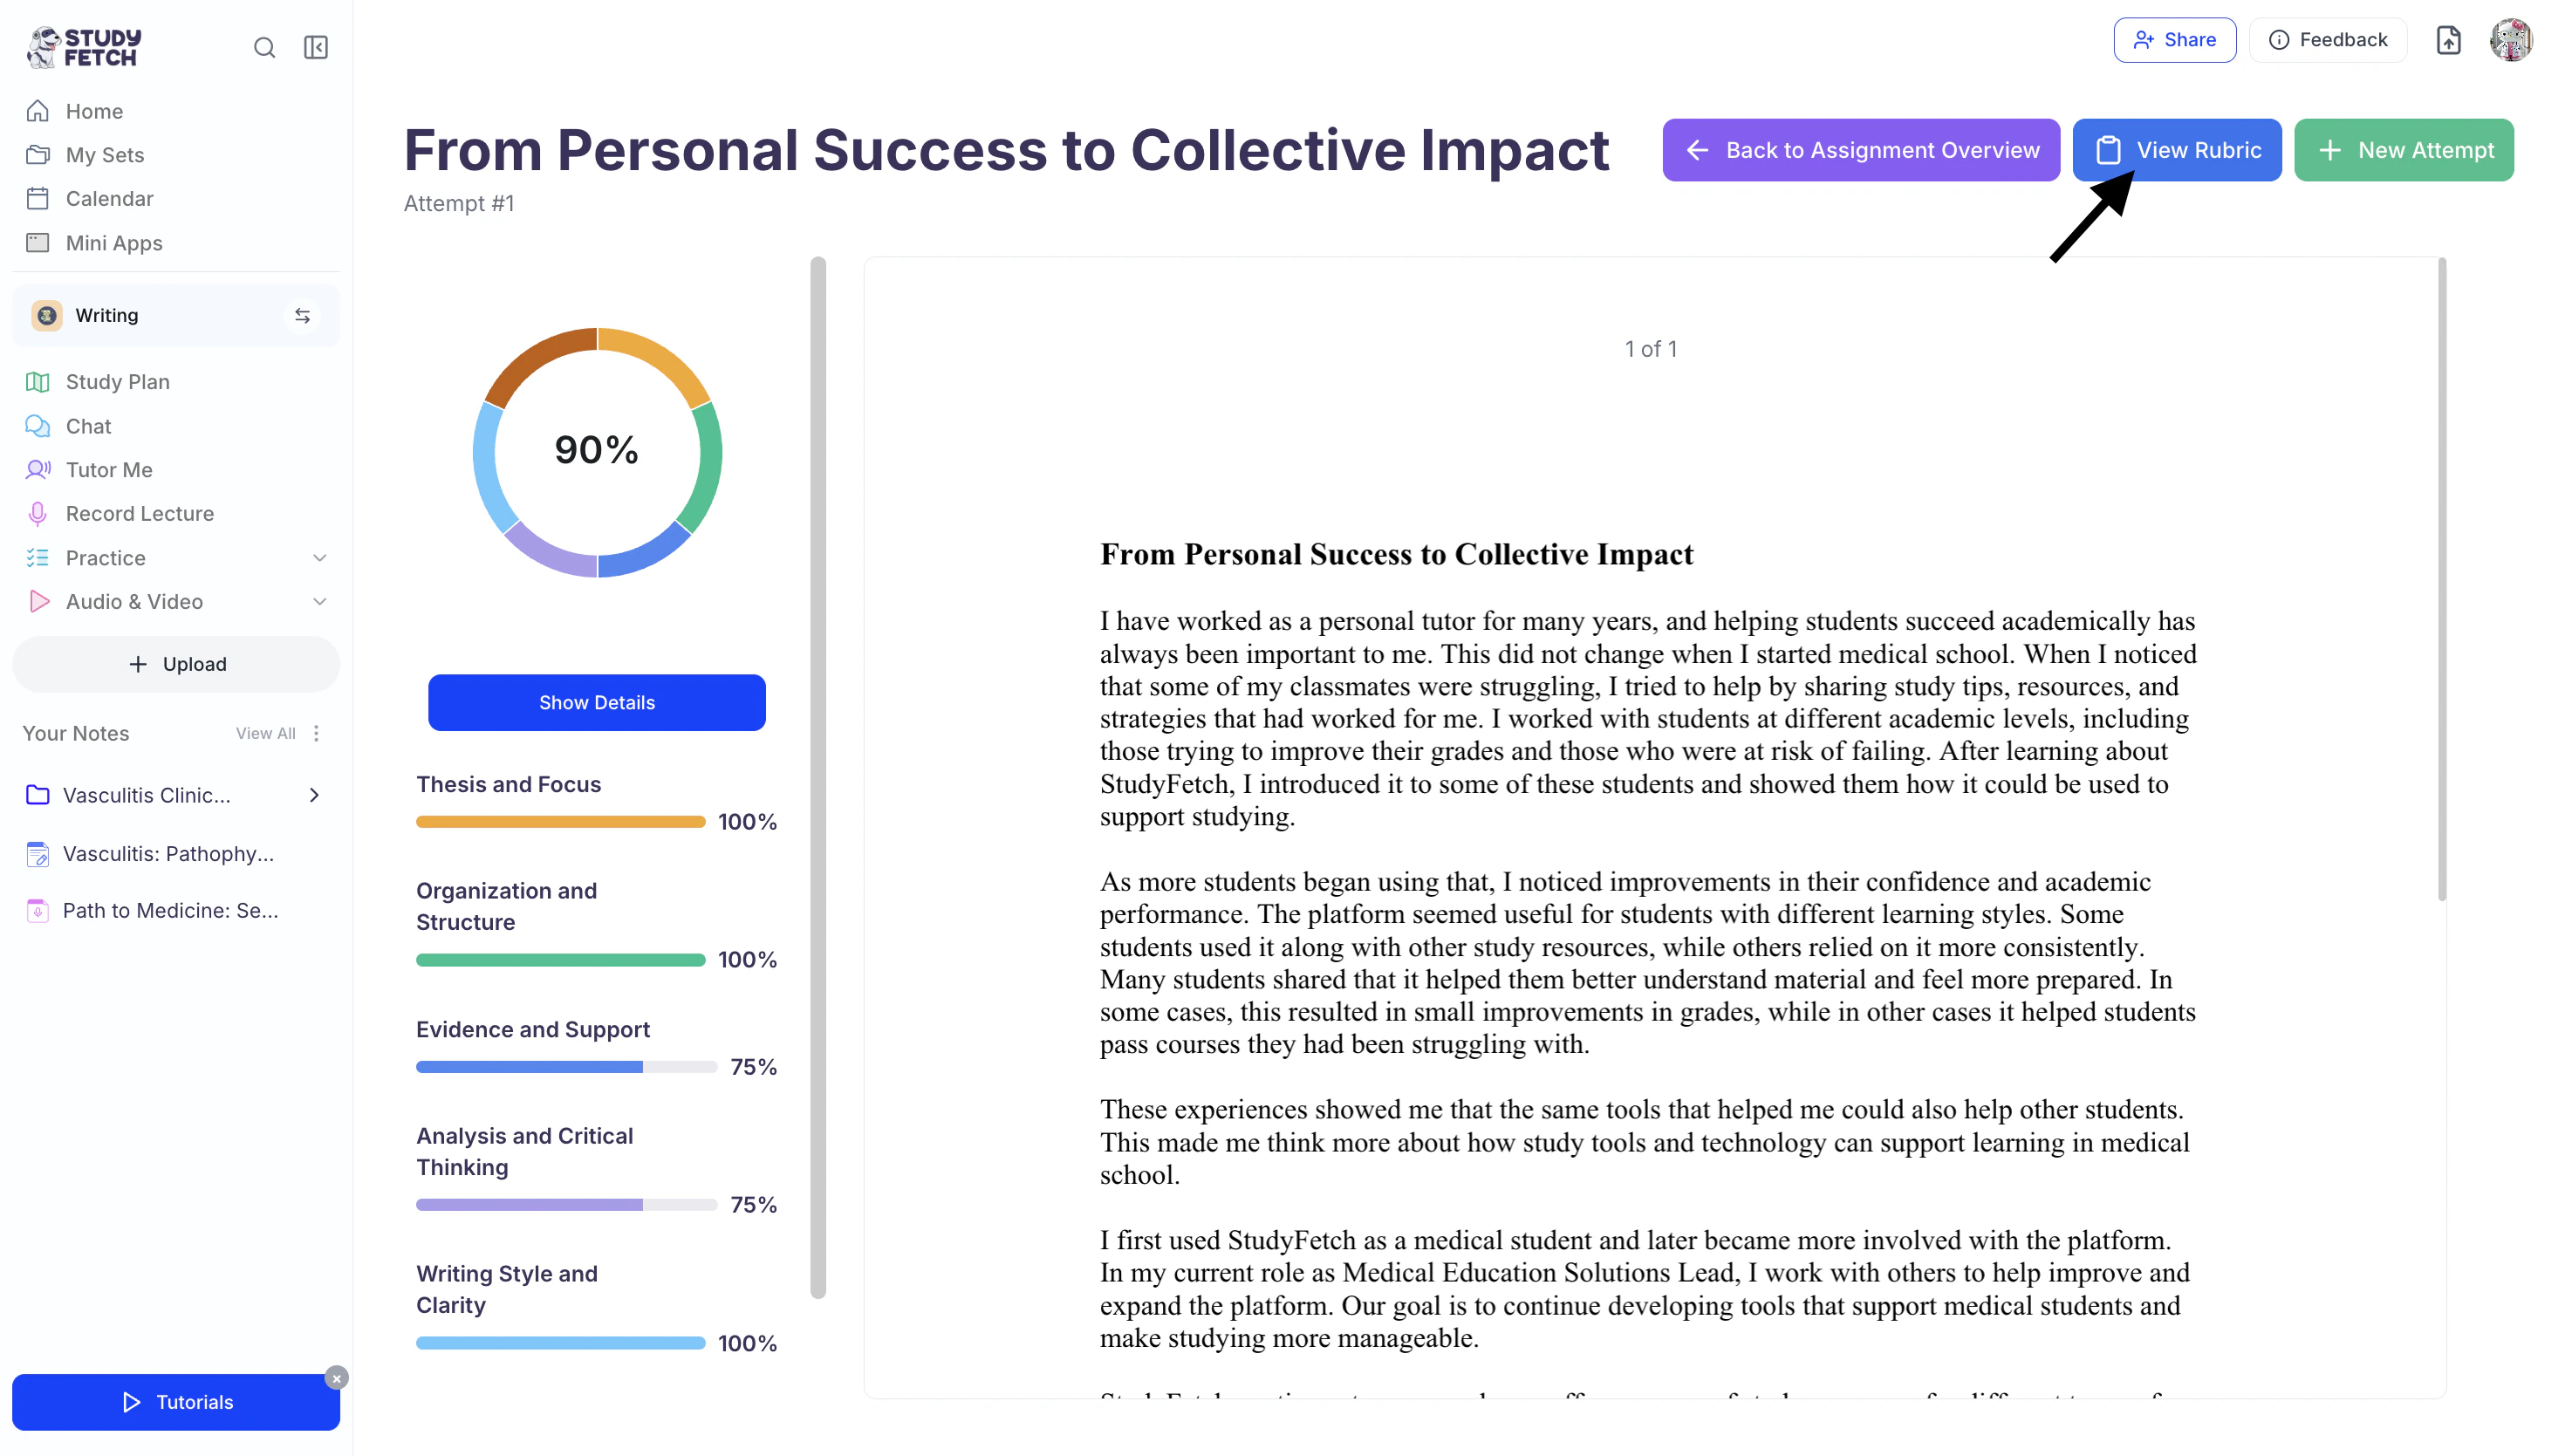
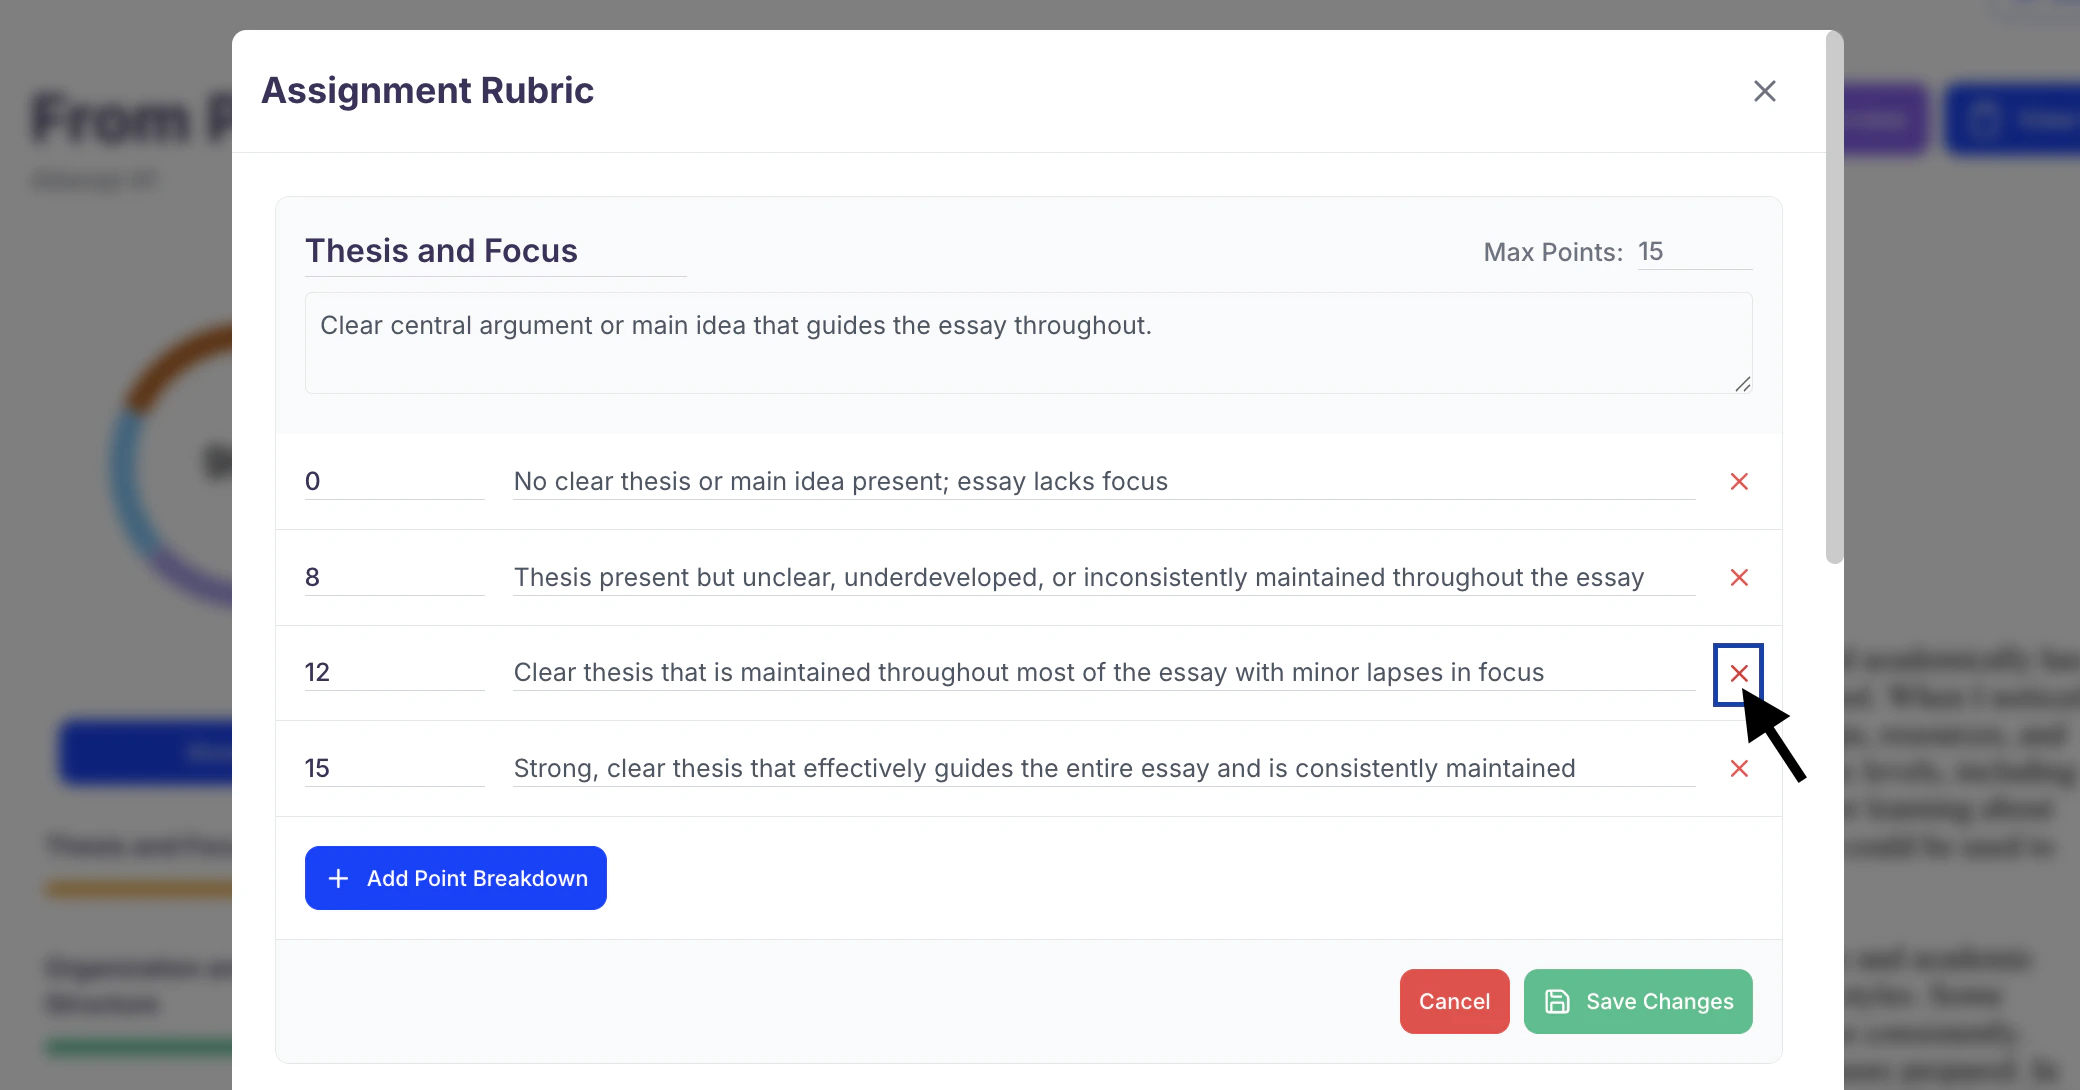
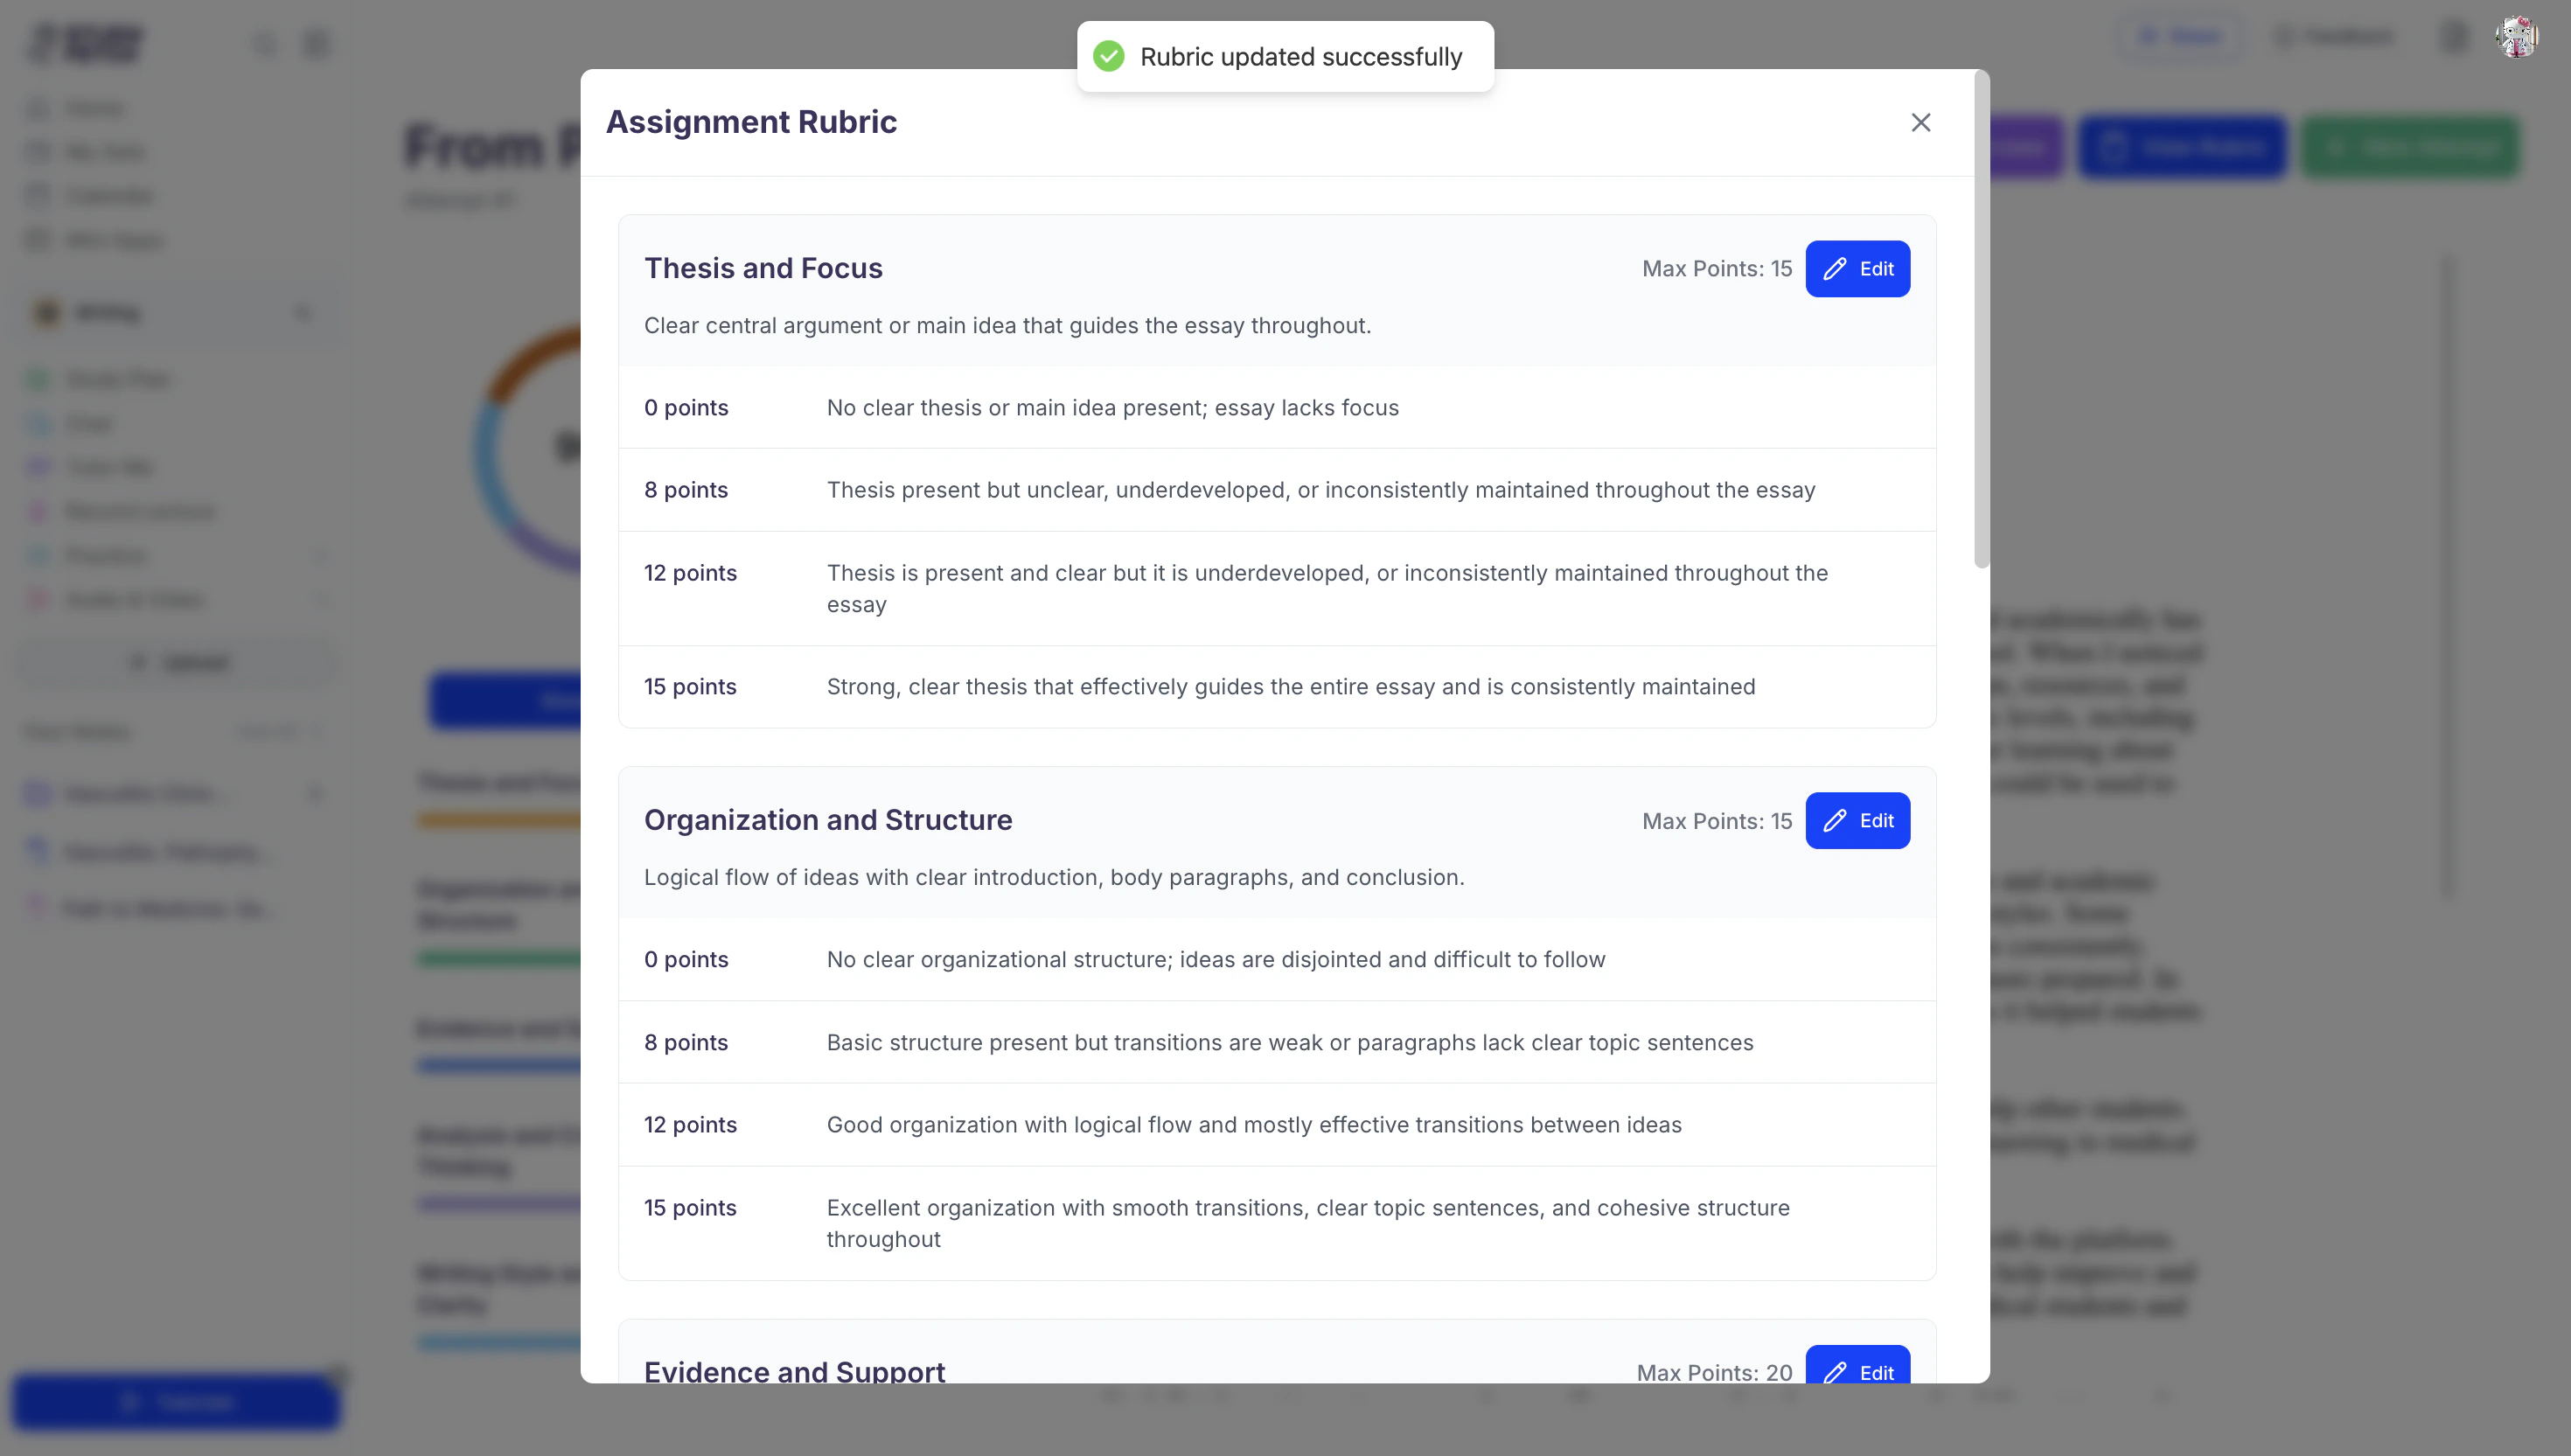
- The Assignment Rubric screen will appear where you can see the exact details of the requirements and point breakdown of each rubric category.
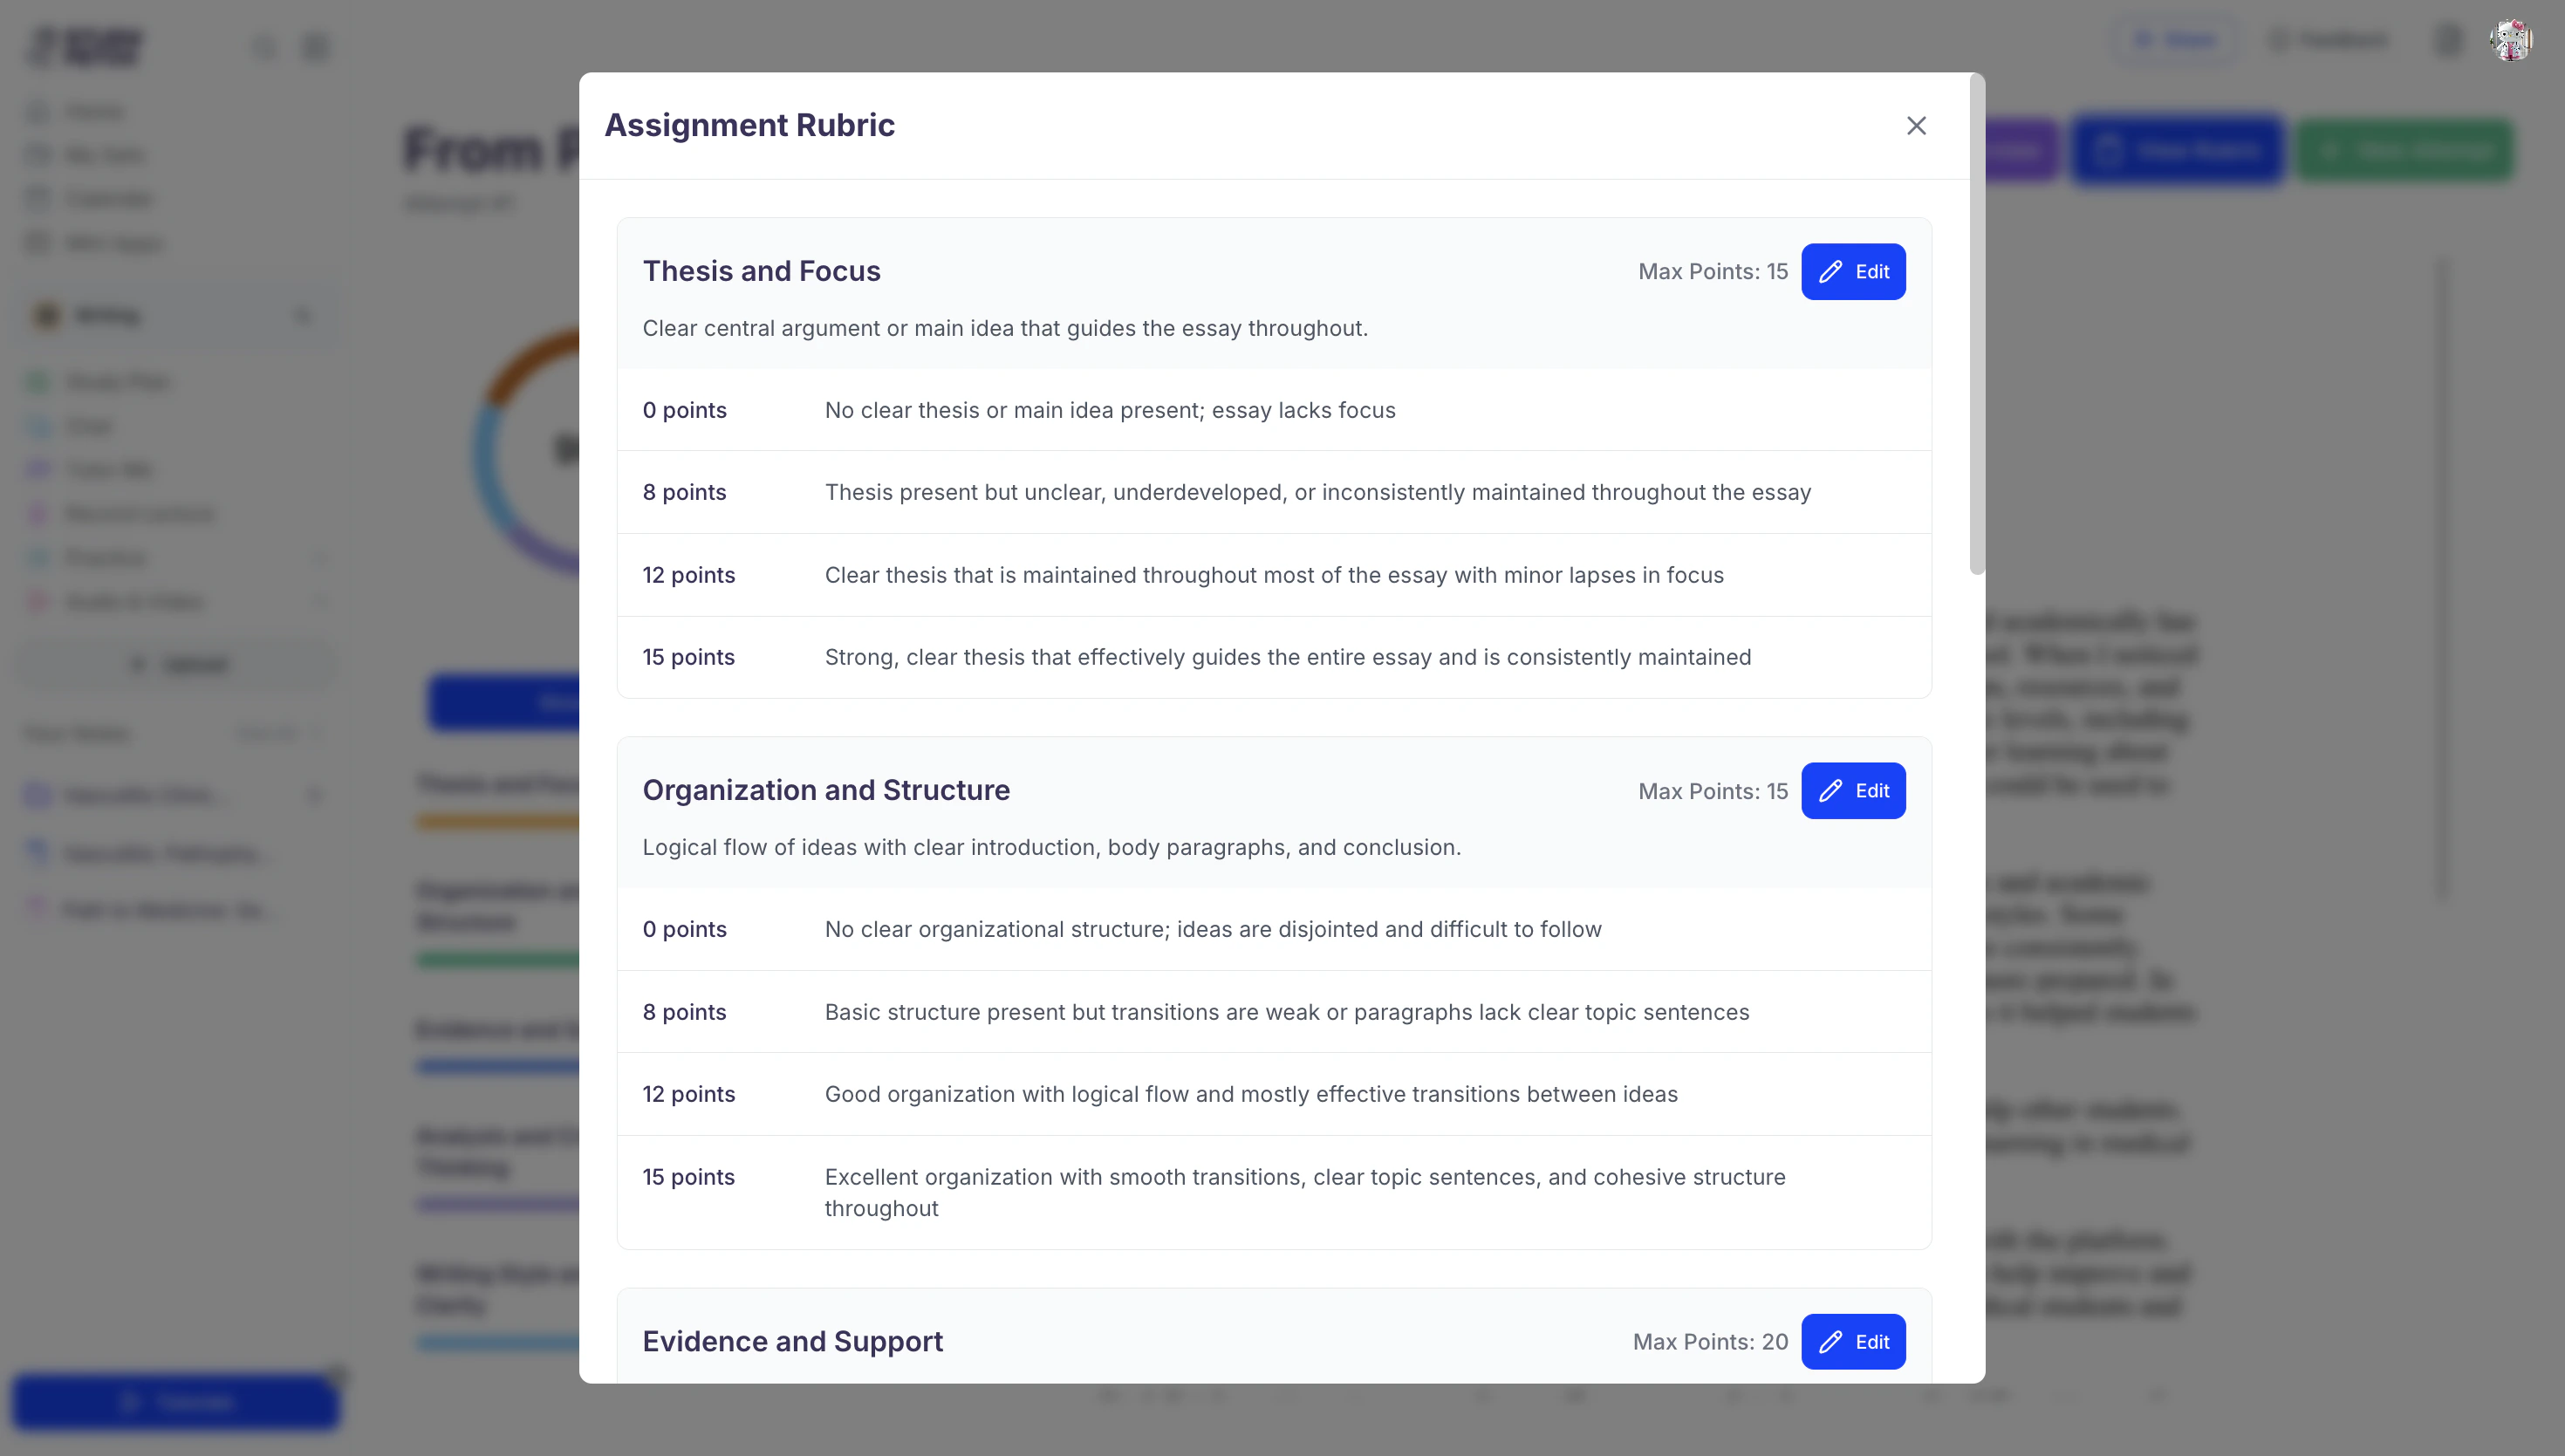
- If you want to modify any part of the rubric, select Edit in the rubric category you wish to update.
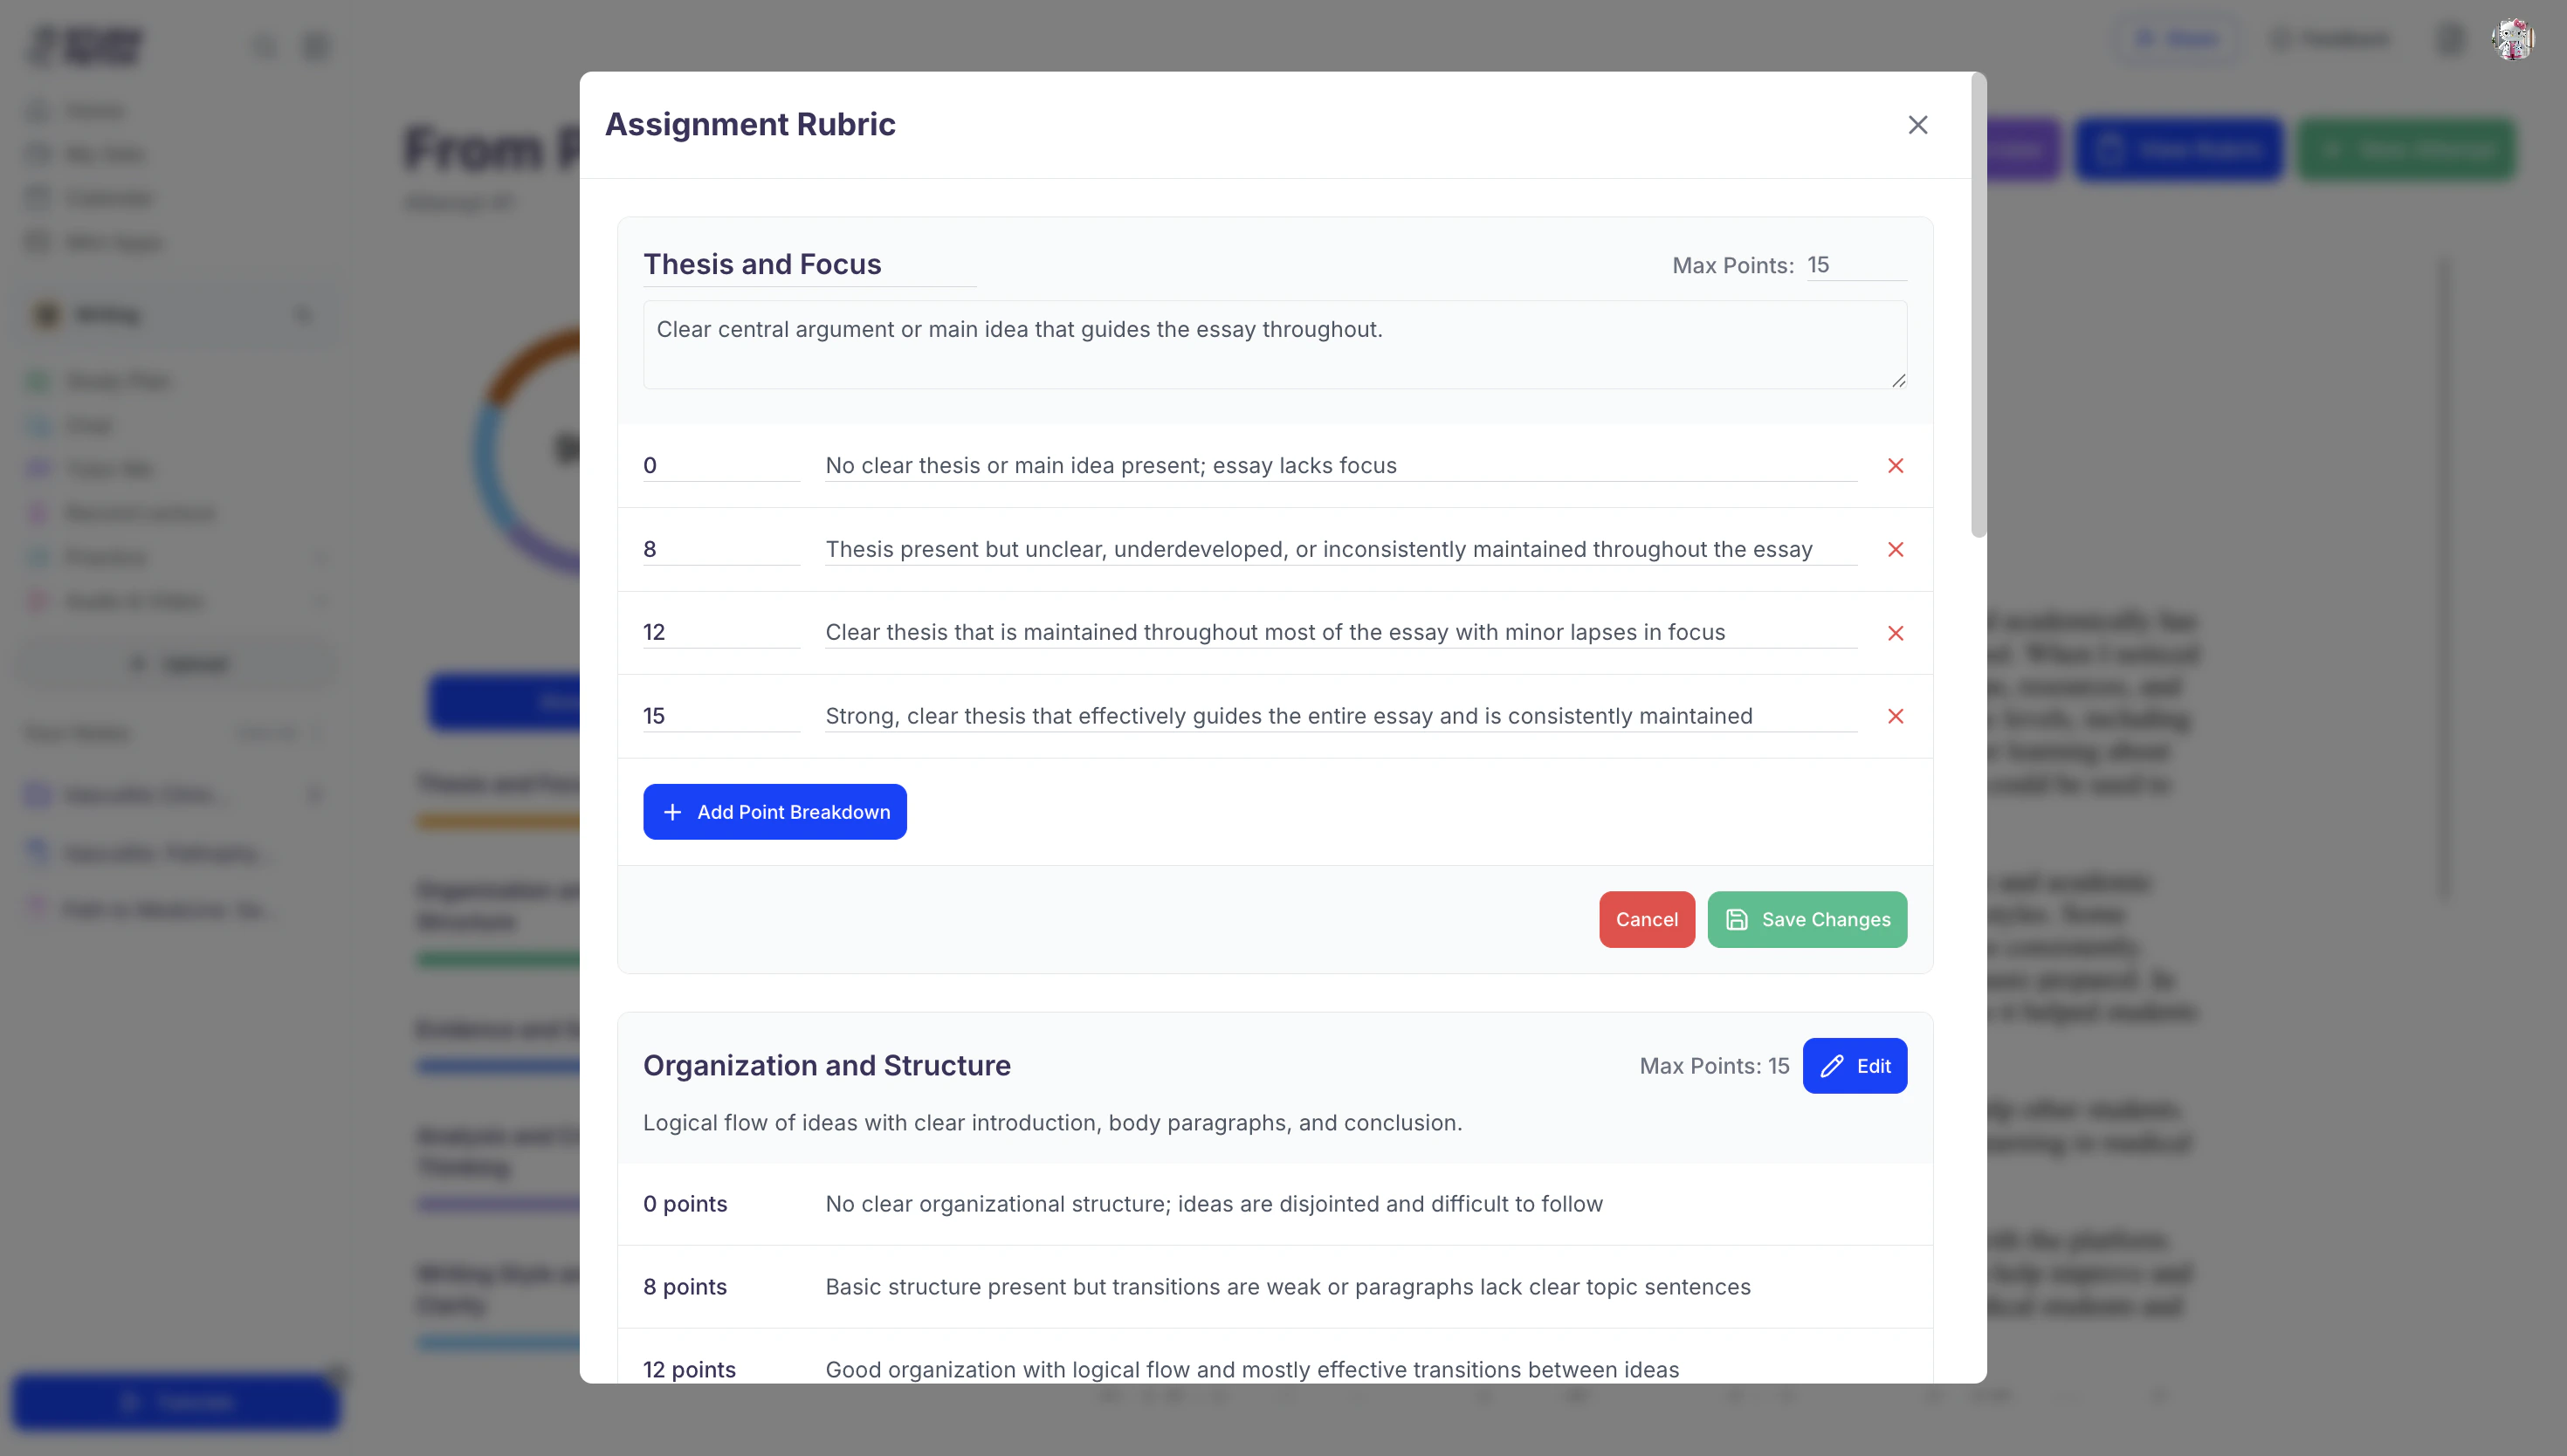
- To rename a category, click directly on the current category title and edit the text as needed.
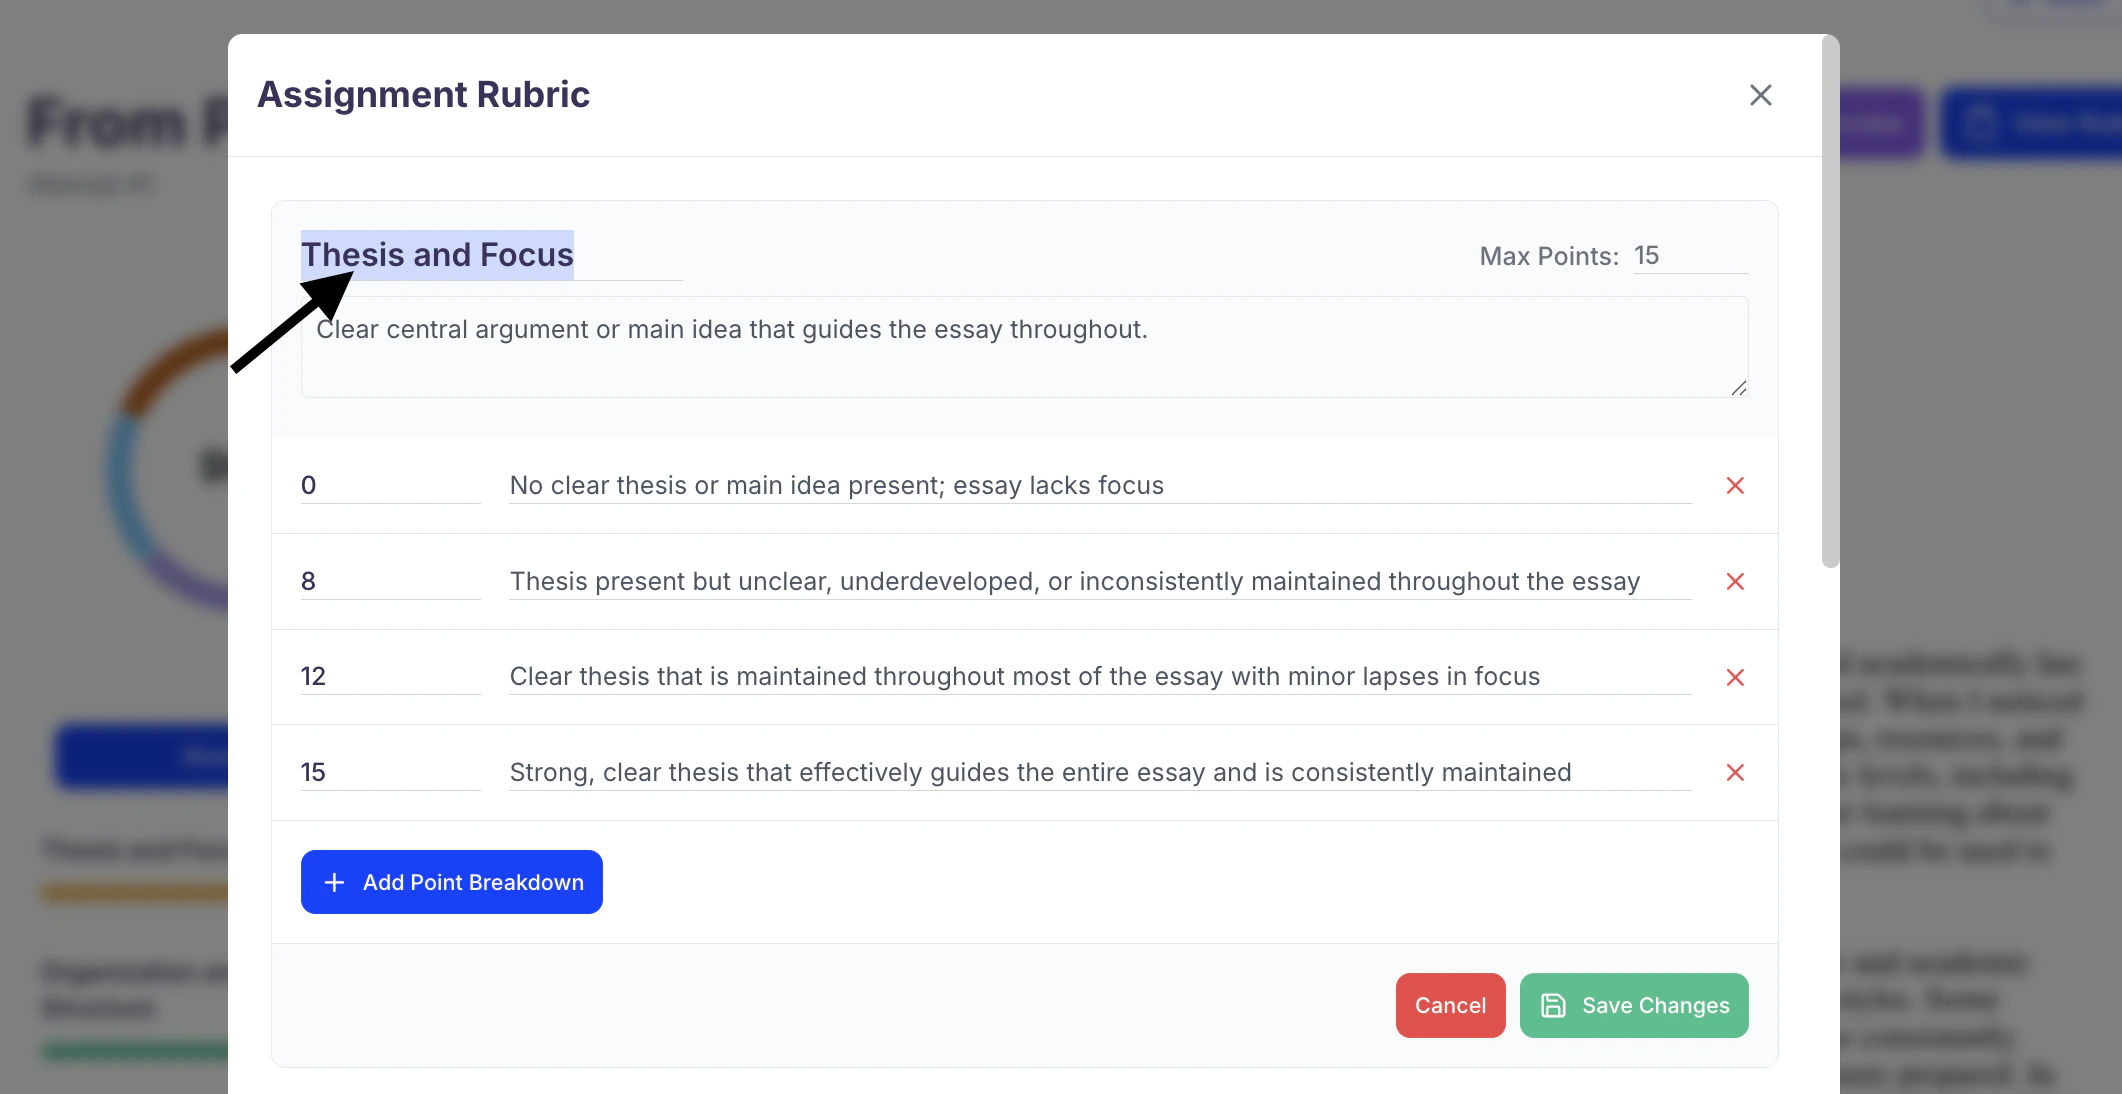
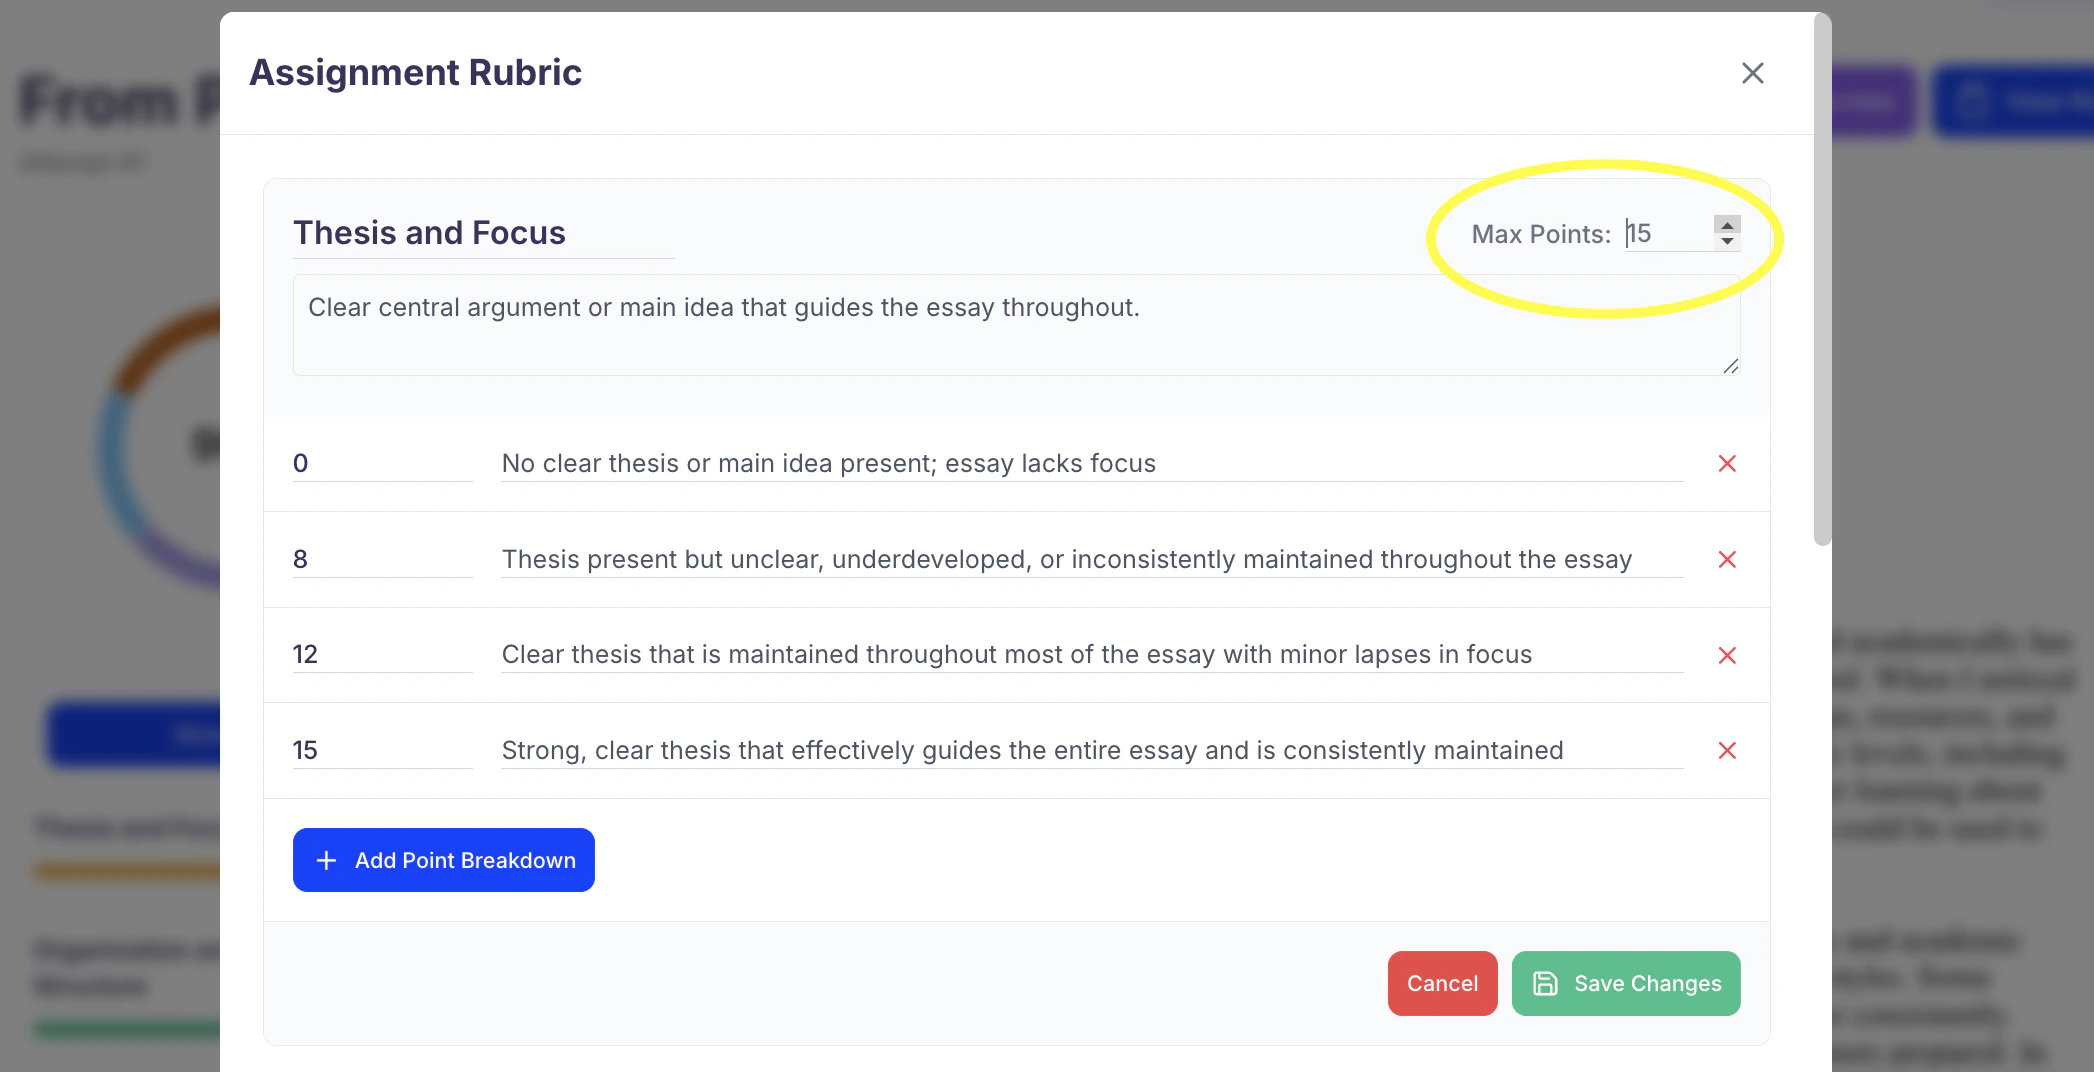
- To adjust the Max Points, use the up and down arrows next to the numerical value.
You can also type in a value directly.
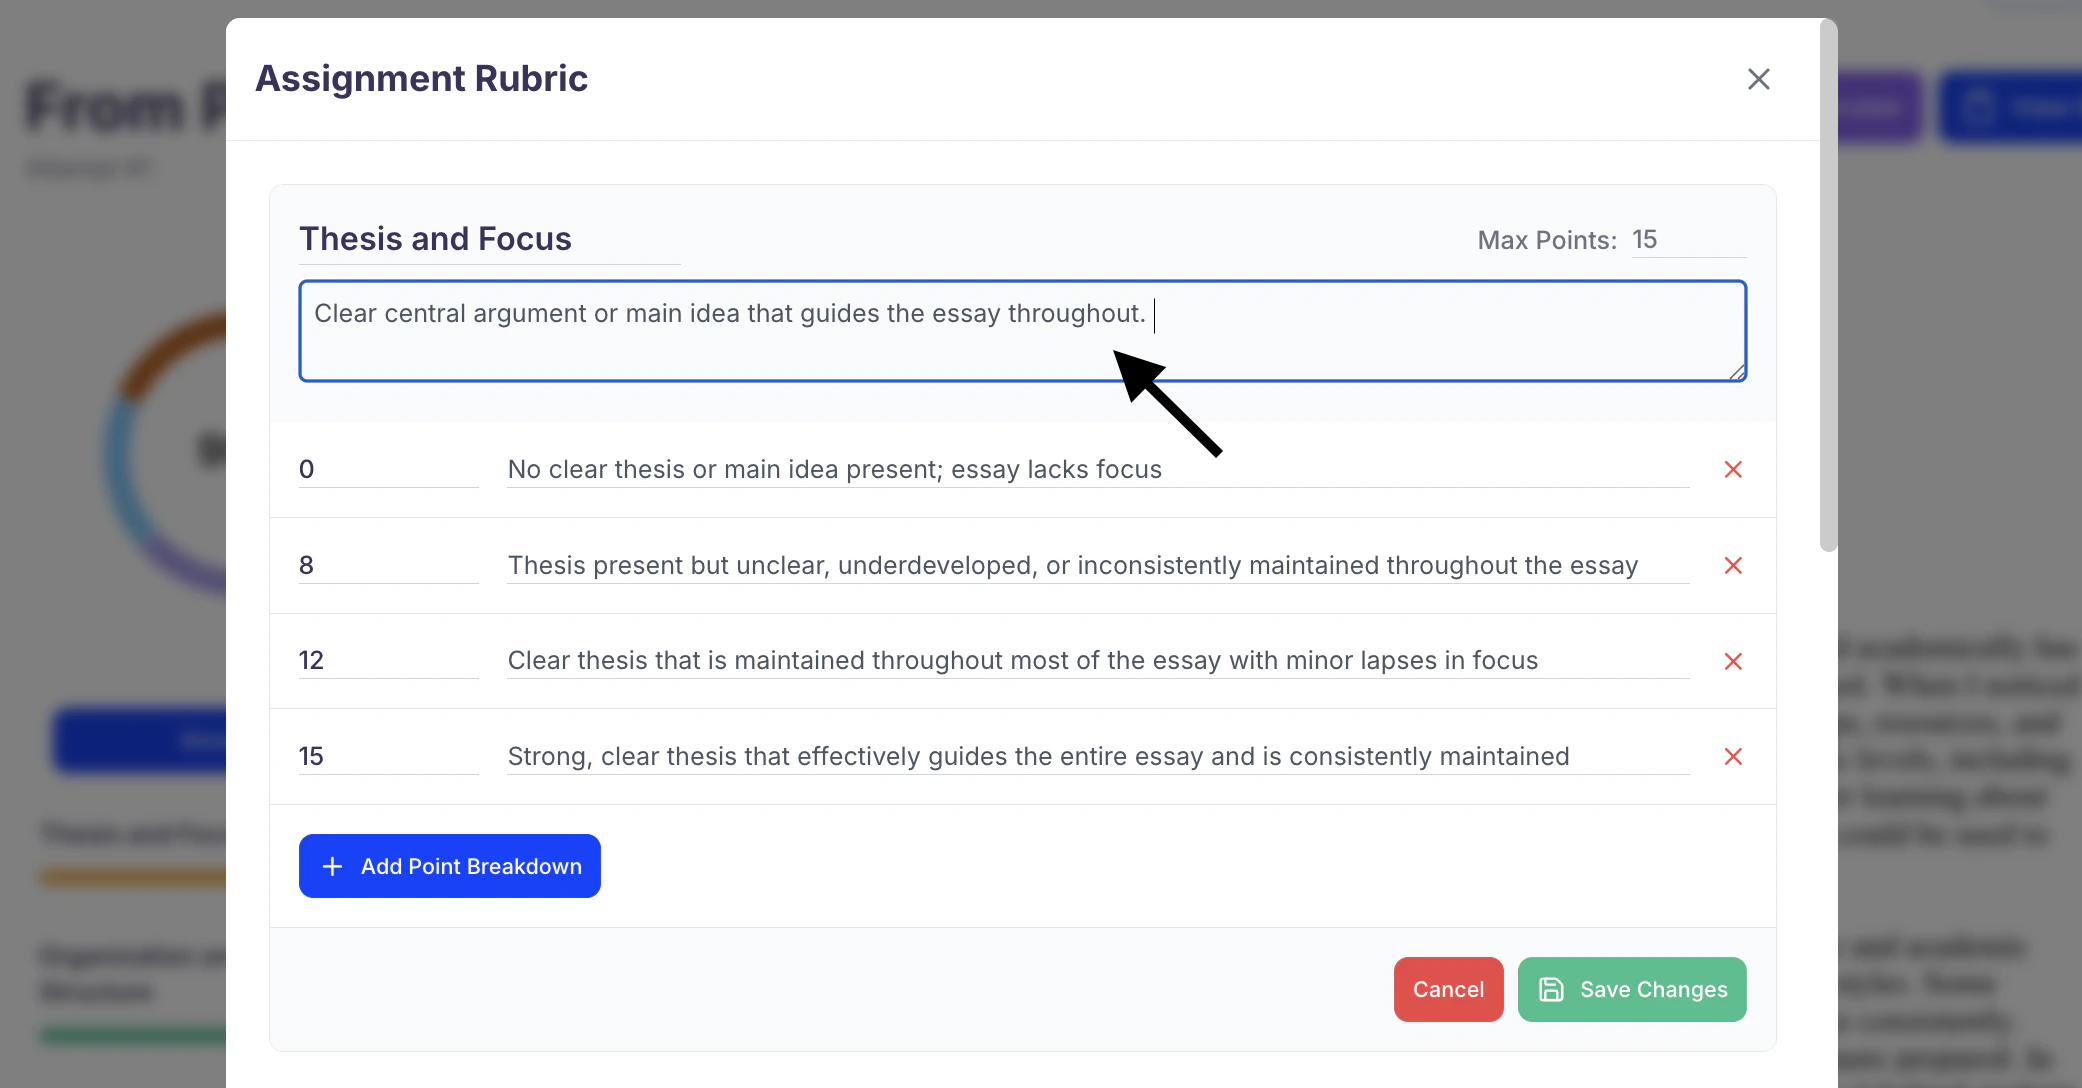
- To edit the category description, click into the text box beneath the category title and make your changes.
- You can also modify the performance descriptions and their corresponding point values by clicking directly on the text or adjusting the numerical values using the up
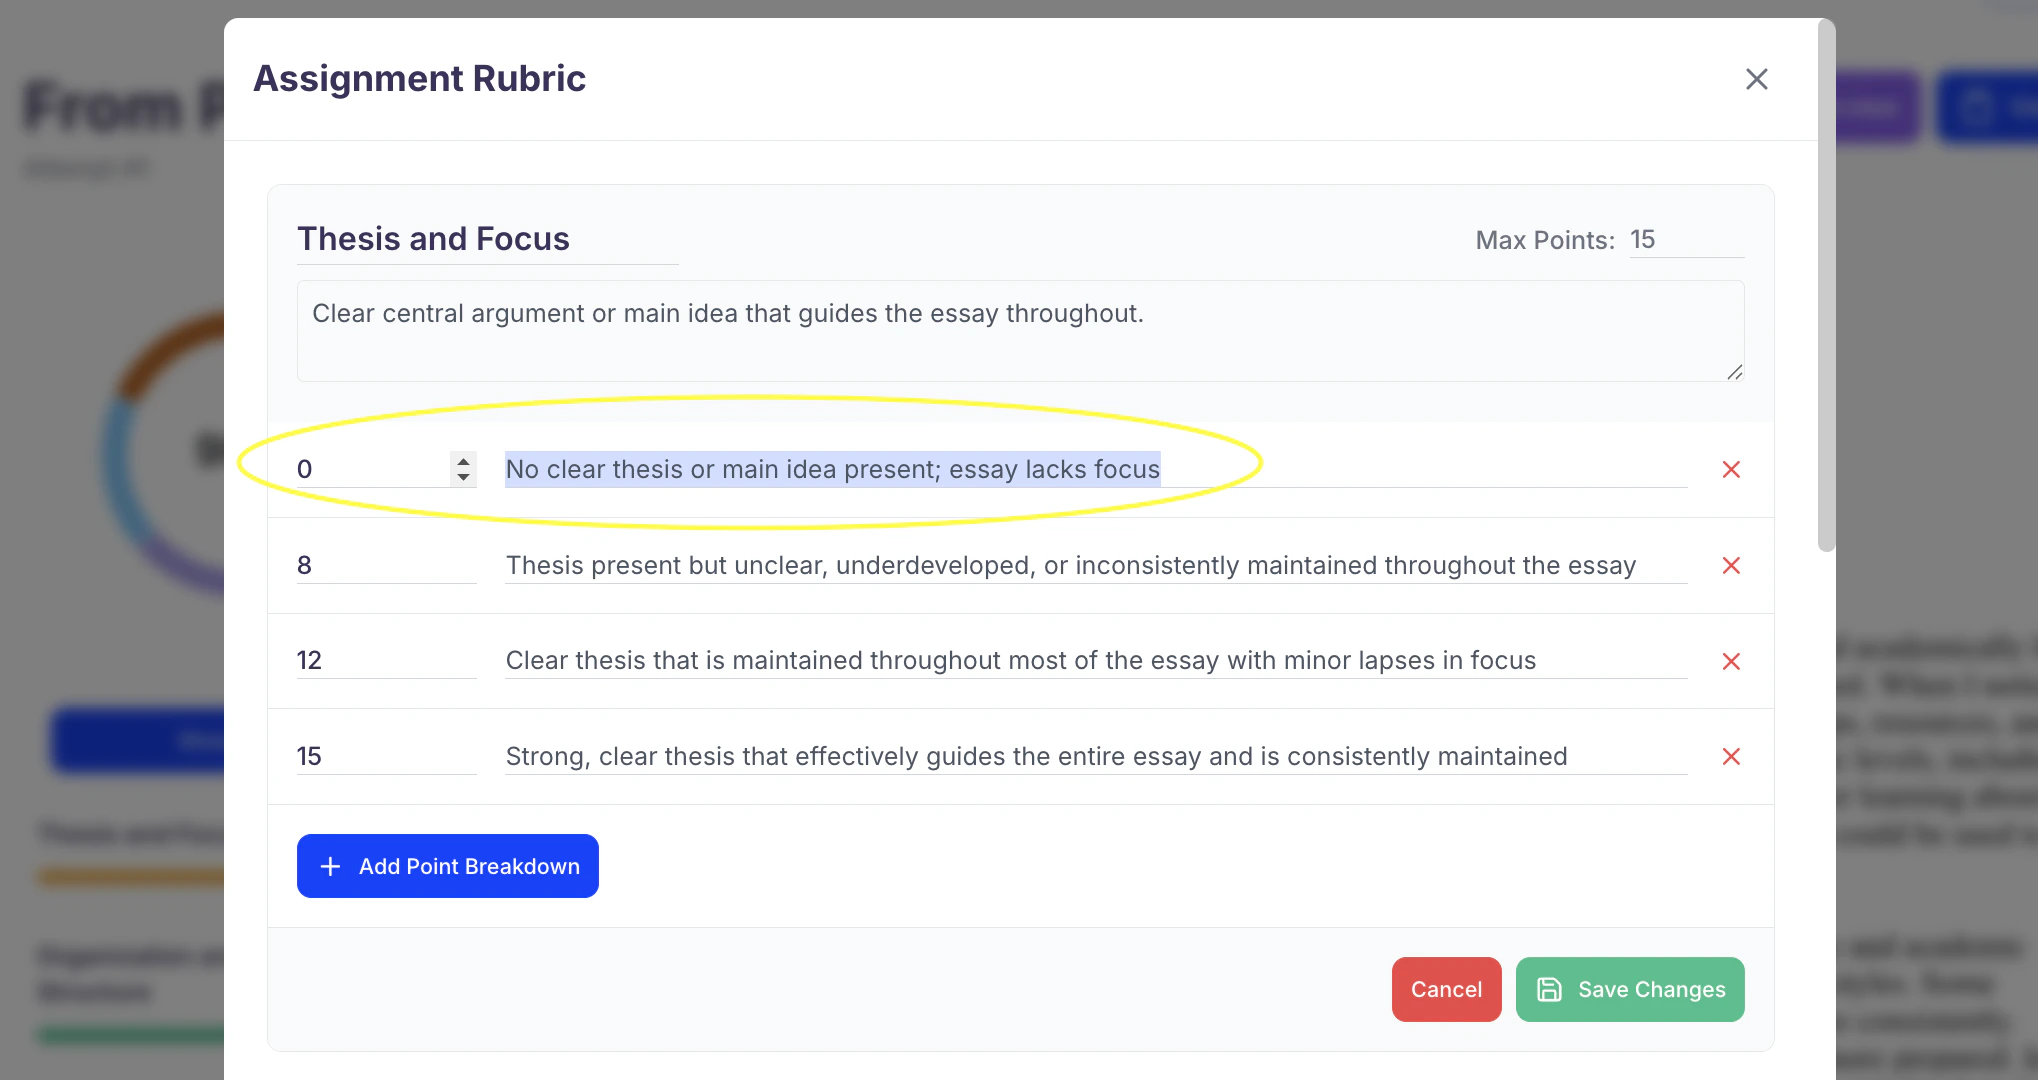
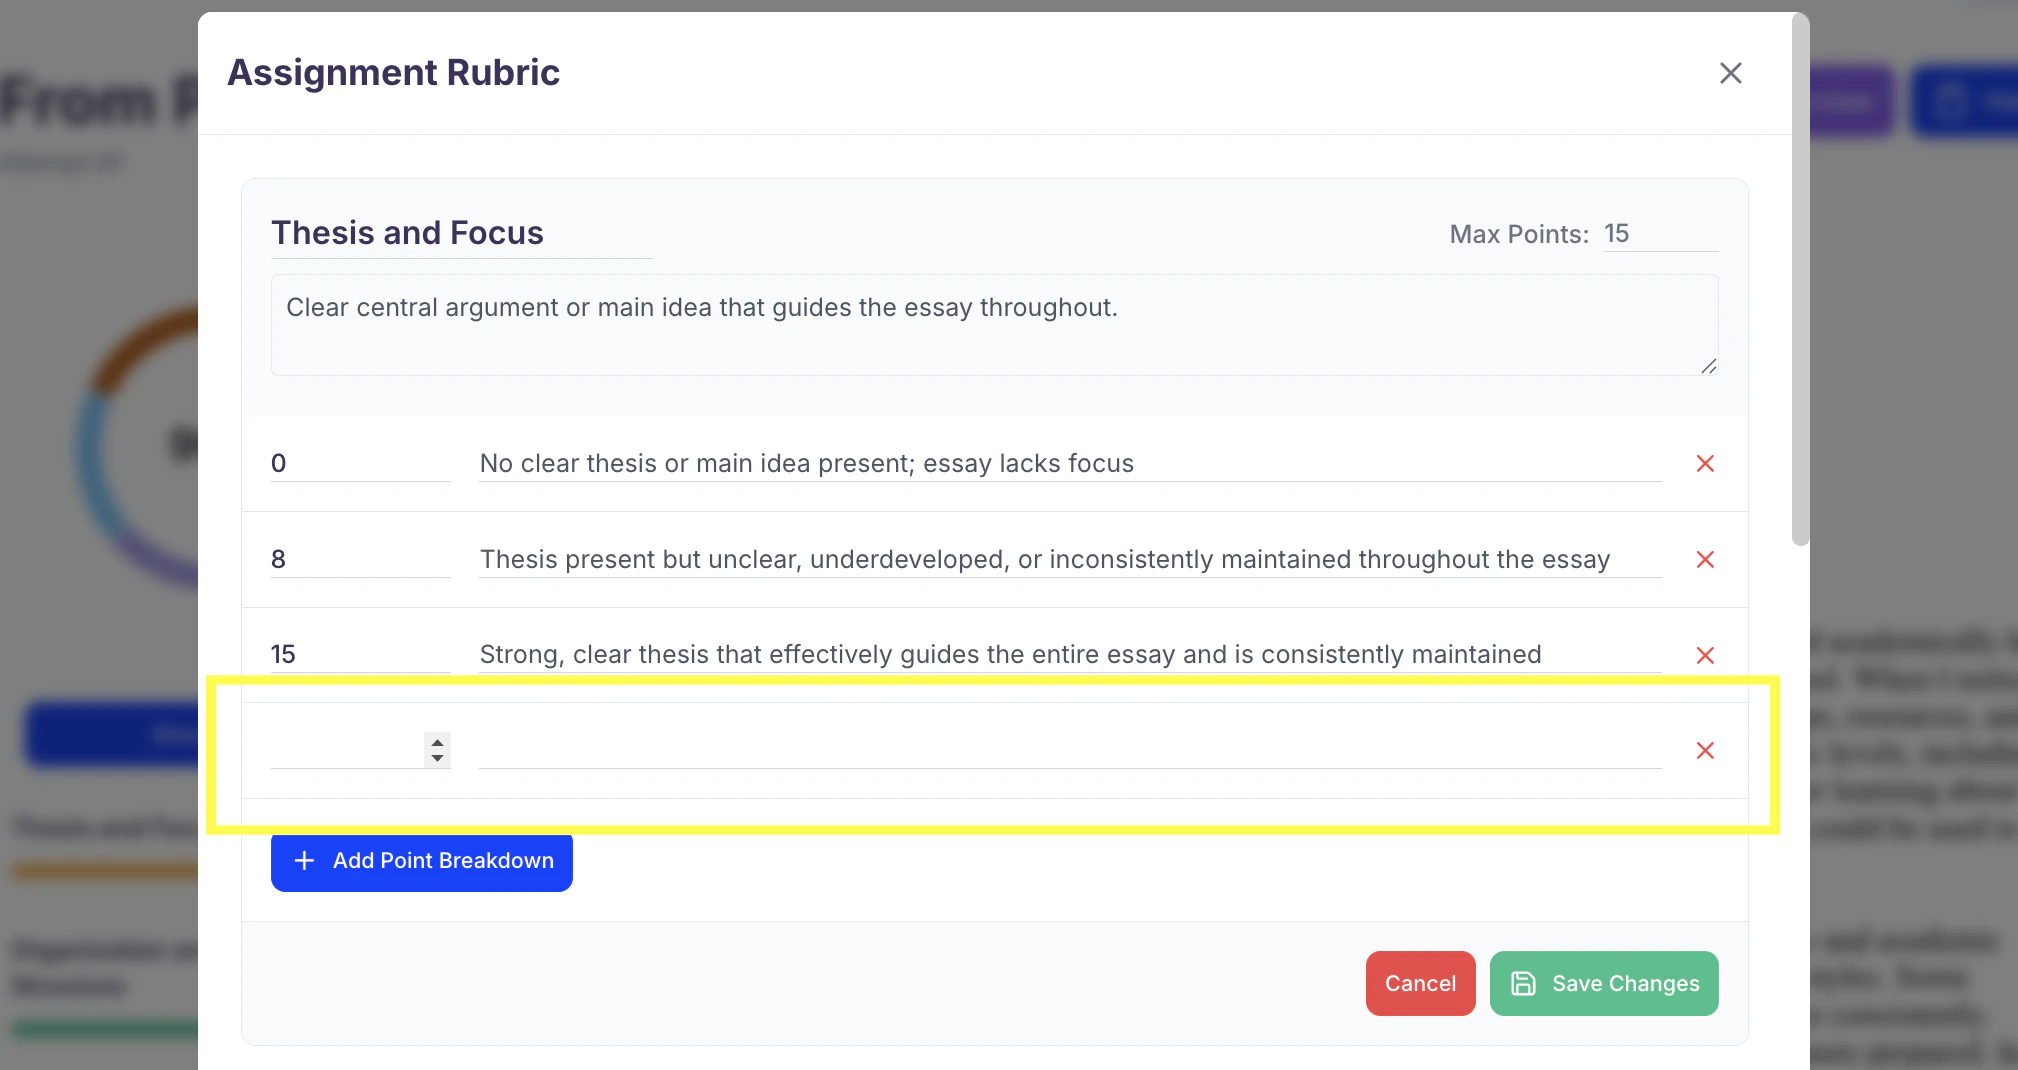
- To remove a performance level and its point breakdown, click the “X” to the right of that section.
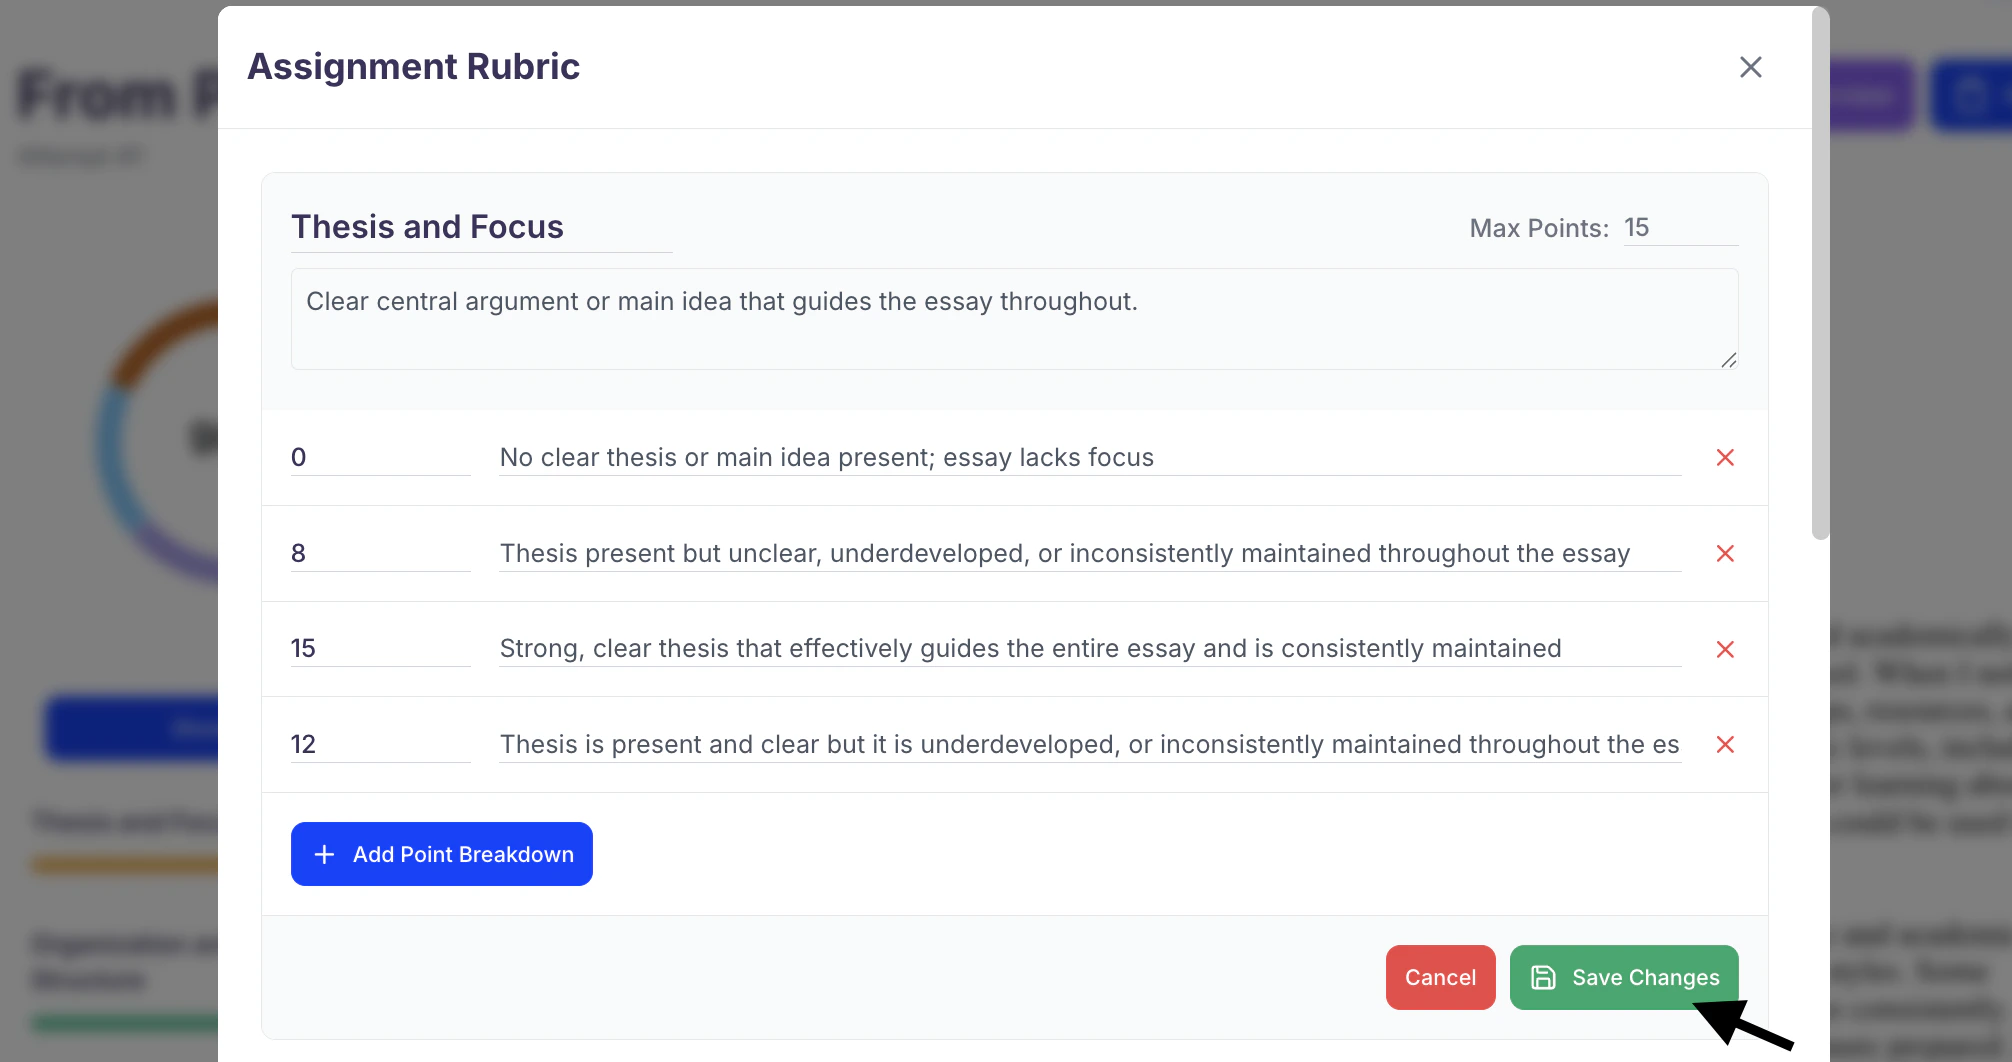
- To add a new performance level, select + Add Point Breakdown.
Then, add the performance descriptions and their corresponding point values as desired.

- Once you’ve finished making changes, click Save Changes to update the rubric.
- To close the Assignment Rubric screen, click the X in the top right corner.
Submit a New Attempt
- After you are done reviewing your feedback from Spark.E, you can revise your assignment based on that feedback and re-submit a new attempt for another round of grading and guidance by clicking + New Attempt.
- Next, select how you want to submit your new attempt from the options below:
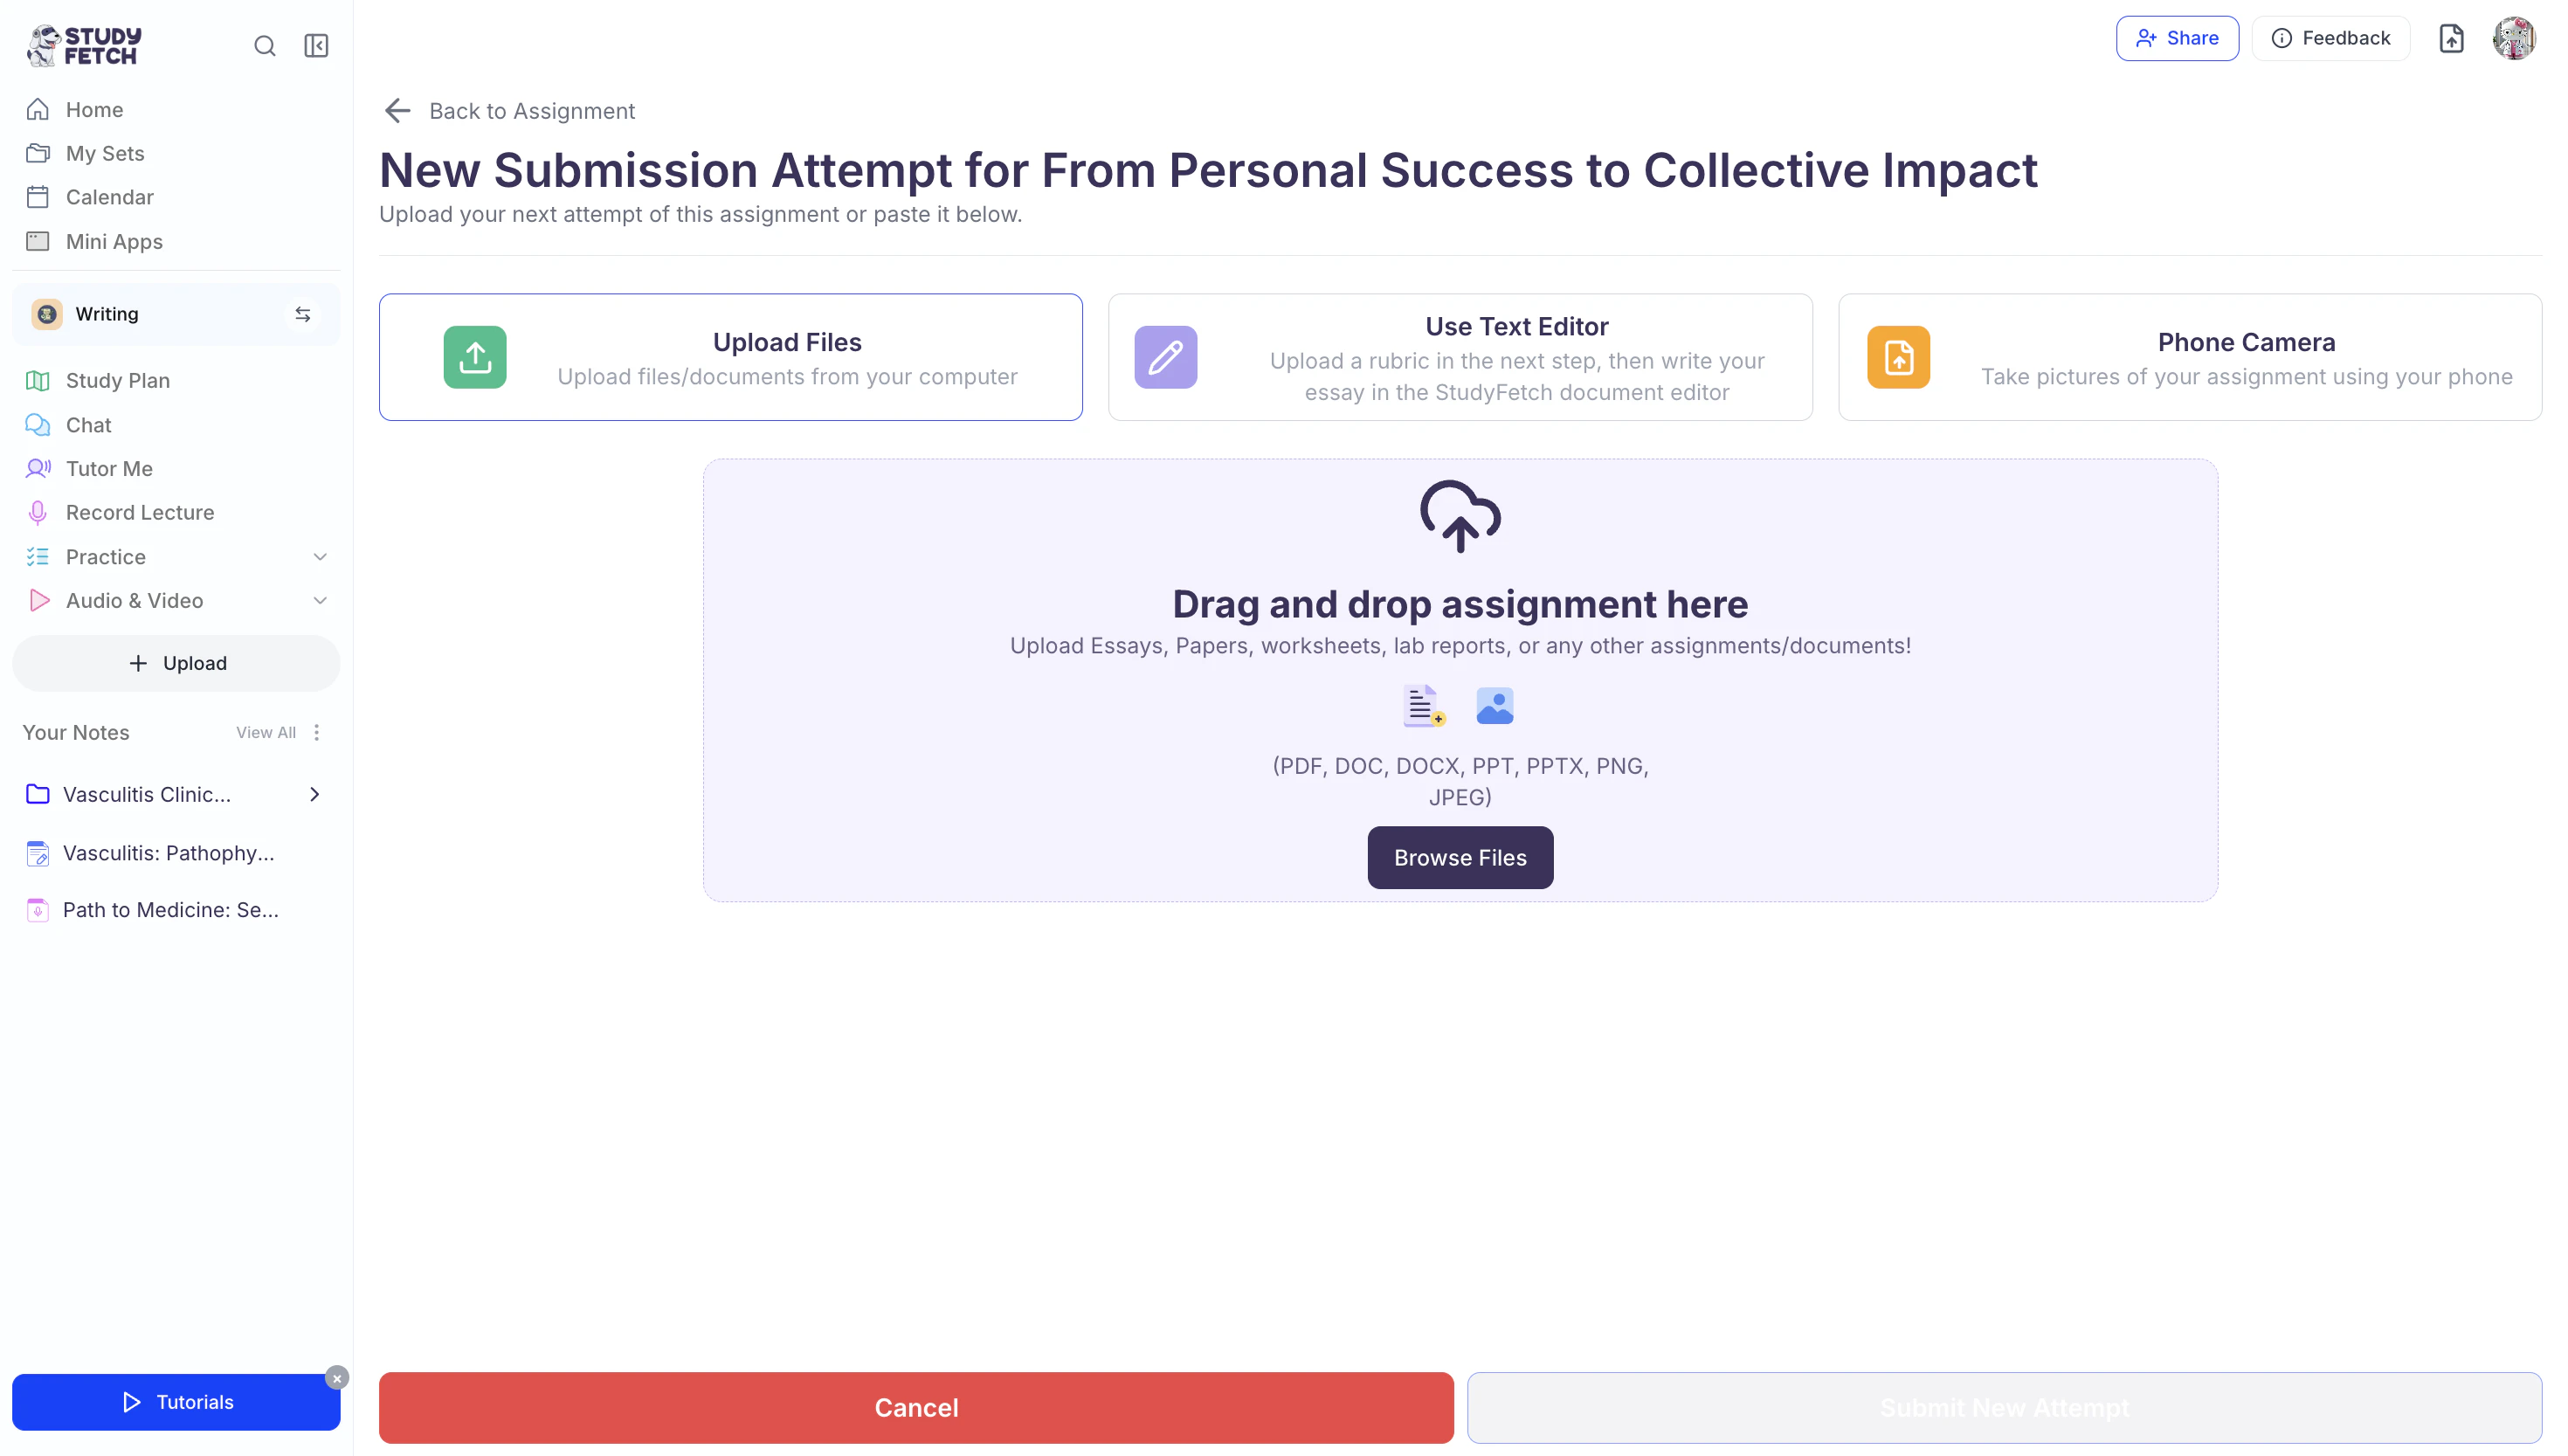
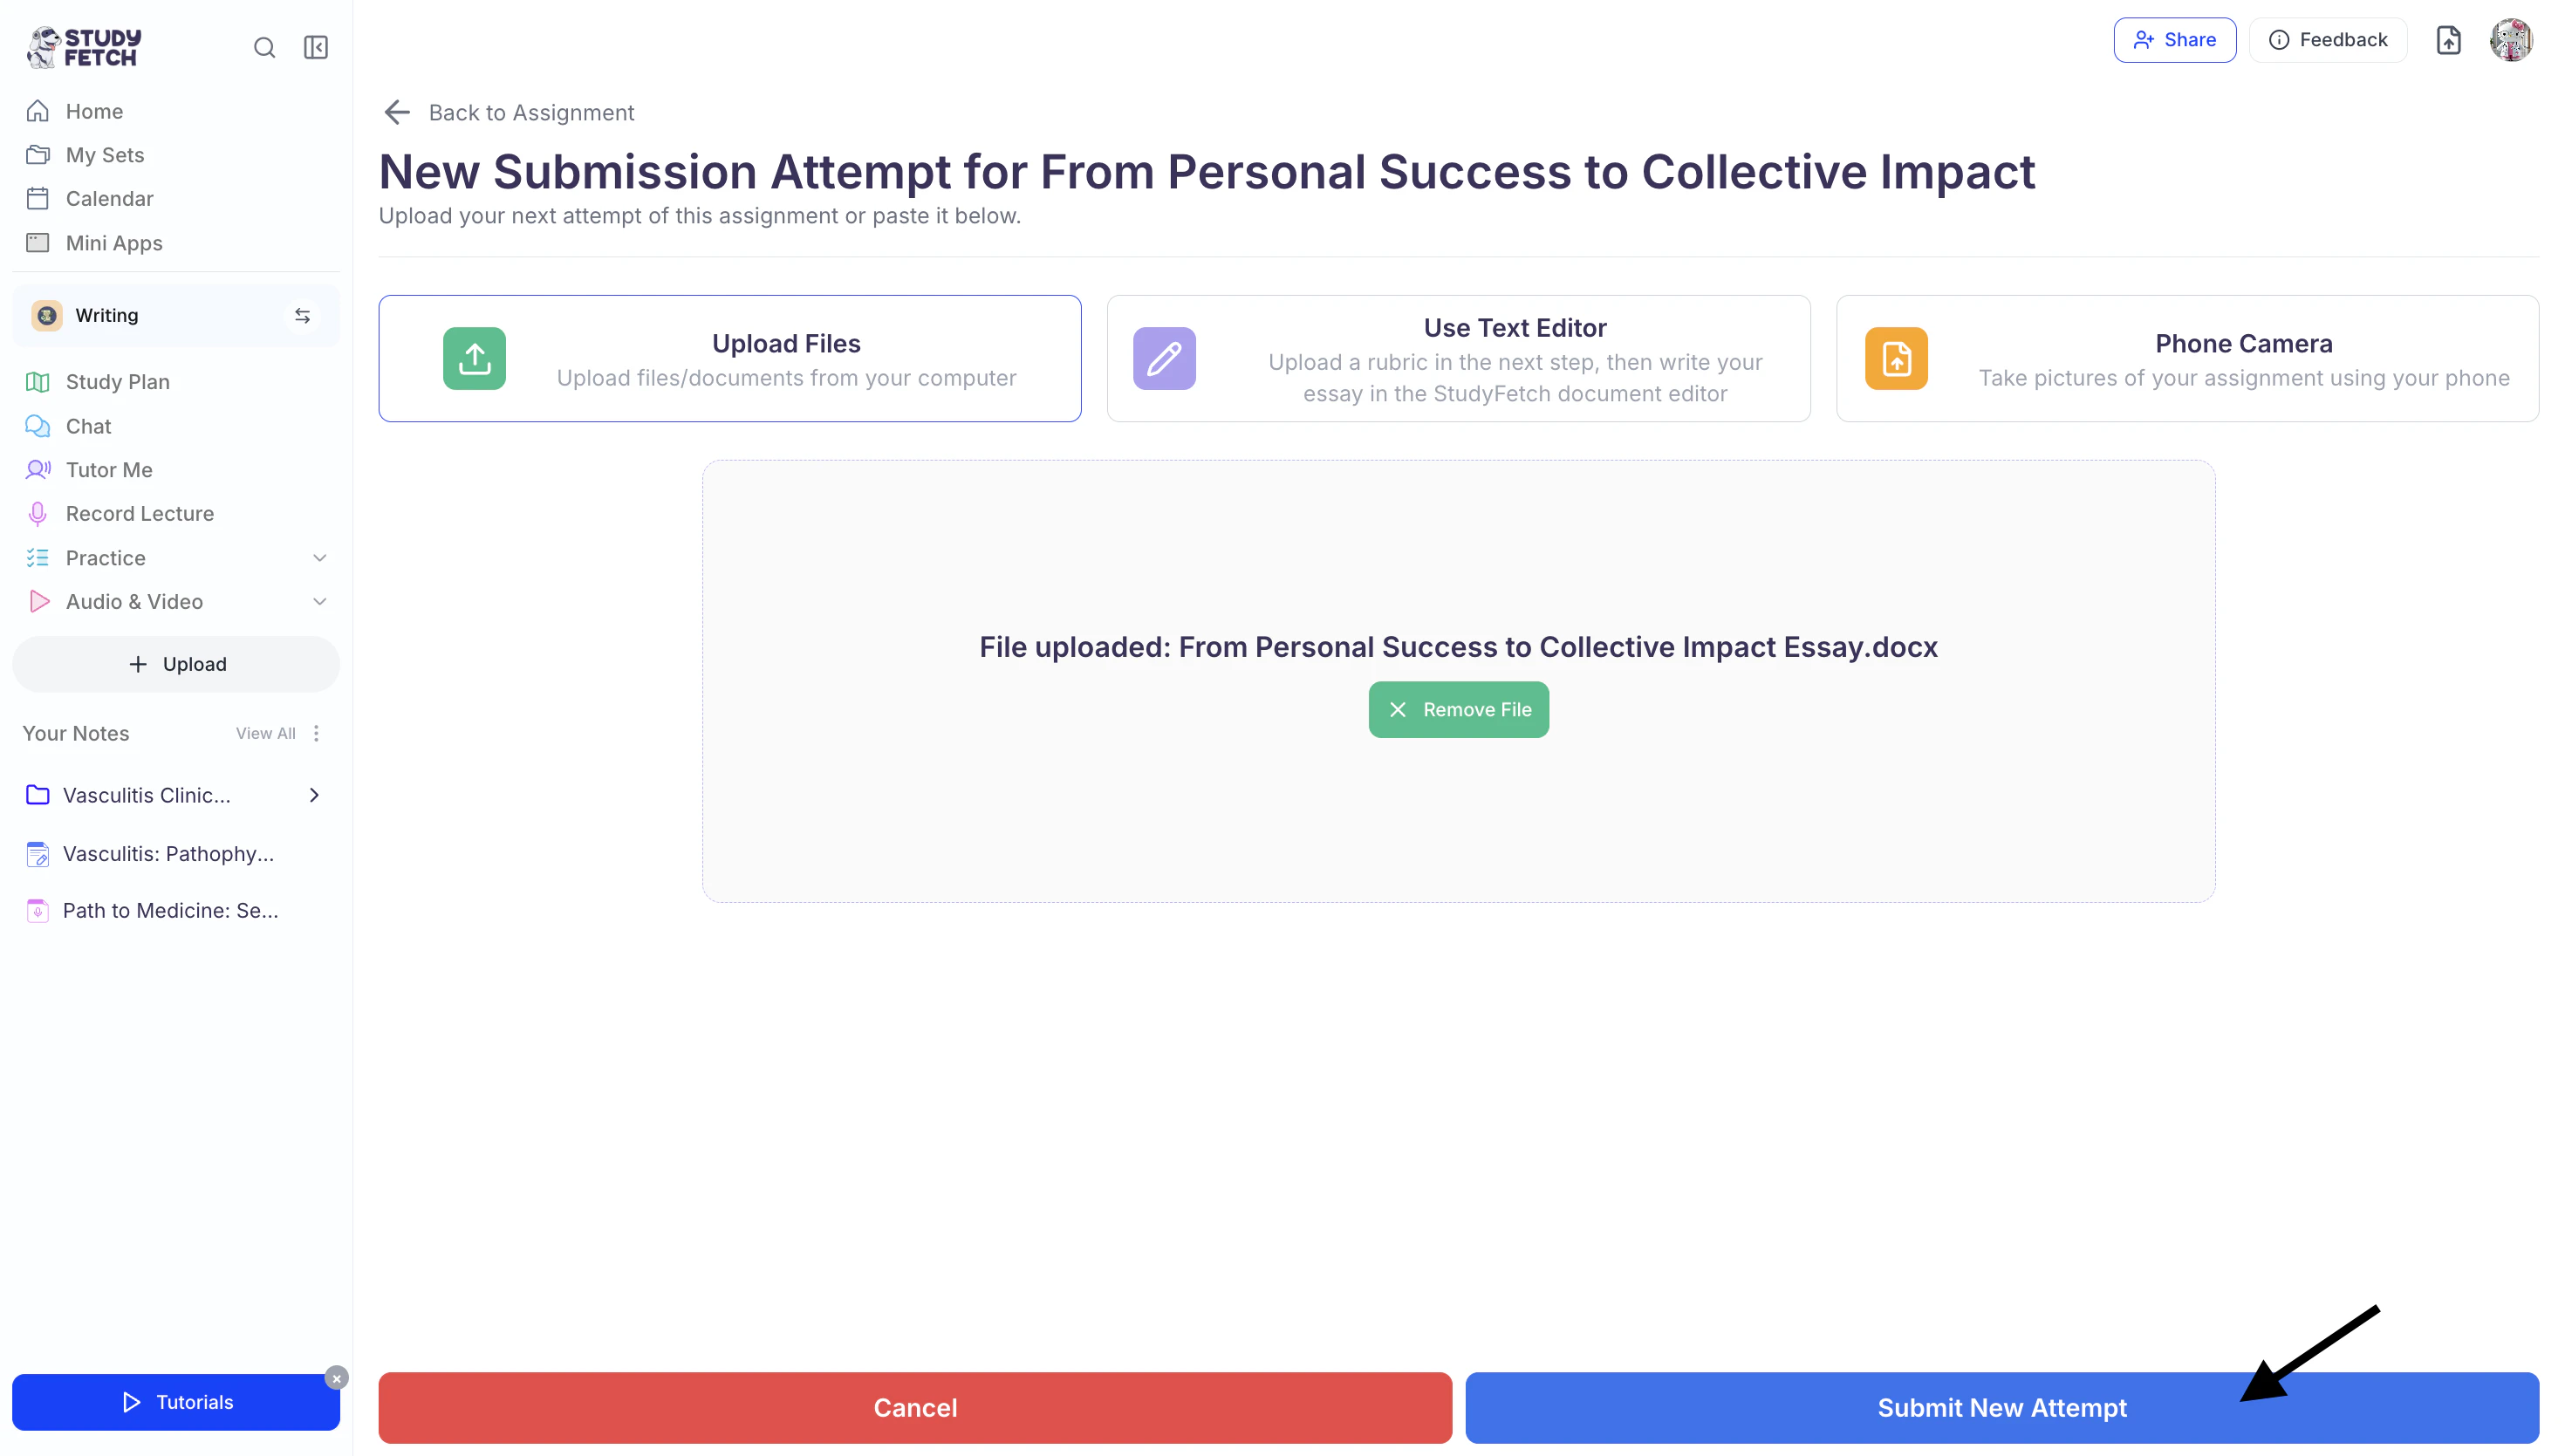
- Select Upload Files to upload any file or document from your computer.
- Select Text Editor to write or paste your assignment in the StudyFetch document editor.
- Select Phone Camera to take pictures of your assignment using your mobile device.
- After adding your new attempt, click Submit New Attempt.
- Spark.E will then generate a detailed breakdown of your performance on the new attempt.
You can continue refining your work based on the updated feedback and submit additional attempts until you’ve perfected your assignment.
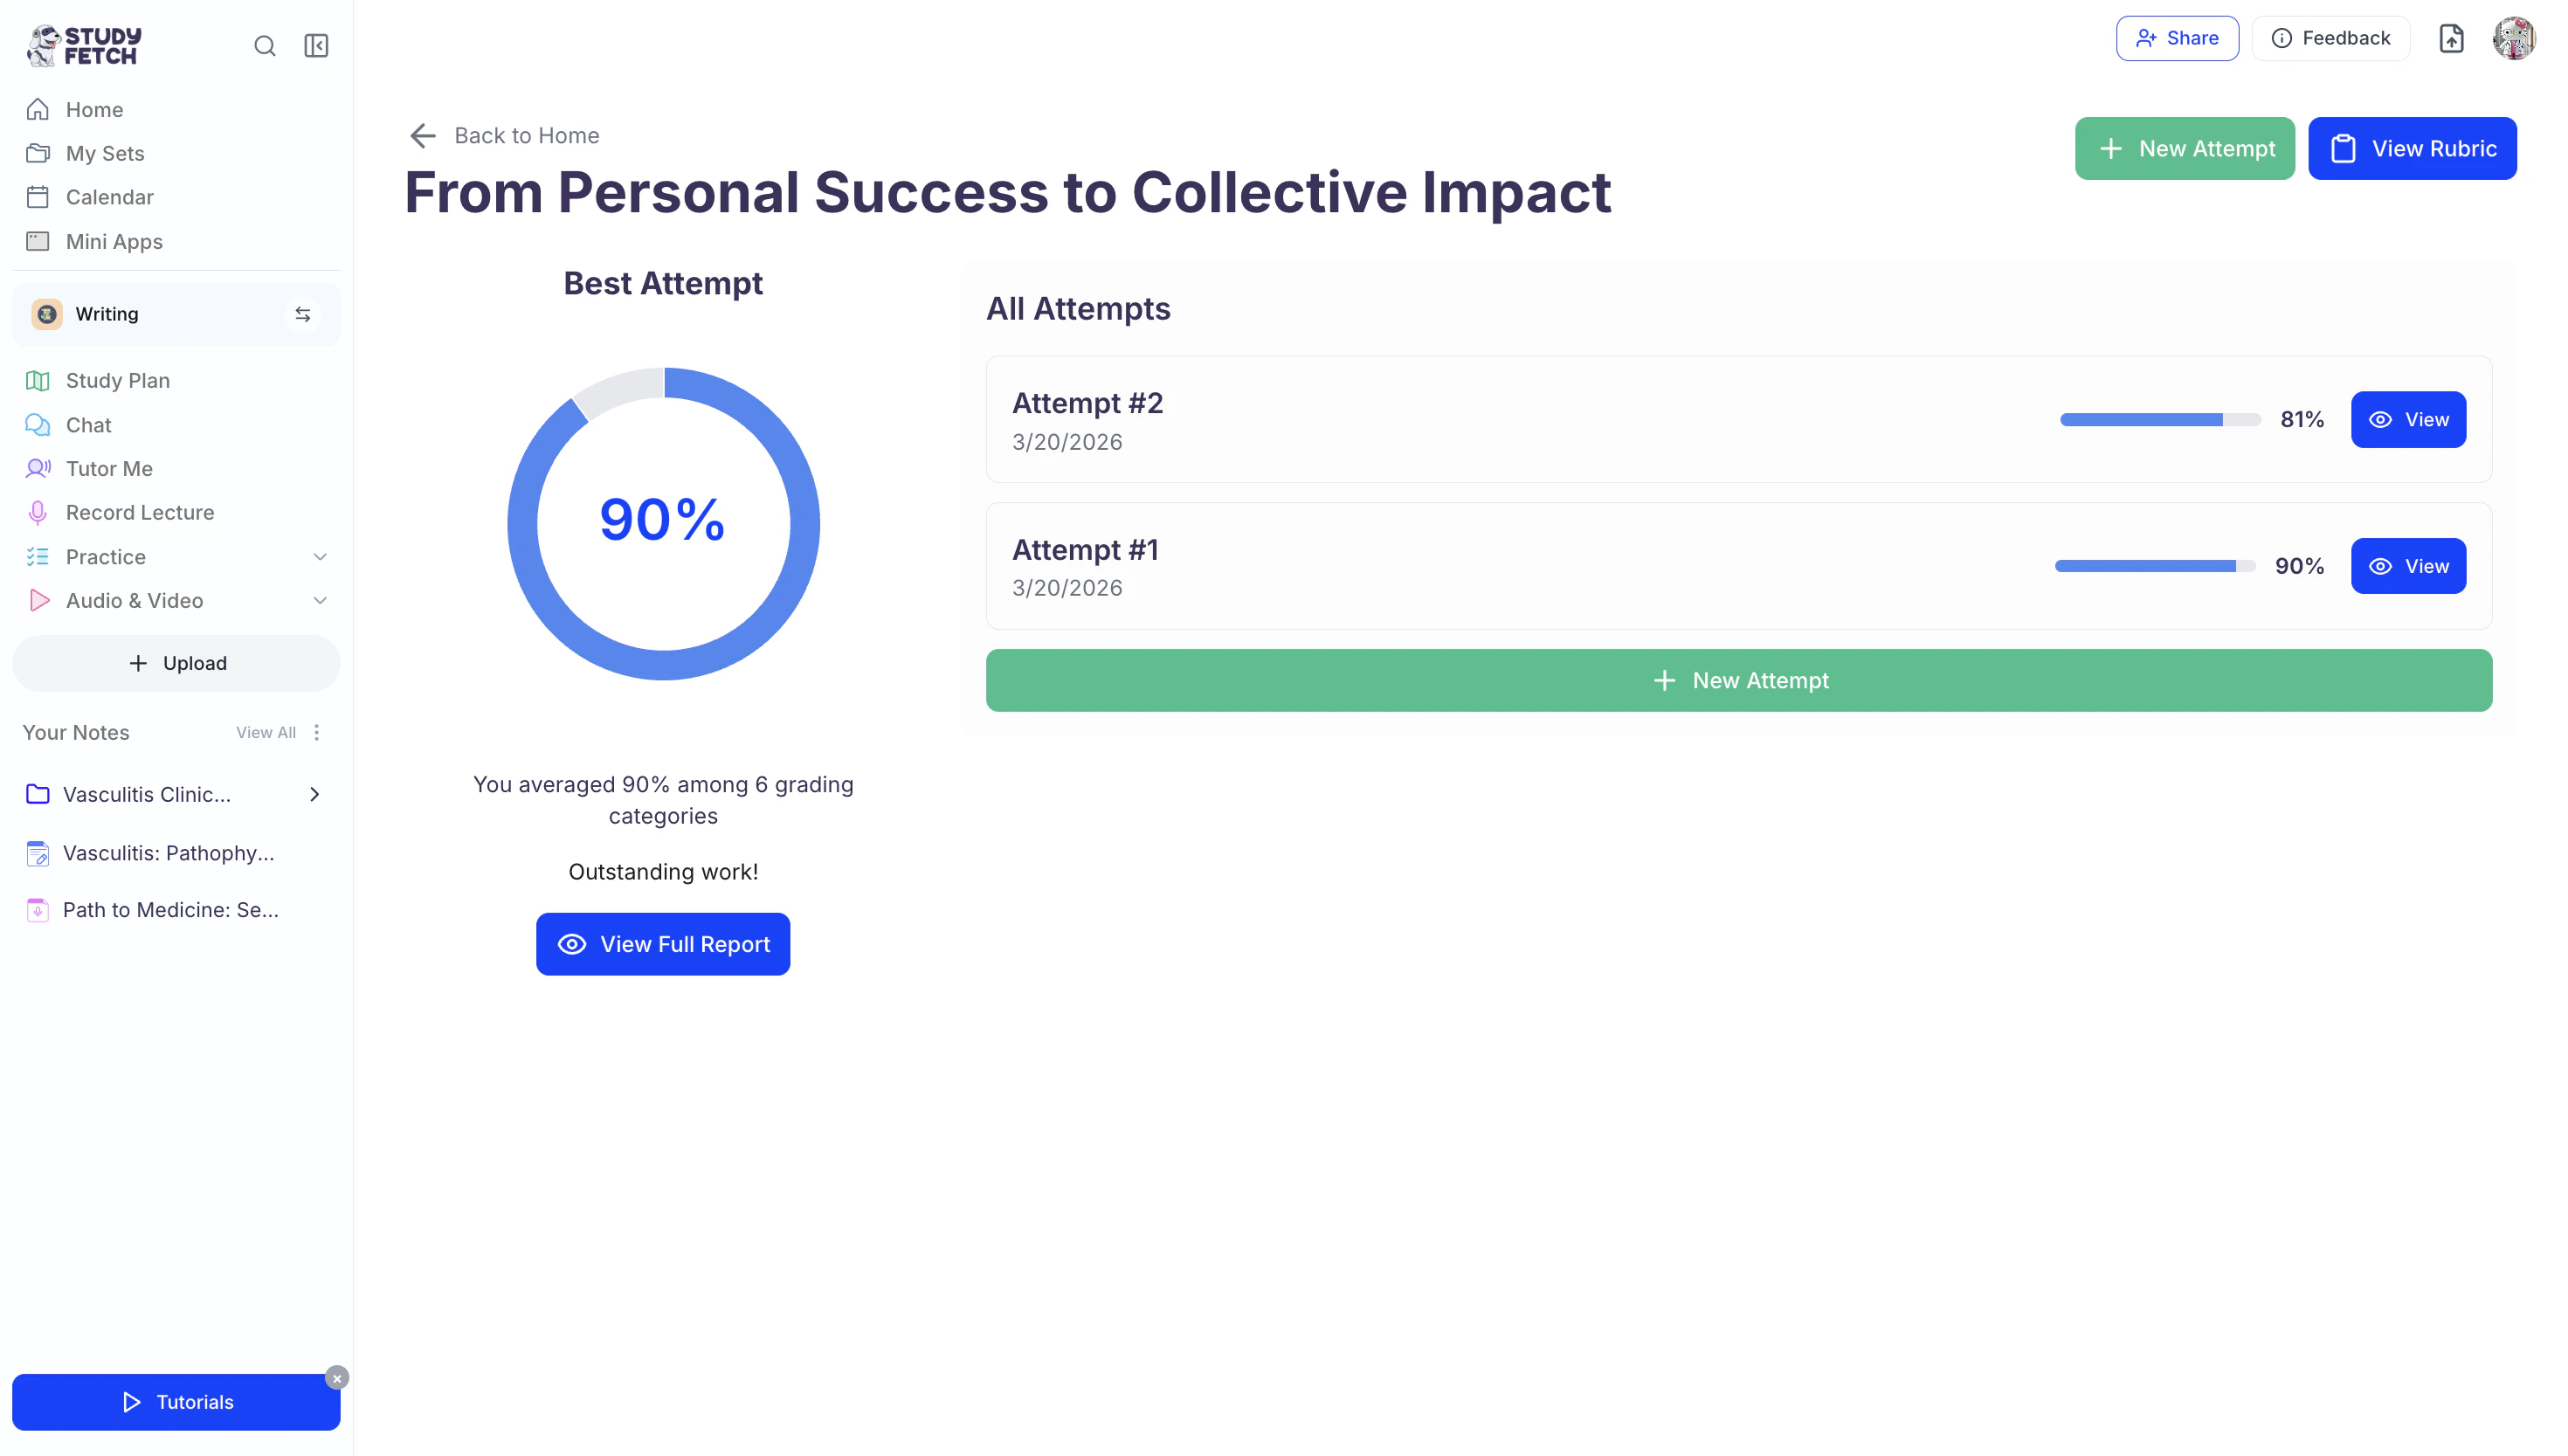
- To view the overview of your assignment and all attempts submitted for grading, select ← Back to Assignment Overview.
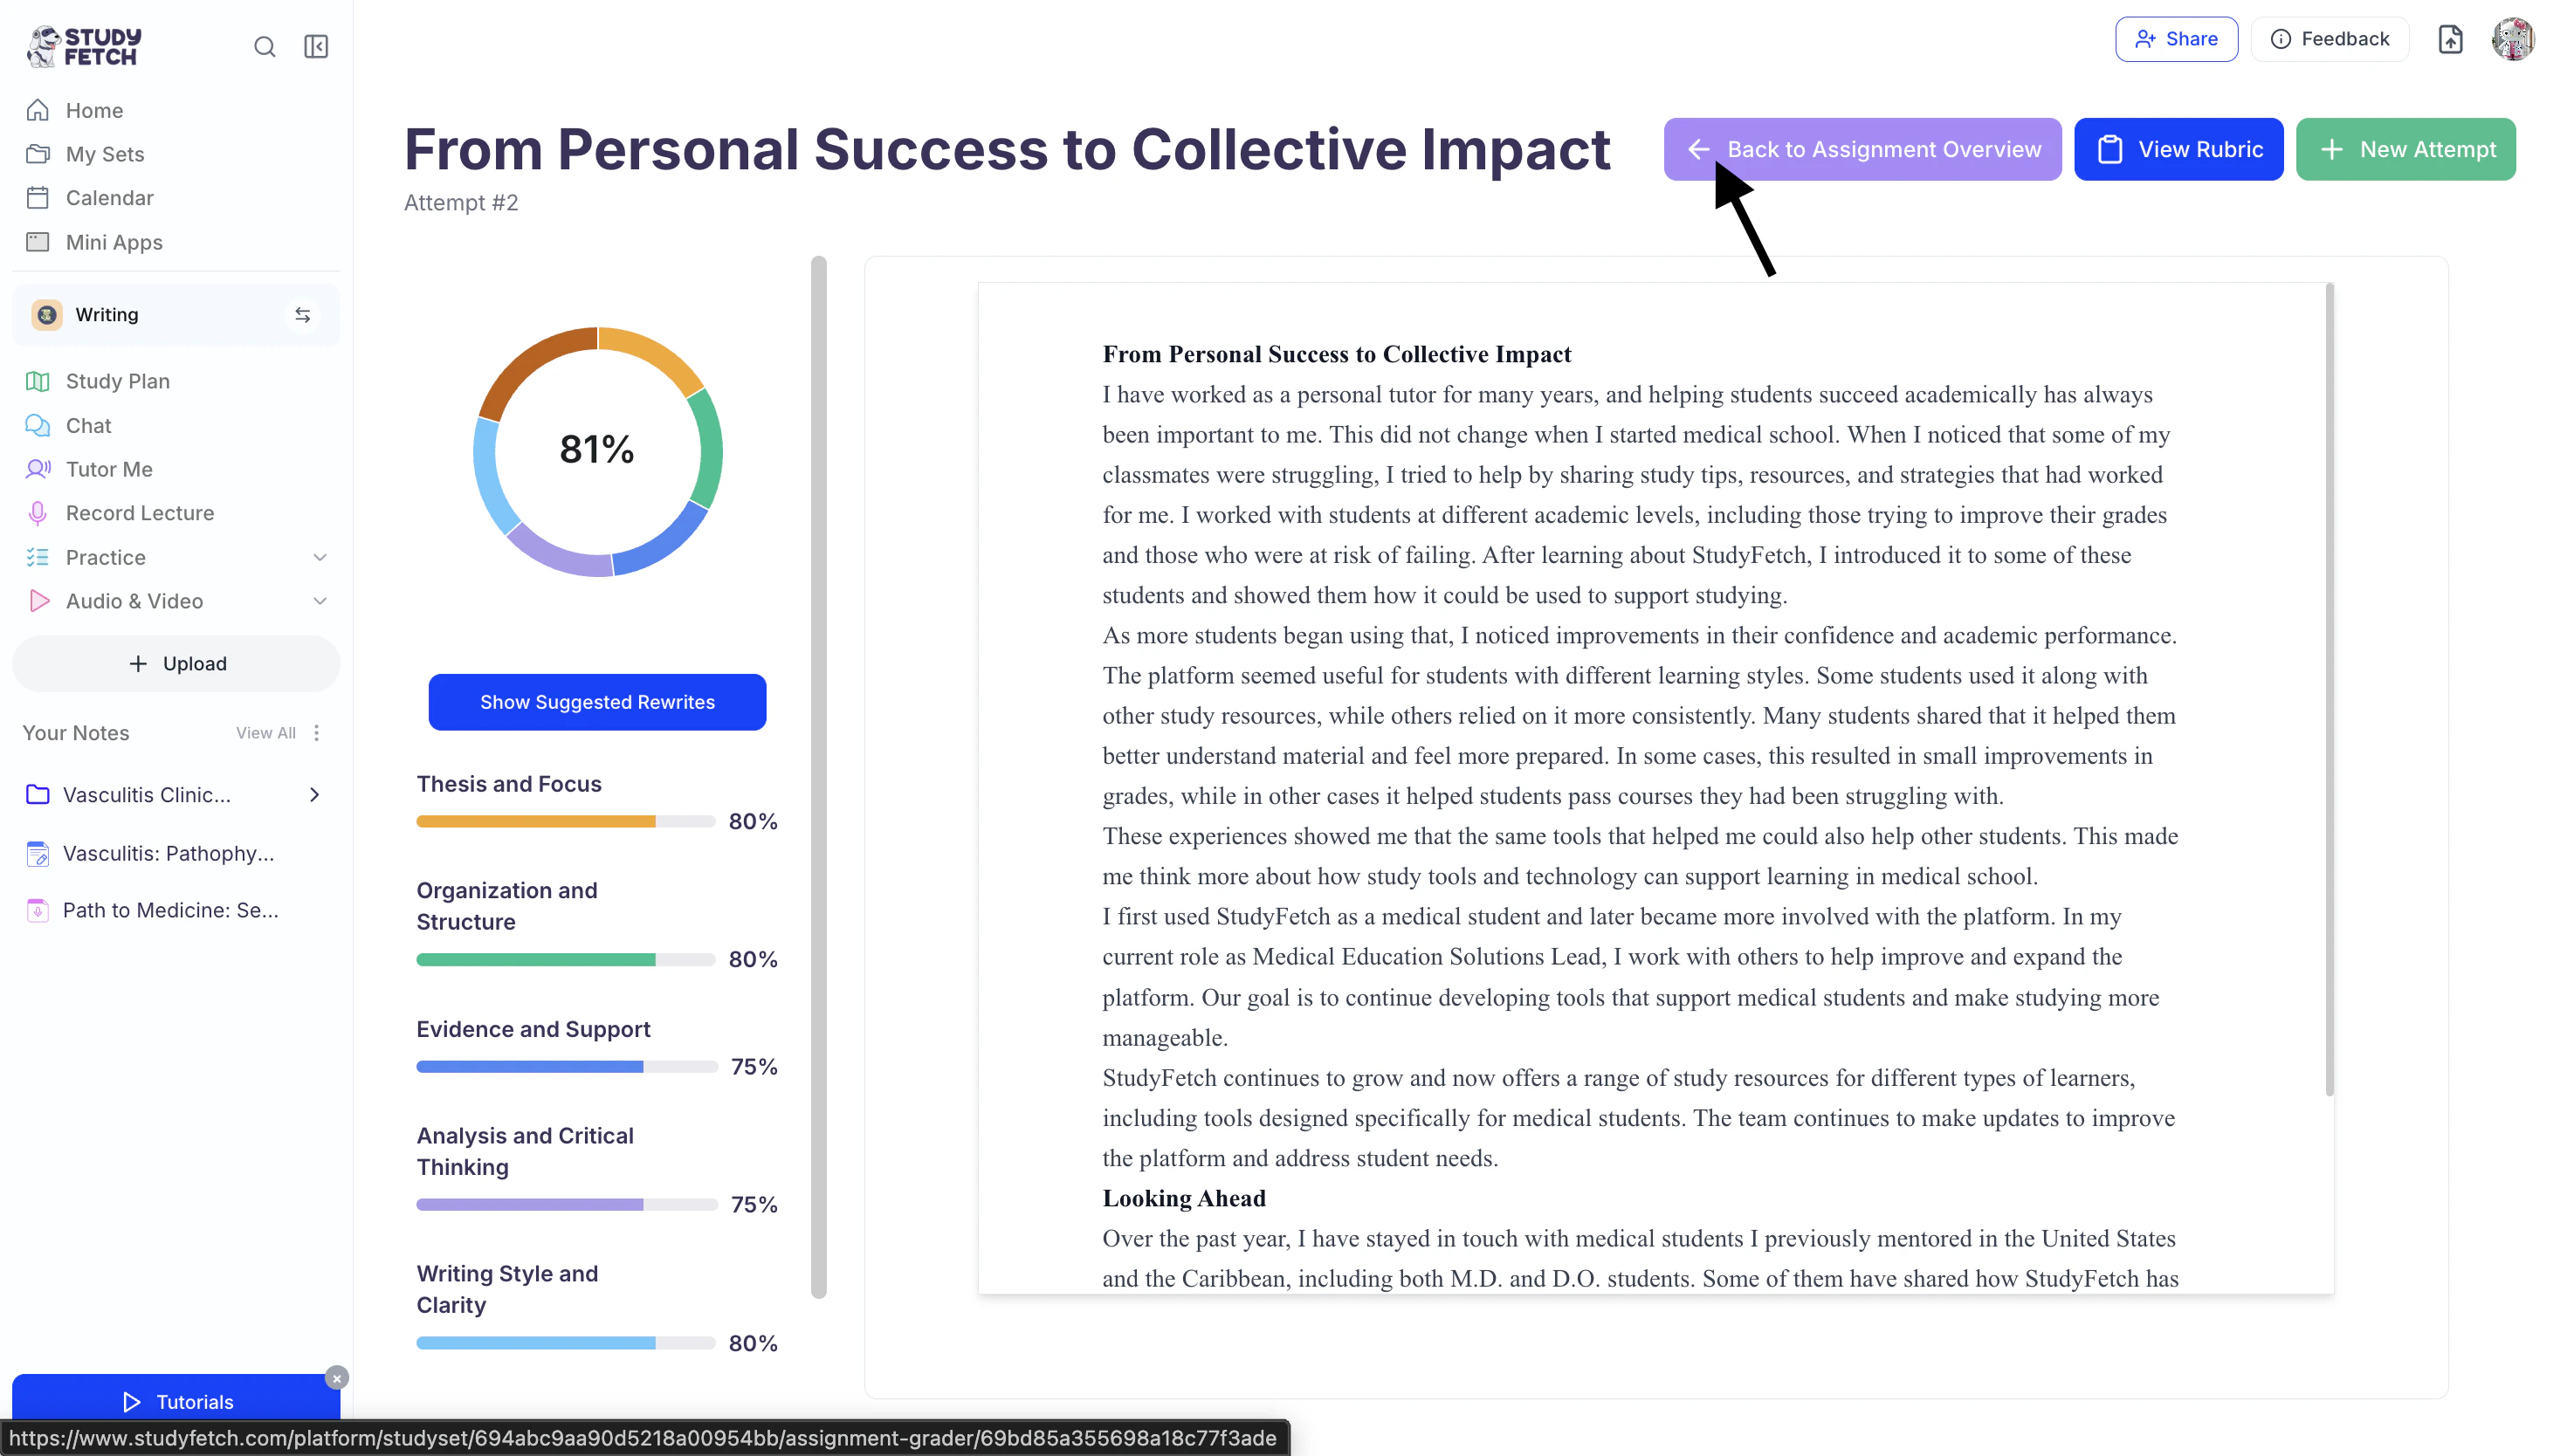
- Here you will be able to see a full breakdown of your assignment submissions.
Managing Your Graded Assignment
Deleting a Previous Assignment
- On the left-hand side of your Dashboard click Practice and then select Essay Grader.
- Select the Trash Can button to the right of the desired assignment name you want to delete.
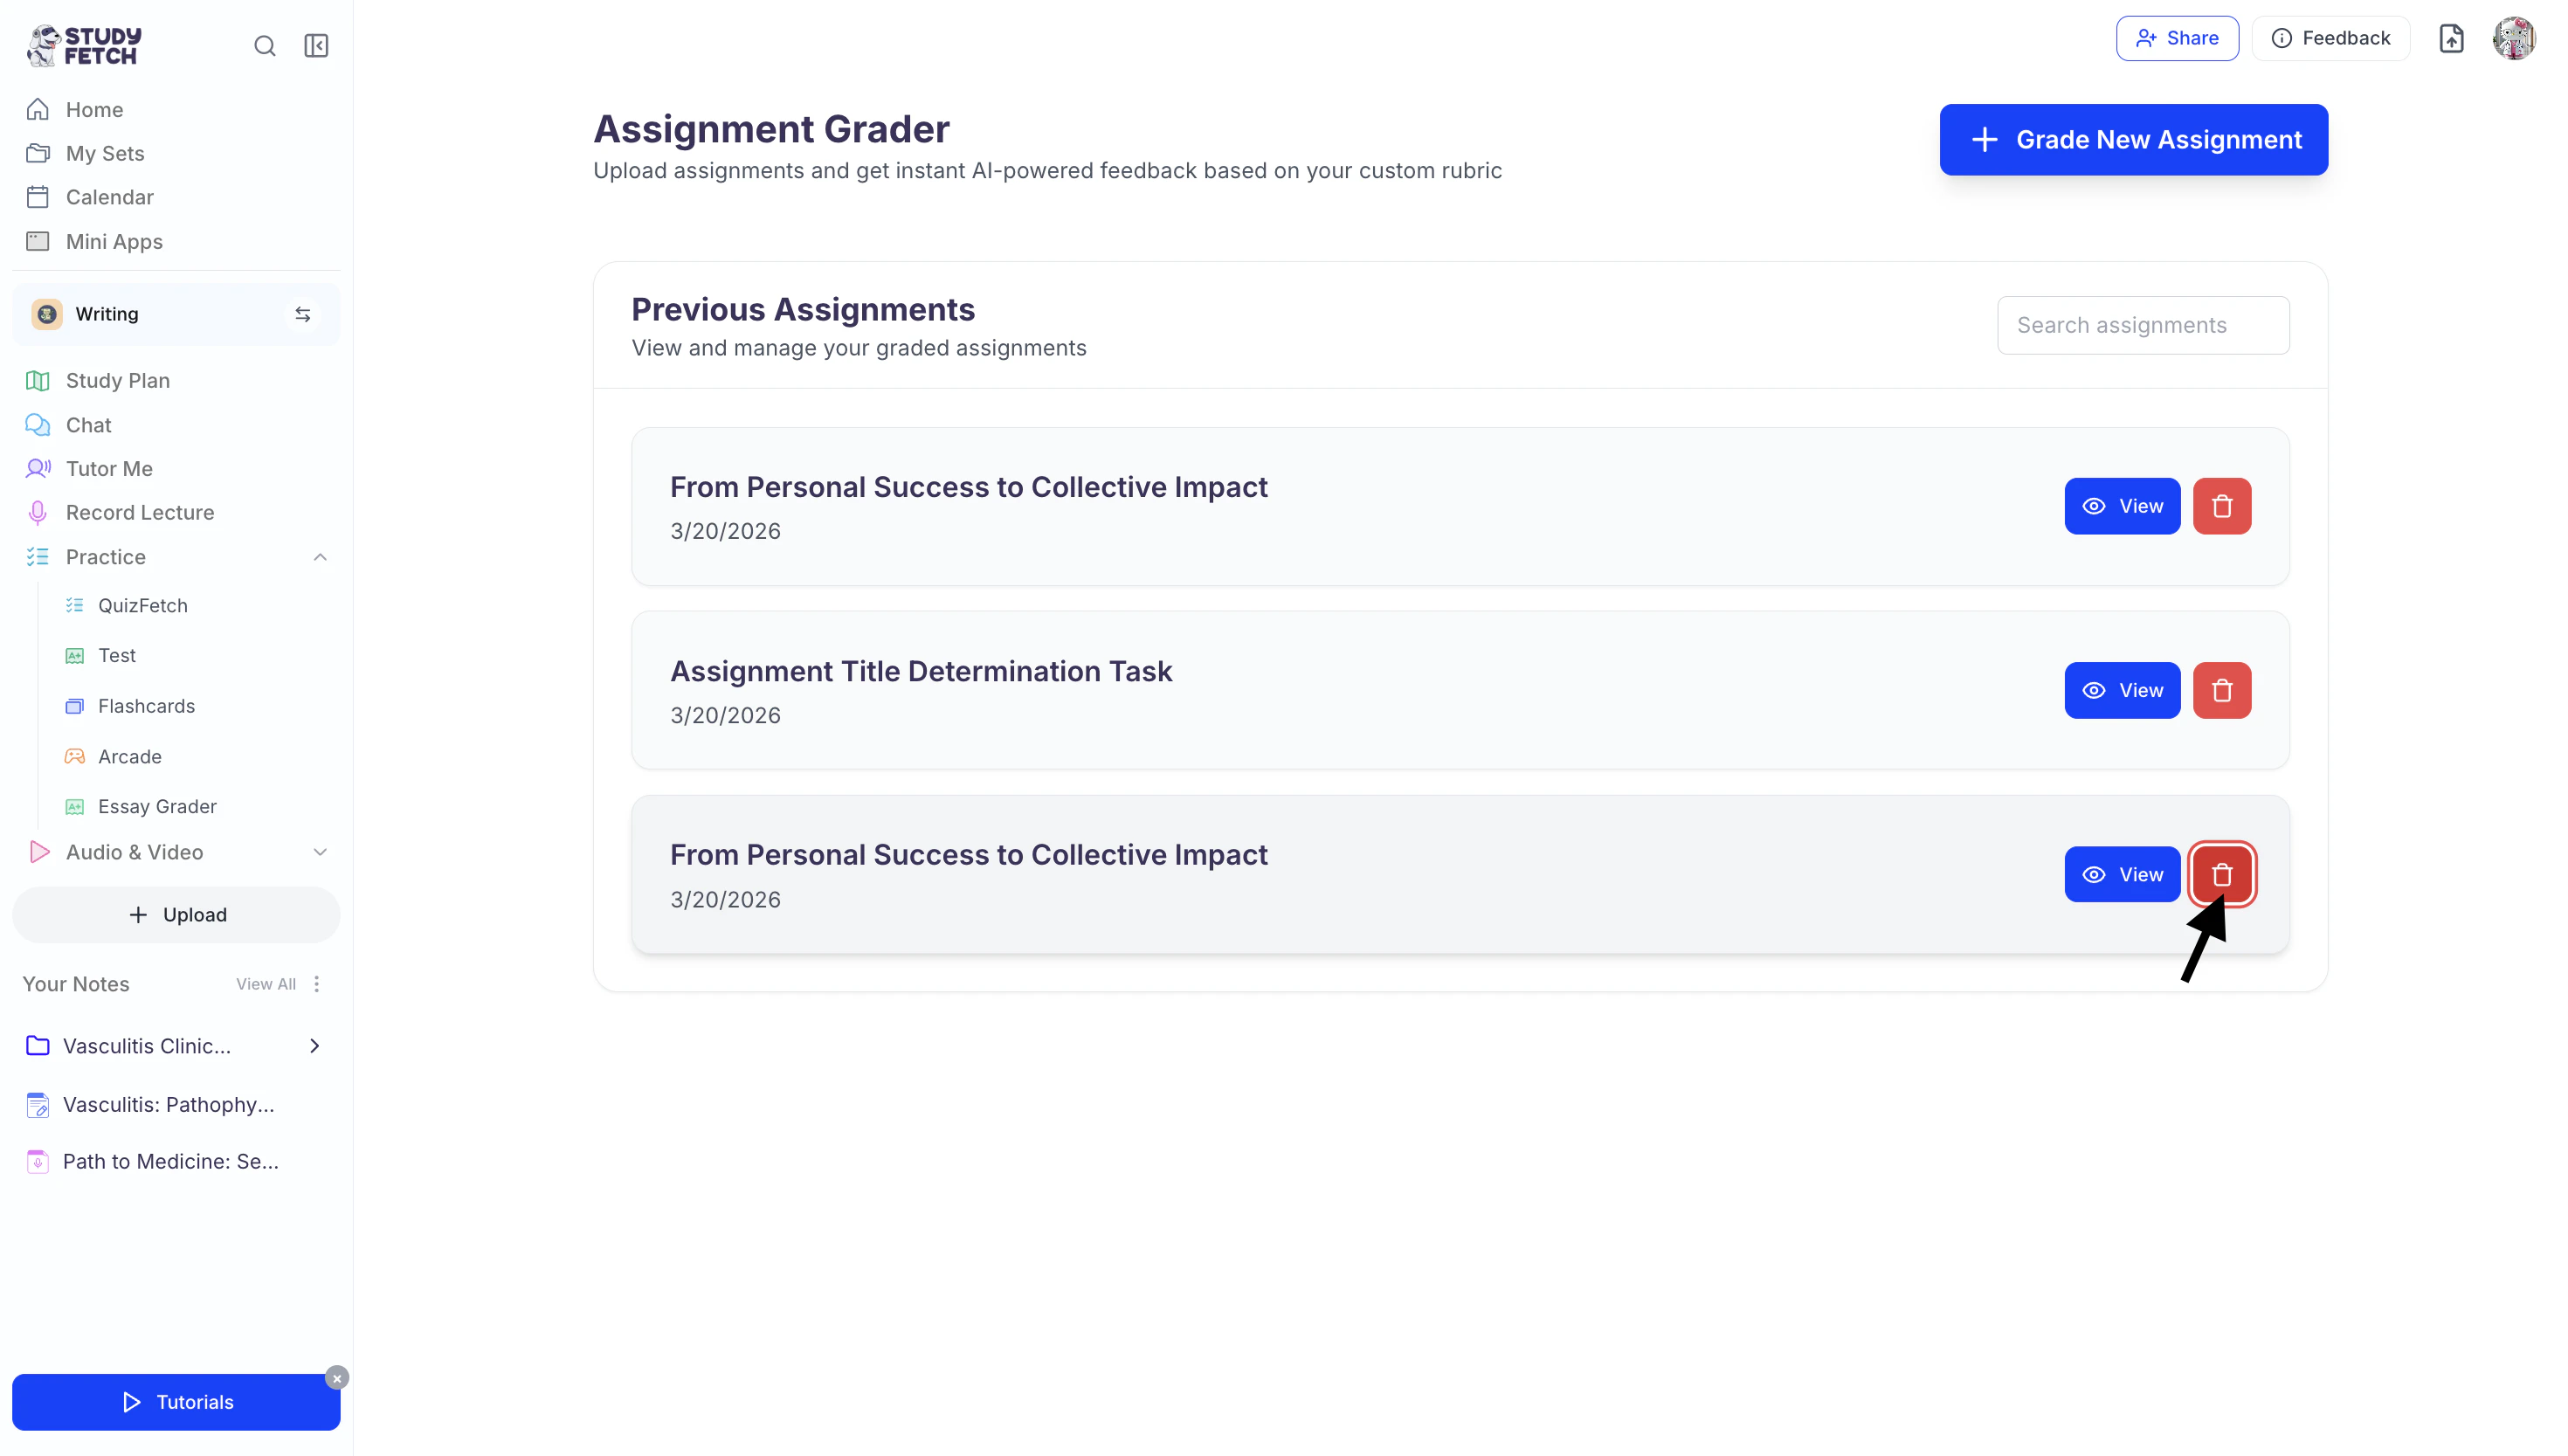
- If you are sure you want to delete the selected assignment, select OK.
